REAR PANEL FEATURES
9![]()
![]() 8
8
7 6
5 | 5 |
3 4 3 4 3 3
2
1
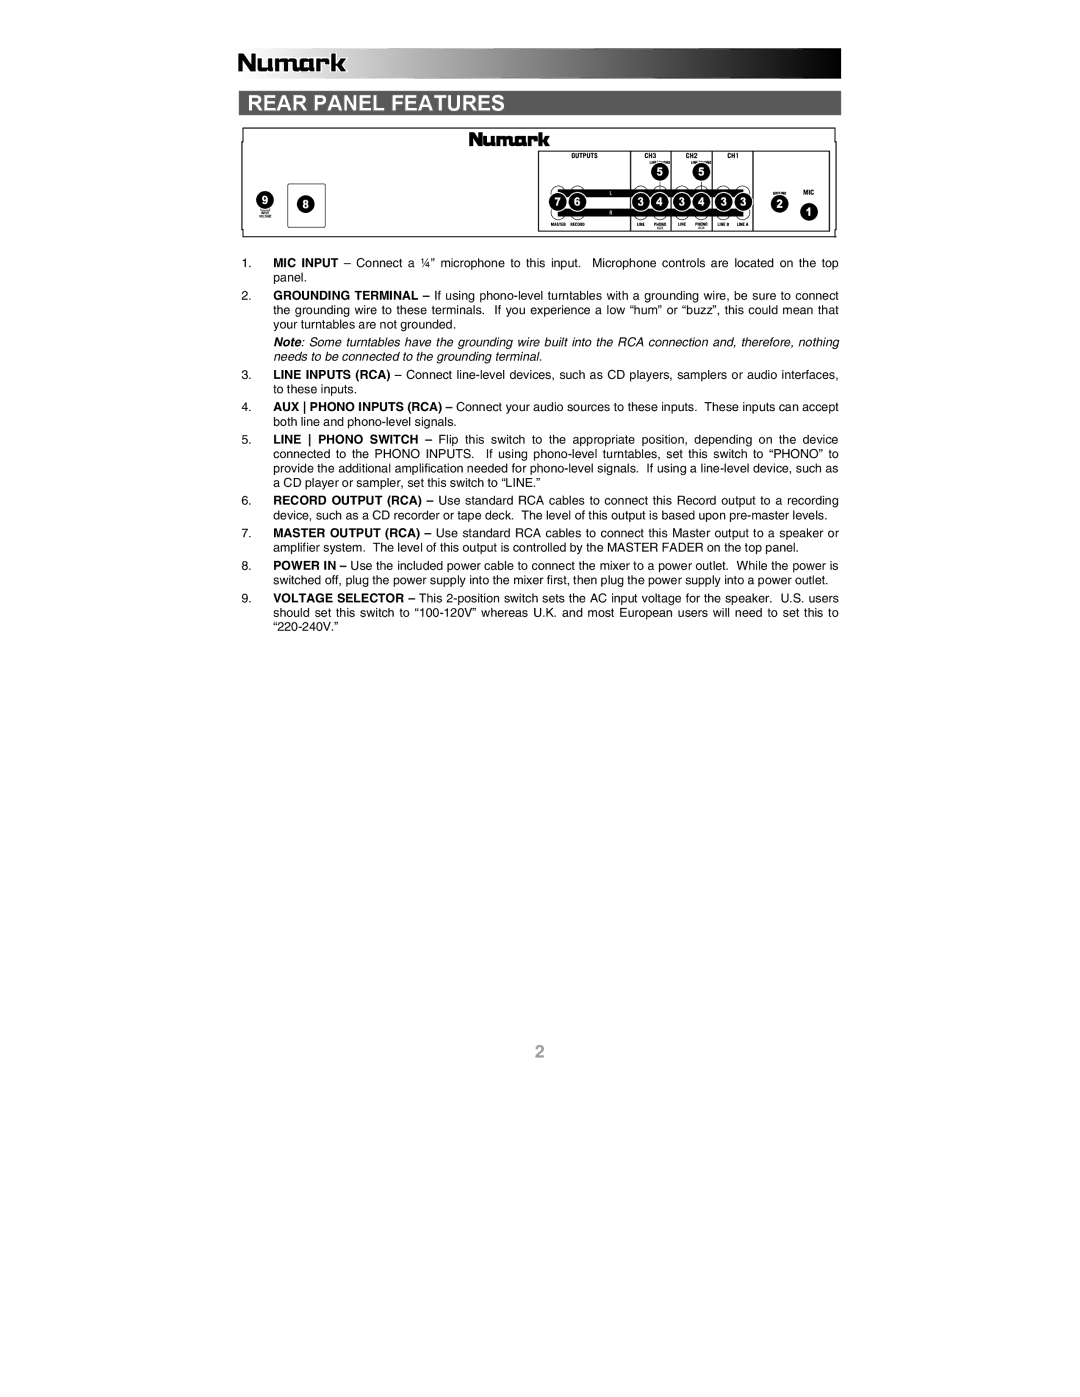
1.MIC INPUT – Connect a ¼” microphone to this input. Microphone controls are located on the top panel.
2.GROUNDING TERMINAL – If using
Note: Some turntables have the grounding wire built into the RCA connection and, therefore, nothing needs to be connected to the grounding terminal.
3.LINE INPUTS (RCA) – Connect
4.AUX PHONO INPUTS (RCA) – Connect your audio sources to these inputs. These inputs can accept both line and
5.LINE PHONO SWITCH – Flip this switch to the appropriate position, depending on the device connected to the PHONO INPUTS. If using
6.RECORD OUTPUT (RCA) – Use standard RCA cables to connect this Record output to a recording device, such as a CD recorder or tape deck. The level of this output is based upon
7.MASTER OUTPUT (RCA) – Use standard RCA cables to connect this Master output to a speaker or amplifier system. The level of this output is controlled by the MASTER FADER on the top panel.
8.POWER IN – Use the included power cable to connect the mixer to a power outlet. While the power is switched off, plug the power supply into the mixer first, then plug the power supply into a power outlet.
9.VOLTAGE SELECTOR – This
2