CONNECTION DIAGRAM
AMP/SPEAKER SYSTEM
THUMB DRIVE OR
OTHER USB STORAGE
DEVICE
DJ MIXER
USB KEYBOARD
1.Make sure the following items were in the box:
DDS USB DJ Media Player
DDS Drive USB DJ Media Rack
DDS Drive Caddy with 2 Keys
USB cable (Blk, 1.5 meter, 2.0 certified)
USB Numark Keyboard
80 GB Hard Drive (Removable and upgradeable)
Power Cord (IEC for DDS Drive)
Switchable Power Supply (DDS)
RCA Cables (2) pair
Quick Start Manual
• Safety Instruction Booklet
2.READ SAFETY INSTRUCTION BOOKLET BEFORE USING THE PRODUCT.
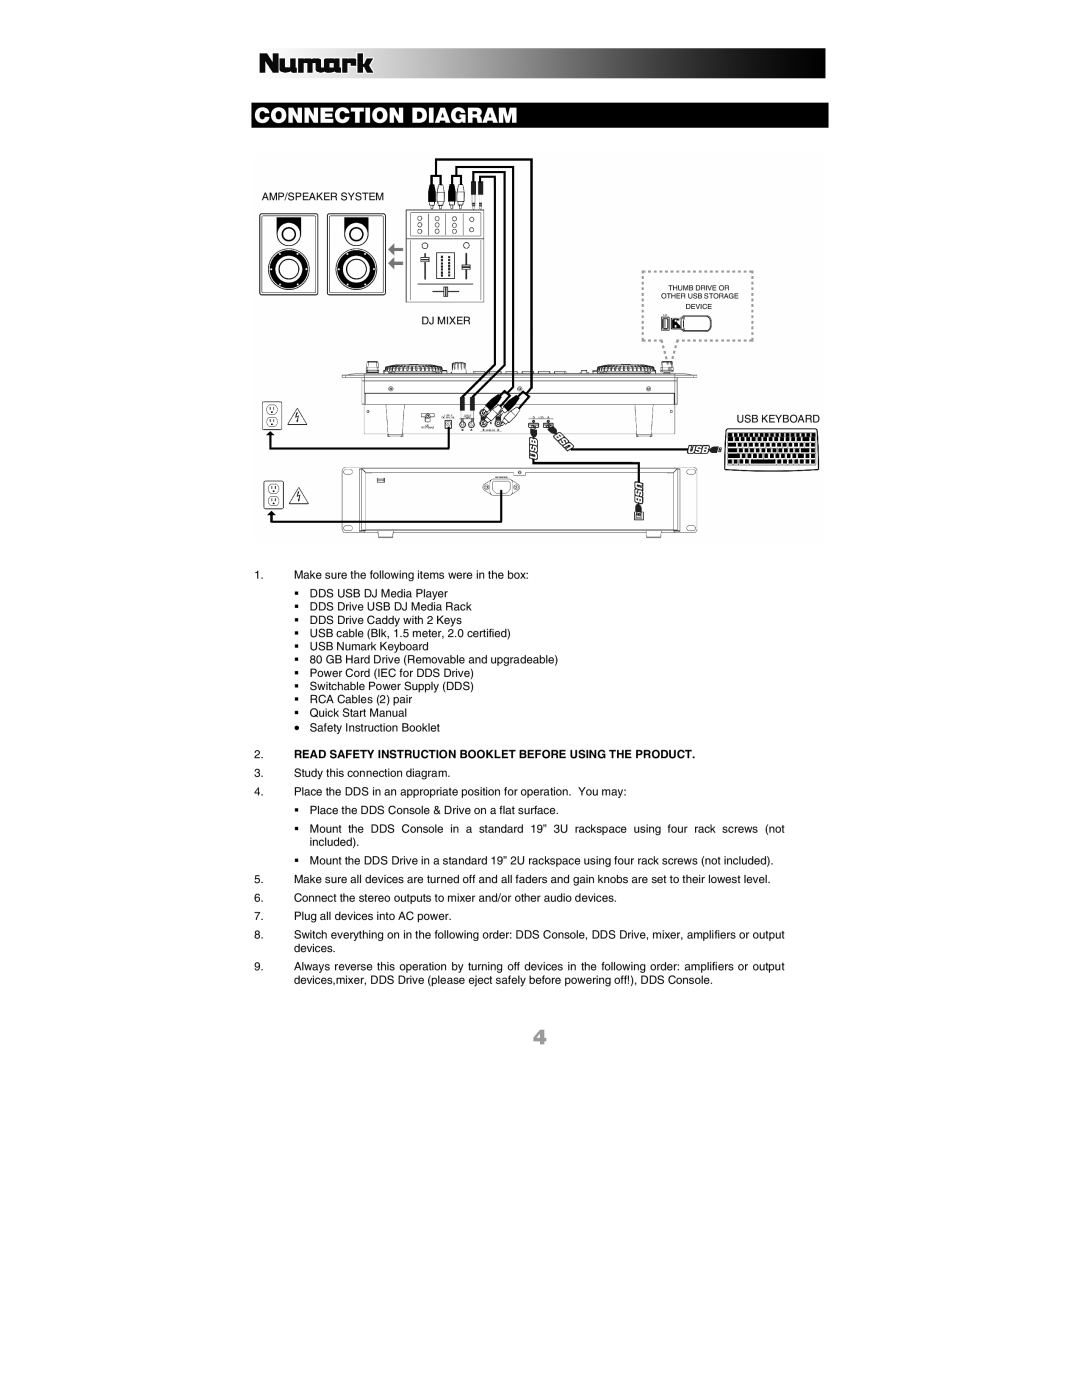
3.Study this connection diagram.
4.Place the DDS in an appropriate position for operation. You may:
Place the DDS Console & Drive on a flat surface.
Mount the DDS Console in a standard 19” 3U rackspace using four rack screws (not included).
Mount the DDS Drive in a standard 19” 2U rackspace using four rack screws (not included).
5.Make sure all devices are turned off and all faders and gain knobs are set to their lowest level.
6.Connect the stereo outputs to mixer and/or other audio devices.
7.Plug all devices into AC power.
8.Switch everything on in the following order: DDS Console, DDS Drive, mixer, amplifiers or output devices.
9.Always reverse this operation by turning off devices in the following order: amplifiers or output devices,mixer, DDS Drive (please eject safely before powering off!), DDS Console.
4
