DDS DRIVE OVERVIEW
| 3 |
|
| |
| 1 | 5 |
| |
4 | 2 | 6 | ||
| ||||
|
|
|
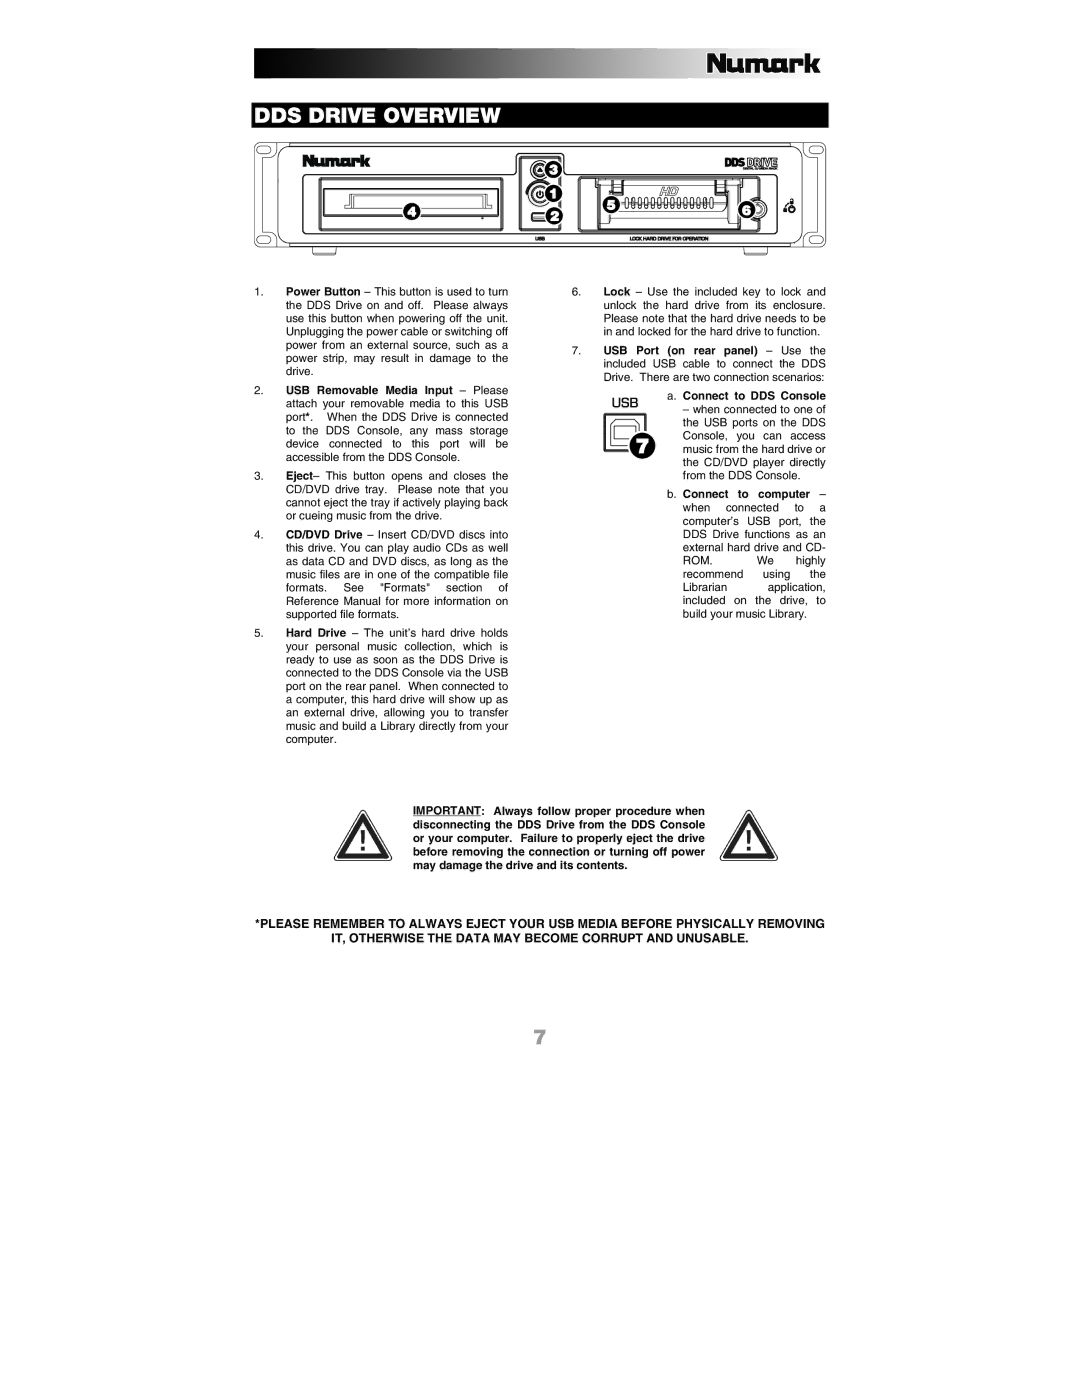
1.Power Button – This button is used to turn the DDS Drive on and off. Please always use this button when powering off the unit. Unplugging the power cable or switching off power from an external source, such as a power strip, may result in damage to the drive.
2.USB Removable Media Input – Please attach your removable media to this USB port*. When the DDS Drive is connected to the DDS Console, any mass storage device connected to this port will be accessible from the DDS Console.
3.Eject– This button opens and closes the CD/DVD drive tray. Please note that you cannot eject the tray if actively playing back or cueing music from the drive.
4.CD/DVD Drive – Insert CD/DVD discs into this drive. You can play audio CDs as well as data CD and DVD discs, as long as the music files are in one of the compatible file formats. See "Formats" section of Reference Manual for more information on supported file formats.
5.Hard Drive – The unit’s hard drive holds your personal music collection, which is ready to use as soon as the DDS Drive is connected to the DDS Console via the USB port on the rear panel. When connected to a computer, this hard drive will show up as an external drive, allowing you to transfer music and build a Library directly from your computer.
6. Lock – Use the included key to lock and unlock the hard drive from its enclosure. Please note that the hard drive needs to be in and locked for the hard drive to function.
7. USB Port (on rear panel) – Use the included USB cable to connect the DDS Drive. There are two connection scenarios:
a. Connect to DDS Console
– when connected to one of the USB ports on the DDS Console, you can access
7 music from the hard drive or the CD/DVD player directly from the DDS Console.
b. Connect to computer – when connected to a computer’s USB port, the DDS Drive functions as an external hard drive and CD-
ROM. We highly recommend using the
Librarian application, included on the drive, to build your music Library.
IMPORTANT: Always follow proper procedure when disconnecting the DDS Drive from the DDS Console or your computer. Failure to properly eject the drive before removing the connection or turning off power may damage the drive and its contents.
*PLEASE REMEMBER TO ALWAYS EJECT YOUR USB MEDIA BEFORE PHYSICALLY REMOVING
IT, OTHERWISE THE DATA MAY BECOME CORRUPT AND UNUSABLE.
7