19.BEATKEEPER™ – A beatsync bargraph illustrates the beats with red LEDs and can be used as a visual aid to beatmatch tracks. Synced decks will show a blue LED between the two red LEDs.
20.MODE – Change deck options such as Track Loading, Time Display, Fader Start and Jog Mode and Pitch settings.
Track Loading determines how tracks are loaded from the Crate: Automatic loads the next track, Continuous will autoplay it, Cyclic sends the played track to the end of the Crate list, Repeat will loop playback of the current track.
Jog Mode describes the operation of the deck’s jog wheel when cueing music: Vinyl causes the music to stop, CD causes the music to loop the next 0.2 seconds continuously when the jog wheel stops moving.
Twisting the PUSH SELECT knob will change settings; pressing it will move to the next option. Press MODE again to exit.
21.LOOP IN – Sets the start point of the loop. If you wish to change the loop in point, press the LOOP IN button again.
22.LOOP OUT – Sets the end point of the loop; playback begins looping. To release or end the loop press LOOP OUT a second time and play will continue forward when the track passes the loopout point.
23.RELOOP – Repeats play (stutters) from the loop in point. If a loop has been set, it plays and repeats the previously set loop until released by pressing LOOP OUT.
24.EJECT – Press to display a menu of connected USB devices. Highlight a device, then press the function button below the display to eject, thereafter you may disconnect the device.
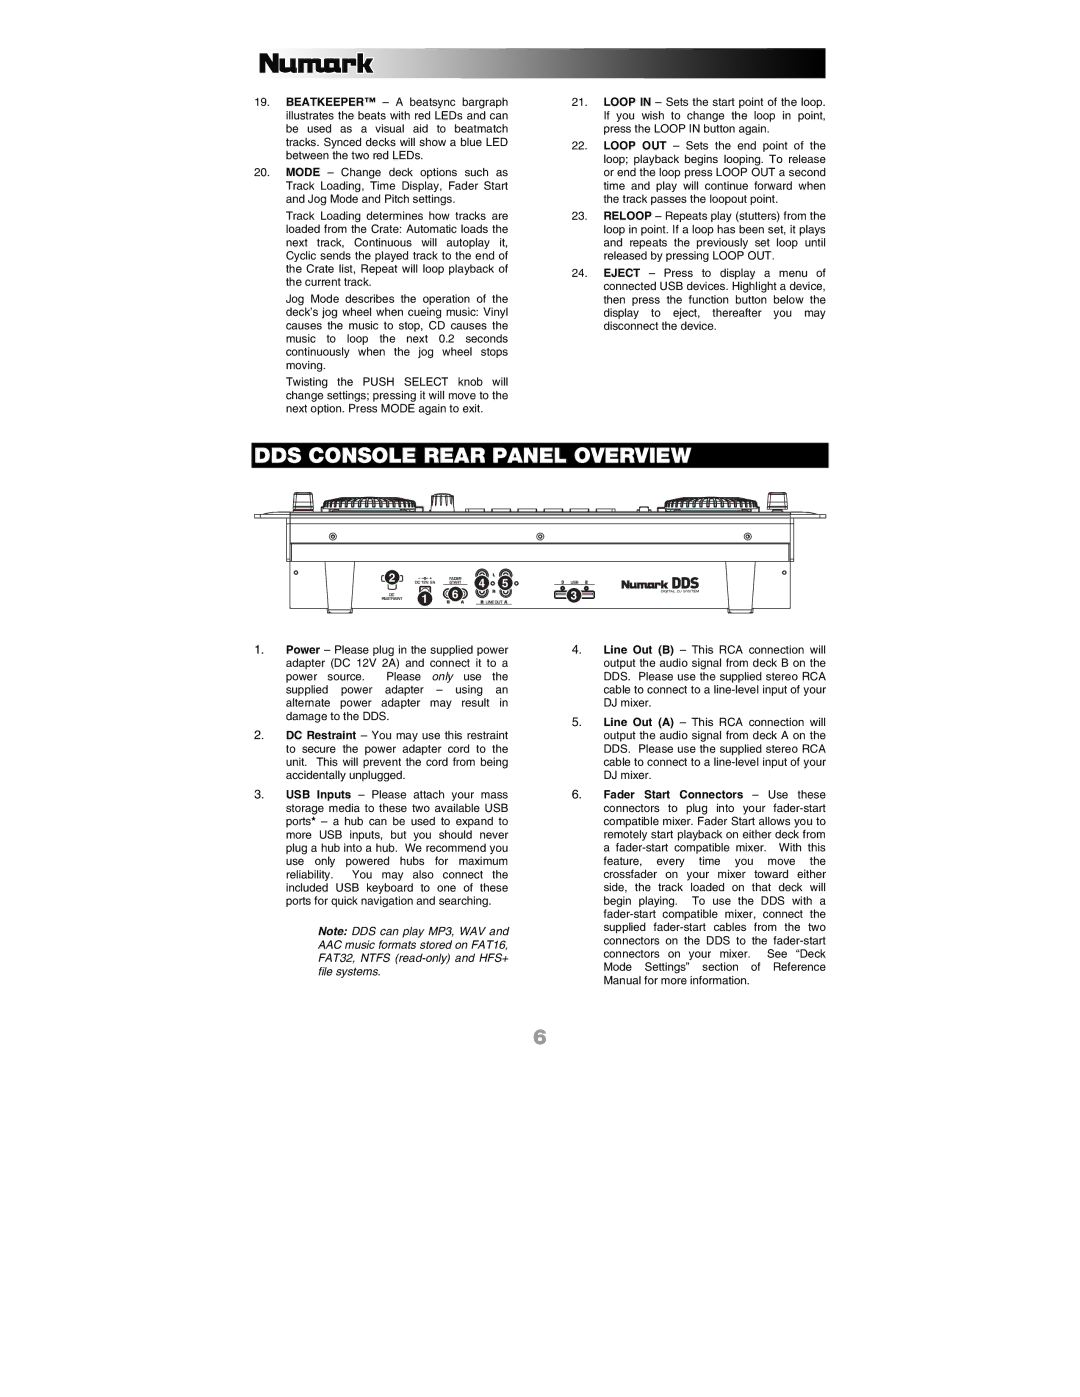
DDS CONSOLE REAR PANEL OVERVIEW
2 


 4 5
4 5 


 1 6
1 6
1.Power – Please plug in the supplied power adapter (DC 12V 2A) and connect it to a power source. Please only use the supplied power adapter – using an alternate power adapter may result in damage to the DDS.
2.DC Restraint – You may use this restraint to secure the power adapter cord to the unit. This will prevent the cord from being accidentally unplugged.
3.USB Inputs – Please attach your mass storage media to these two available USB ports* – a hub can be used to expand to more USB inputs, but you should never plug a hub into a hub. We recommend you use only powered hubs for maximum reliability. You may also connect the included USB keyboard to one of these ports for quick navigation and searching.
Note: DDS can play MP3, WAV and AAC music formats stored on FAT16, FAT32, NTFS
3![]()
4.Line Out (B) – This RCA connection will output the audio signal from deck B on the DDS. Please use the supplied stereo RCA cable to connect to a
5.Line Out (A) – This RCA connection will output the audio signal from deck A on the DDS. Please use the supplied stereo RCA cable to connect to a
6.Fader Start Connectors – Use these connectors to plug into your
6