DDS CONSOLE FRONT PANEL OVERVIEW
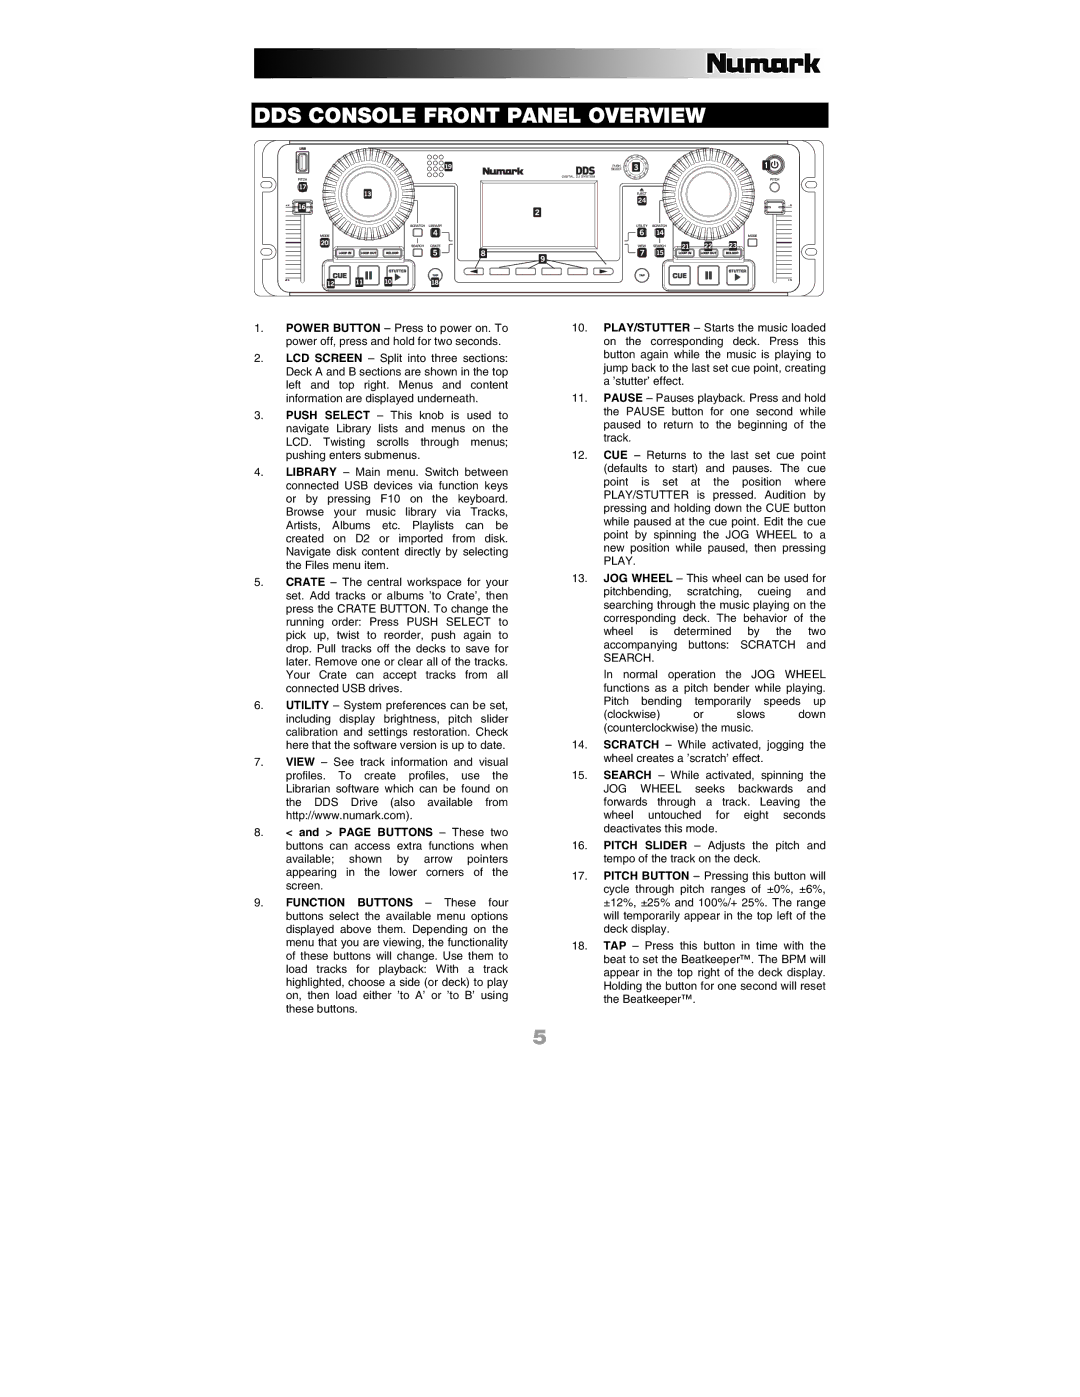
1.POWER BUTTON – Press to power on. To power off, press and hold for two seconds.
2.LCD SCREEN – Split into three sections: Deck A and B sections are shown in the top left and top right. Menus and content information are displayed underneath.
3.PUSH SELECT – This knob is used to navigate Library lists and menus on the LCD. Twisting scrolls through menus; pushing enters submenus.
4.LIBRARY – Main menu. Switch between connected USB devices via function keys or by pressing F10 on the keyboard. Browse your music library via Tracks, Artists, Albums etc. Playlists can be created on D2 or imported from disk. Navigate disk content directly by selecting the Files menu item.
5.CRATE – The central workspace for your set. Add tracks or albums ’to Crate’, then press the CRATE BUTTON. To change the running order: Press PUSH SELECT to pick up, twist to reorder, push again to drop. Pull tracks off the decks to save for later. Remove one or clear all of the tracks. Your Crate can accept tracks from all connected USB drives.
6.UTILITY – System preferences can be set, including display brightness, pitch slider calibration and settings restoration. Check here that the software version is up to date.
7.VIEW – See track information and visual profiles. To create profiles, use the Librarian software which can be found on the DDS Drive (also available from http://www.numark.com).
8.< and > PAGE BUTTONS – These two buttons can access extra functions when available; shown by arrow pointers appearing in the lower corners of the screen.
9.FUNCTION BUTTONS – These four buttons select the available menu options displayed above them. Depending on the menu that you are viewing, the functionality of these buttons will change. Use them to load tracks for playback: With a track highlighted, choose a side (or deck) to play on, then load either ’to A’ or ’to B’ using these buttons.
5
10.PLAY/STUTTER – Starts the music loaded on the corresponding deck. Press this button again while the music is playing to jump back to the last set cue point, creating a ’stutter’ effect.
11.PAUSE – Pauses playback. Press and hold the PAUSE button for one second while paused to return to the beginning of the track.
12.CUE – Returns to the last set cue point (defaults to start) and pauses. The cue point is set at the position where PLAY/STUTTER is pressed. Audition by pressing and holding down the CUE button while paused at the cue point. Edit the cue point by spinning the JOG WHEEL to a new position while paused, then pressing PLAY.
13.JOG WHEEL – This wheel can be used for pitchbending, scratching, cueing and searching through the music playing on the corresponding deck. The behavior of the wheel is determined by the two accompanying buttons: SCRATCH and
SEARCH.
In normal operation the JOG WHEEL functions as a pitch bender while playing. Pitch bending temporarily speeds up
(clockwise) or slows down (counterclockwise) the music.
14.SCRATCH – While activated, jogging the wheel creates a ’scratch’ effect.
15.SEARCH – While activated, spinning the JOG WHEEL seeks backwards and forwards through a track. Leaving the wheel untouched for eight seconds deactivates this mode.
16.PITCH SLIDER – Adjusts the pitch and tempo of the track on the deck.
17.PITCH BUTTON – Pressing this button will cycle through pitch ranges of ±0%, ±6%, ±12%, ±25% and 100%/+ 25%. The range will temporarily appear in the top left of the deck display.
18.TAP – Press this button in time with the beat to set the Beatkeeper™. The BPM will appear in the top right of the deck display. Holding the button for one second will reset the Beatkeeper™.