PRO
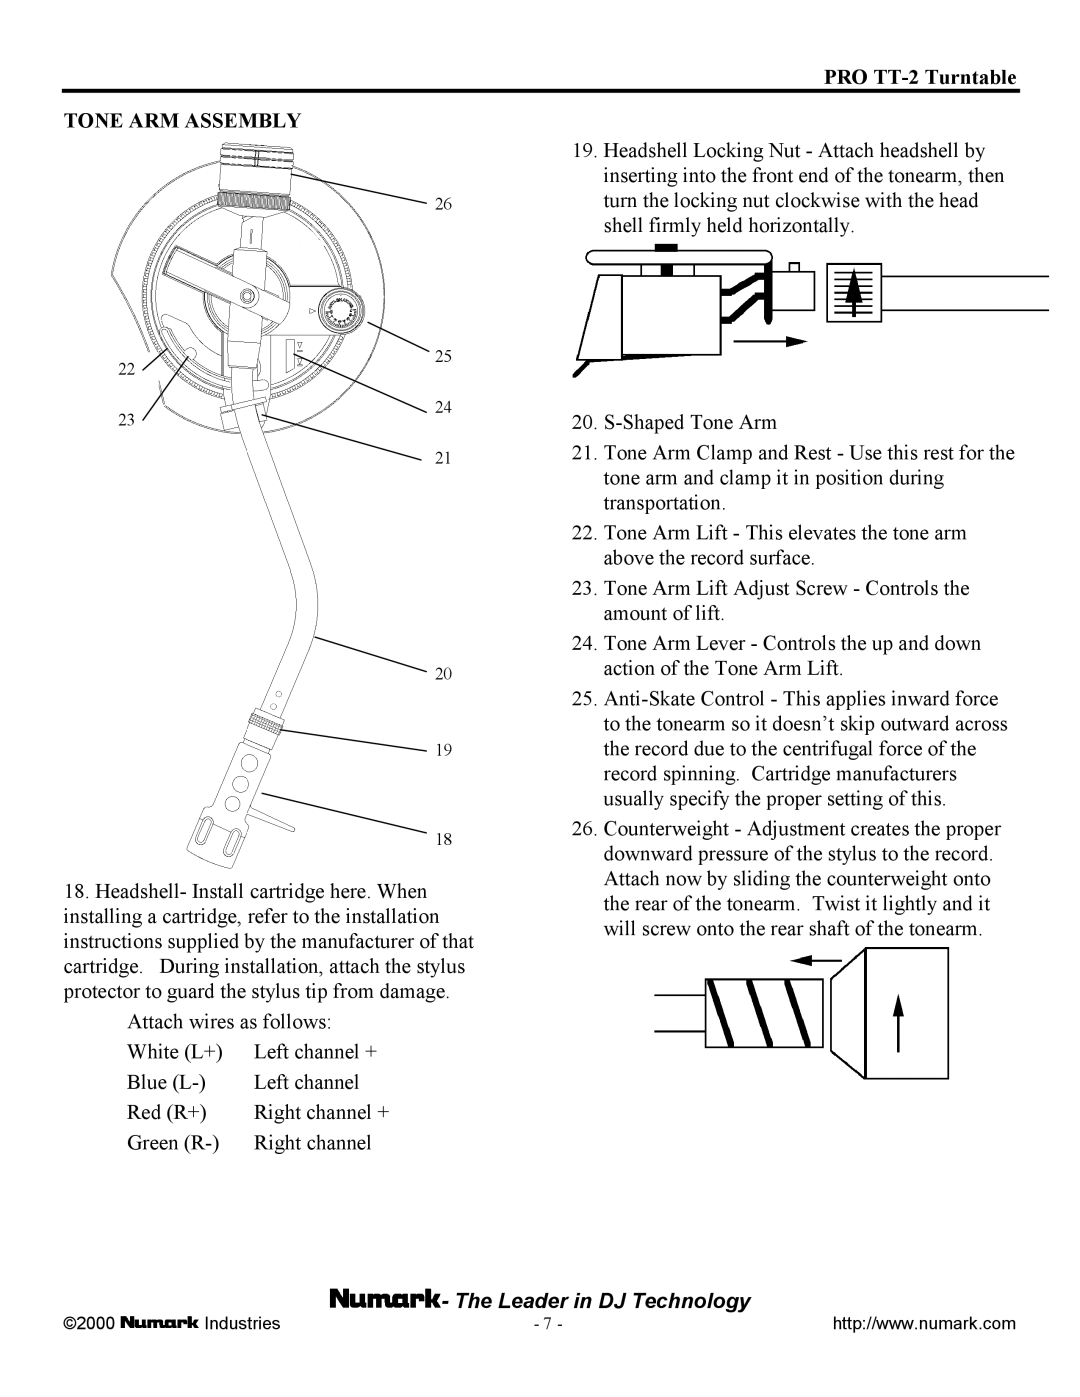
TONE ARM ASSEMBLY
22
23
26
25
24
21
20
19
18
19. | Headshell Locking Nut - Attach headshell by |
| inserting into the front end of the tonearm, then |
| turn the locking nut clockwise with the head |
| shell firmly held horizontally. |
20. | |
21. | Tone Arm Clamp and Rest - Use this rest for the |
| tone arm and clamp it in position during |
| transportation. |
22. | Tone Arm Lift - This elevates the tone arm |
| above the record surface. |
23. | Tone Arm Lift Adjust Screw - Controls the |
| amount of lift. |
24. | Tone Arm Lever - Controls the up and down |
| action of the Tone Arm Lift. |
25. | |
| to the tonearm so it doesn’t skip outward across |
| the record due to the centrifugal force of the |
| record spinning. Cartridge manufacturers |
| usually specify the proper setting of this. |
26. | Counterweight - Adjustment creates the proper |
| downward pressure of the stylus to the record. |
| Attach now by sliding the counterweight onto |
18.Headshell- Install cartridge here. When installing a cartridge, refer to the installation instructions supplied by the manufacturer of that cartridge. During installation, attach the stylus protector to guard the stylus tip from damage.
Attach wires as follows:
White (L+) | Left channel + |
Blue | Left channel |
Red (R+) | Right channel + |
Green | Right channel |
the rear of the tonearm. Twist it lightly and it |
will screw onto the rear shaft of the tonearm. |
 - The Leader in DJ Technology
©2000Industries | - 7 - | http://www.numark.com |