INSTALLING THE PUSHBUTTONS
A diode must be added to the front door pushbutton so that power will be supplied continuously to the Musical Chime while the tune is playing.
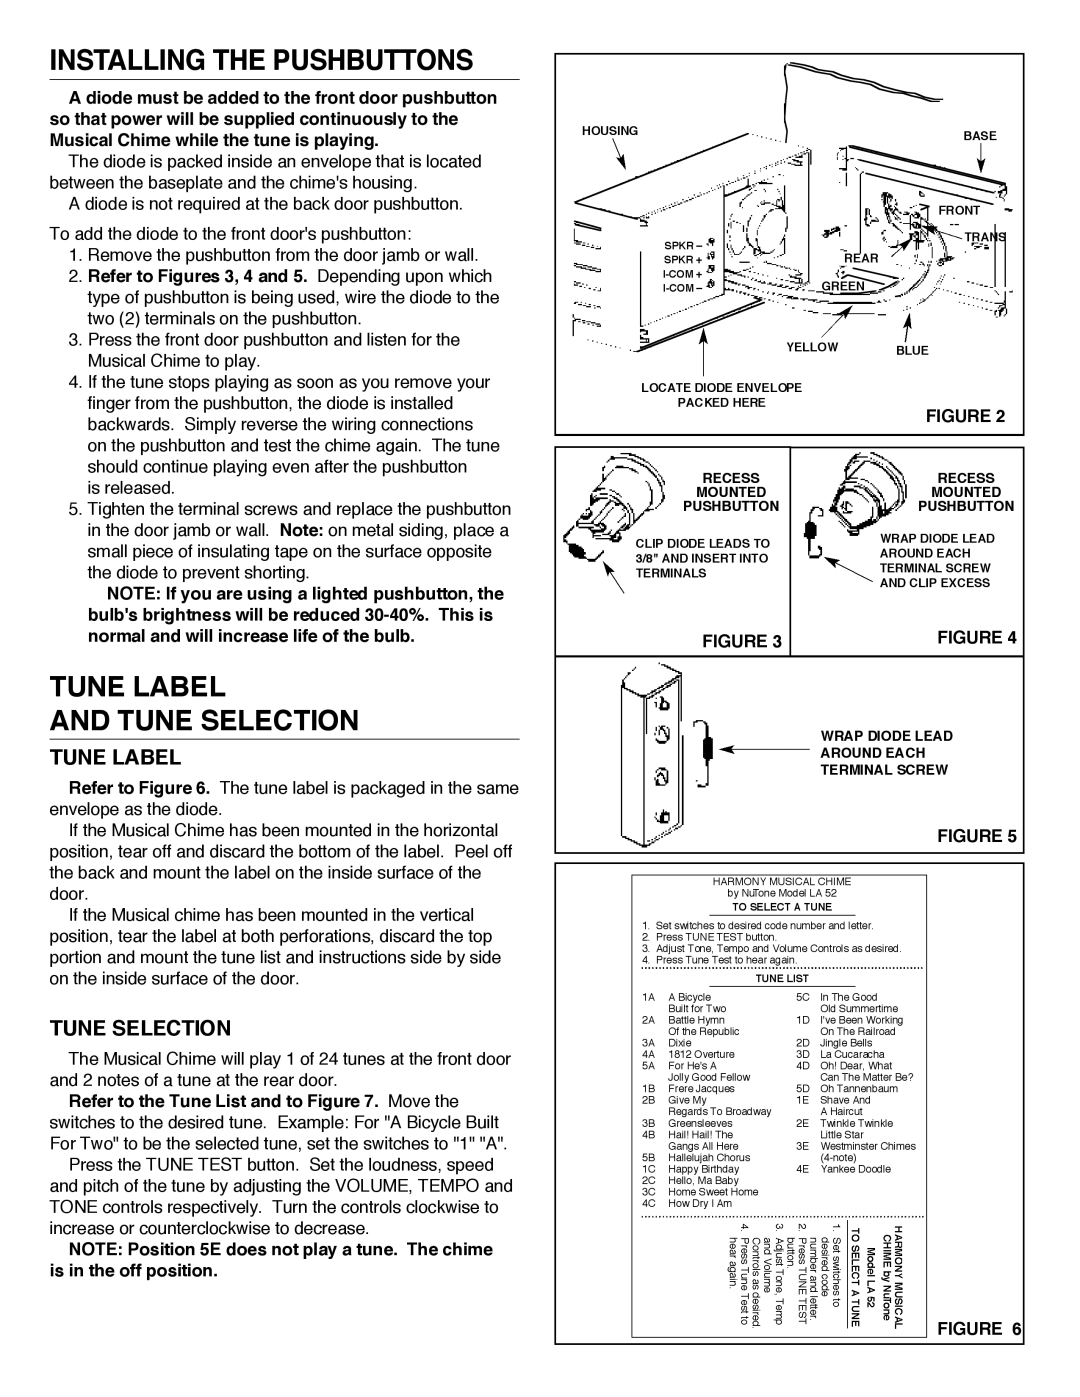
The diode is packed inside an envelope that is located between the baseplate and the chime's housing.
A diode is not required at the back door pushbutton.
To add the diode to the front door's pushbutton:
1. | Remove the pushbutton from the door jamb or wall. |
2. Refer to Figures 3, 4 and 5. Depending upon which | |
| type of pushbutton is being used, wire the diode to the |
| two (2) terminals on the pushbutton. |
3. | Press the front door pushbutton and listen for the |
HOUSING
SPKR – ![]()
SPKR + ![]()
![]()
![]()
BASE
![]()
![]()
![]() FRONT
FRONT
![]()
![]() TRANS
TRANS
REAR
GREEN
Musical Chime to play. |
4. If the tune stops playing as soon as you remove your |
finger from the pushbutton, the diode is installed |
backwards. Simply reverse the wiring connections |
on the pushbutton and test the chime again. The tune |
should continue playing even after the pushbutton |
is released. |
5. Tighten the terminal screws and replace the pushbutton |
in the door jamb or wall. Note: on metal siding, place a |
small piece of insulating tape on the surface opposite |
the diode to prevent shorting. |
NOTE: If you are using a lighted pushbutton, the |
bulb's brightness will be reduced |
YELLOW
LOCATE DIODE ENVELOPE
PACKED HERE
RECESS
MOUNTED
PUSHBUTTON
CLIP DIODE LEADS TO 3/8" AND INSERT INTO TERMINALS
BLUE
FIGURE 2
RECESS
MOUNTED
PUSHBUTTON
WRAP DIODE LEAD AROUND EACH TERMINAL SCREW AND CLIP EXCESS
normal and will increase life of the bulb. |
TUNE LABEL
AND TUNE SELECTION
TUNE LABEL
Refer to Figure 6. The tune label is packaged in the same envelope as the diode.
If the Musical Chime has been mounted in the horizontal position, tear off and discard the bottom of the label. Peel off the back and mount the label on the inside surface of the door .
If the Musical chime has been mounted in the vertical position, tear the label at both perforations, discard the top portion and mount the tune list and instructions side by side on the inside surface of the door.
TUNE SELECTION
The Musical Chime will play 1 of 24 tunes at the front door and 2 notes of a tune at the rear door.
Refer to the Tune List and to Figure 7. Move the switches to the desired tune. Example: For "A Bicycle Built For Two" to be the selected tune, set the switches to "1" "A". Press the TUNE TEST button. Set the loudness, speed and pitch of the tune by adjusting the VOLUME, TEMPO and TONE controls respectively. Turn the controls clockwise to
increase or counterclockwise to decrease.
NOTE: Position 5E does not play a tune. The chime is in the off position.
FIGURE 3 | FIGURE 4 |
WRAP DIODE LEAD
AROUND EACH
TERMINAL SCREW
FIGURE 5
HARMONY MUSICAL CHIME
by NuTone Model LA 52
TO SELECT A TUNE
1.Set switches to desired code number and letter.
2.Press TUNE TEST button.
3.Adjust Tone, Tempo and Volume Controls as desired.
4.Press Tune Test to hear again.
|
| TUNE LIST |
|
| |
1A | A Bicycle | 5C | In The Good | ||
2A | Built for Two | 1D | Old Summertime | ||
Battle Hymn | I've Been Working | ||||
3A | Of the Republic | 2D | On The Railroad | ||
Dixie | Jingle Bells | ||||
4A | 1812 Overture | 3D | La Cucaracha | ||
5A | For He's A | 4D | Oh! Dear, What | ||
1B | Jolly Good Fellow | 5D | Can The Matter Be? | ||
Frere Jacques | Oh Tannenbaum | ||||
2B | Give My | 1E | Shave And | ||
3B | Regards To Broadway | 2E | A Haircut | ||
Greensleeves | Twinkle Twinkle | ||||
4B | Hail! Hail! The | 3E | Little Star | ||
5B | Gangs All Here | Westminster Chimes | |||
Hallelujah Chorus | 4E | (4 - note) | |||
1C | Happy Birthday | Yankee Doodle | |||
2C | Hello, Ma Baby |
|
|
| |
3C | Home Sweet Home |
|
|
| |
4C How Dry I Am
FIGURE 6