OPTIONAL FEATURES
USING THE MUSICAL CHIME WITH A NUTONE RADIO-INTERCOM SYSTEM
If desired, the Musical Chime may be used with a NuTone
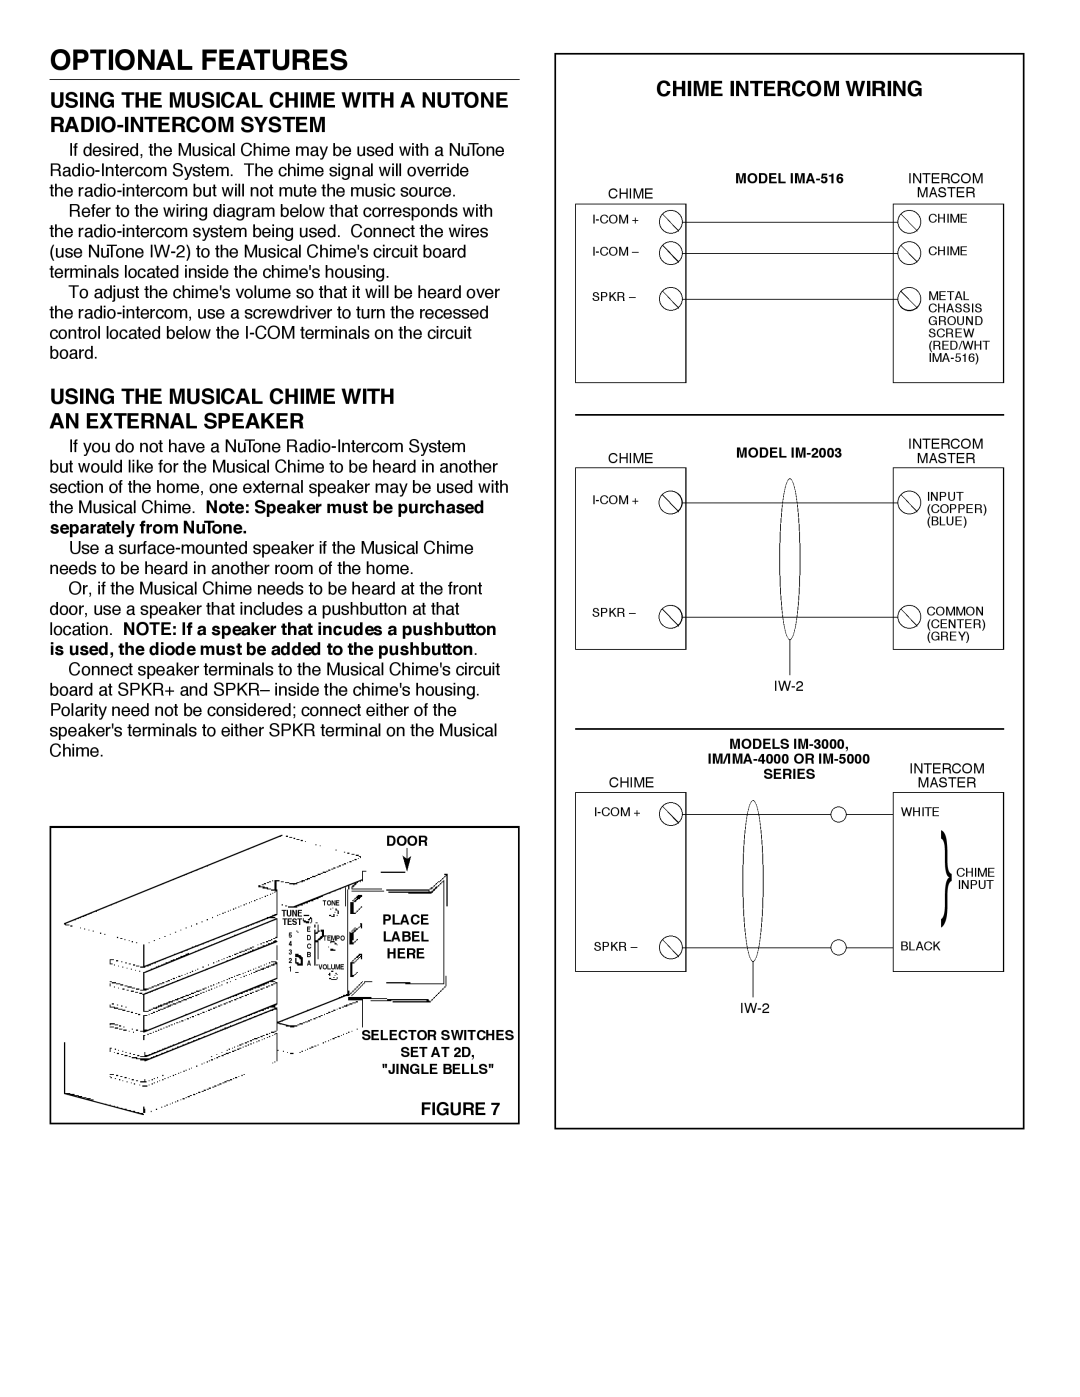
Refer to the wiring diagram below that corresponds with the
To adjust the chime's volume so that it will be heard over the
USING THE MUSICAL CHIME WITH
AN EXTERNAL SPEAKER
If you do not have a NuTone
Use a
Or, if the Musical Chime needs to be heard at the front door, use a speaker that includes a pushbutton at that location. NOTE: If a speaker that incudes a pushbutton is used, the diode must be added to the pushbutton.
Connect speaker terminals to the Musical Chime's circuit board at SPKR+ and SPKR– inside the chime's housing. Polarity need not be considered; connect either of the speaker's terminals to either SPKR terminal on the Musical Chime .
|
|
| DOOR | |
TUNE |
| TONE |
| |
|
| PLACE | ||
TEST | E |
| ||
4 | TEMPO | LABEL | ||
C | ||||
5 | D | HERE | ||
2 | B |
| ||
3 |
|
| ||
1 | A | VOLUME |
|
SELECTOR SWITCHES
SET AT 2D,
"JINGLE BELLS"
FIGURE 7
CHIME INTERCOM WIRING
| MODEL | INTERCOM |
CHIME | MASTER | |
| CHIME | |
| ||
| CHIME | |
| ||
SPKR – |
| METAL |
|
| CHASSIS |
|
| GROUND |
|
| SCREW |
|
| (RED/WHT |
|
| |
| MODEL | INTERCOM | |
CHIME | MASTER | ||
| |||
| INPUT | ||
|
| (COPPER) | |
|
| (BLUE) |
SPKR – |
|
|
| COMMON | |
|
|
|
|
| (CENTER) |
|
|
|
|
| (GREY) |
|
|
|
|
| |
|
|
|
|
|
|
|
|
|
| ||
|
|
|
|
| |
|
| MODELS |
|
| |
|
|
| INTERCOM | ||
|
| SERIES |
| ||
CHIME |
| MASTER | |||
|
|
| |||
|
|
| WHITE | ||
|
| ||||
|
|
|
|
| CHIME |
|
|
|
|
| }INPUT |
SPKR – |
|
|
| BLACK | |
