Connecting and Mounting the Handset
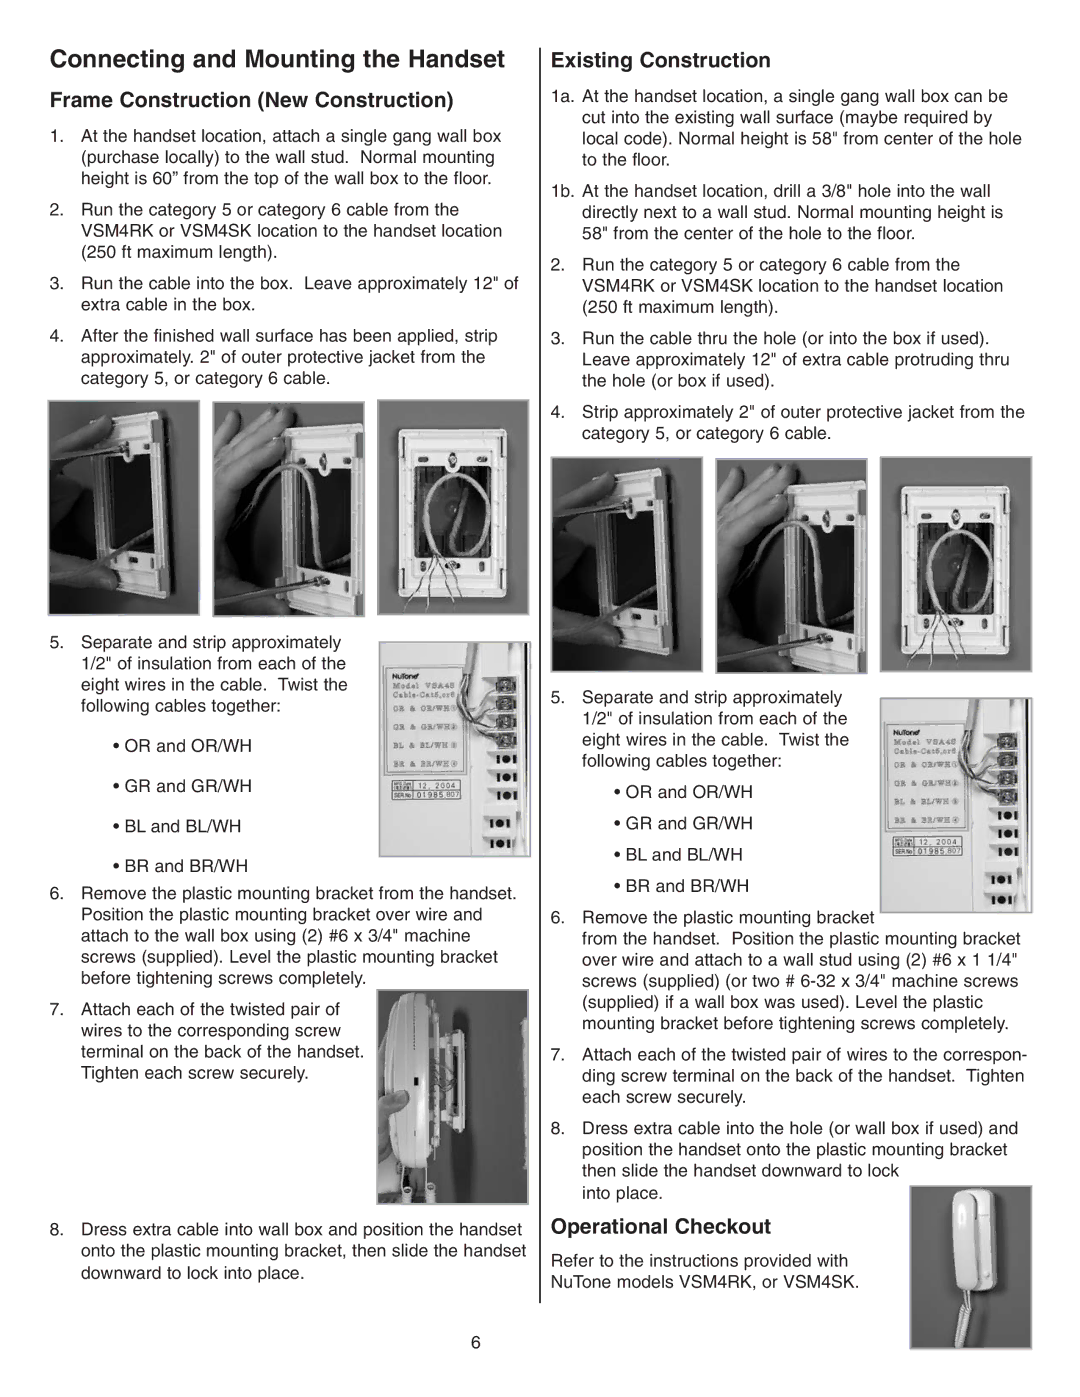
Frame Construction (New Construction)
1.At the handset location, attach a single gang wall box (purchase locally) to the wall stud. Normal mounting height is 60” from the top of the wall box to the floor.
2.Run the category 5 or category 6 cable from the VSM4RK or VSM4SK location to the handset location (250 ft maximum length).
3.Run the cable into the box. Leave approximately 12" of extra cable in the box.
4.After the finished wall surface has been applied, strip approximately. 2" of outer protective jacket from the category 5, or category 6 cable.
5.Separate and strip approximately 1/2" of insulation from each of the eight wires in the cable. Twist the following cables together:
•OR and OR/WH
•GR and GR/WH
•BL and BL/WH
•BR and BR/WH
6.Remove the plastic mounting bracket from the handset. Position the plastic mounting bracket over wire and attach to the wall box using (2) #6 x 3/4" machine screws (supplied). Level the plastic mounting bracket before tightening screws completely.
7.Attach each of the twisted pair of wires to the corresponding screw terminal on the back of the handset. Tighten each screw securely.
8.Dress extra cable into wall box and position the handset onto the plastic mounting bracket, then slide the handset downward to lock into place.
Existing Construction
1a. At the handset location, a single gang wall box can be cut into the existing wall surface (maybe required by local code). Normal height is 58" from center of the hole to the floor.
1b. At the handset location, drill a 3/8" hole into the wall directly next to a wall stud. Normal mounting height is 58" from the center of the hole to the floor.
2.Run the category 5 or category 6 cable from the VSM4RK or VSM4SK location to the handset location (250 ft maximum length).
3.Run the cable thru the hole (or into the box if used). Leave approximately 12" of extra cable protruding thru the hole (or box if used).
4.Strip approximately 2" of outer protective jacket from the category 5, or category 6 cable.
5.Separate and strip approximately 1/2" of insulation from each of the eight wires in the cable. Twist the following cables together:
•OR and OR/WH
•GR and GR/WH
•BL and BL/WH
•BR and BR/WH
6.Remove the plastic mounting bracket
from the handset. Position the plastic mounting bracket over wire and attach to a wall stud using (2) #6 x 1 1/4" screws (supplied) (or two #
7.Attach each of the twisted pair of wires to the correspon- ding screw terminal on the back of the handset. Tighten each screw securely.
8.Dress extra cable into the hole (or wall box if used) and position the handset onto the plastic mounting bracket then slide the handset downward to lock
into place.
Operational Checkout
Refer to the instructions provided with
NuTone models VSM4RK, or VSM4SK.
6