
DX-250 specifications
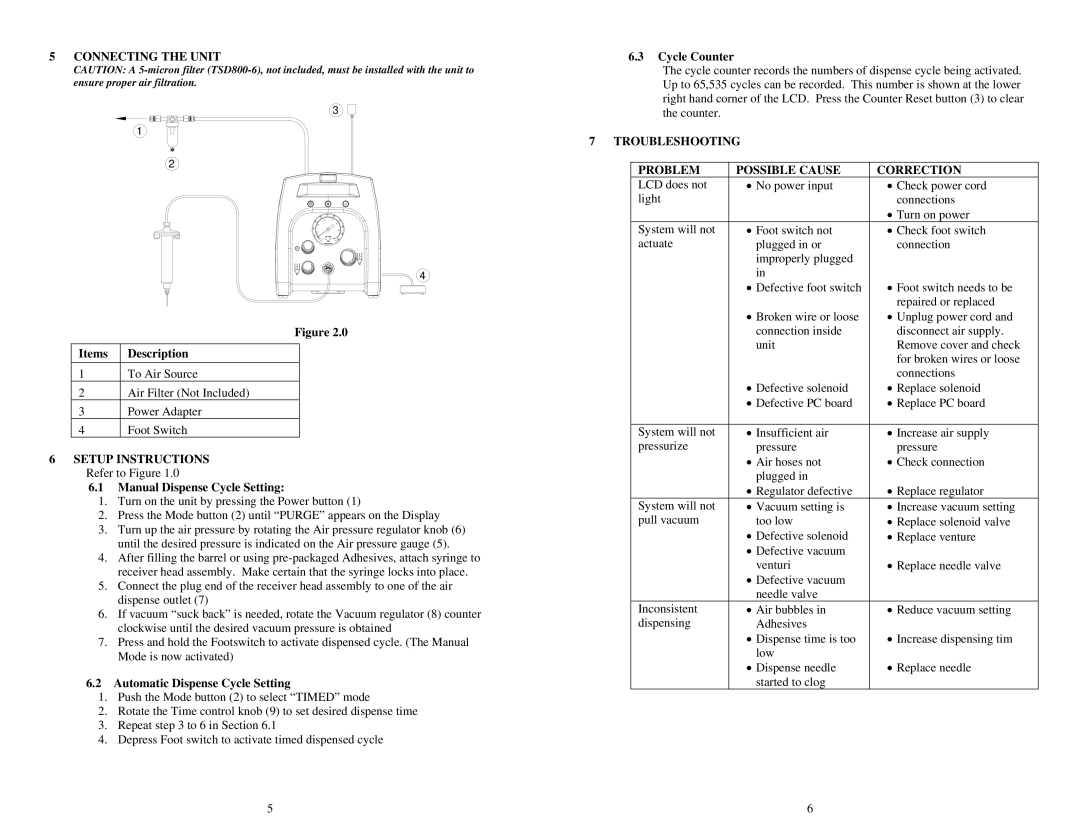
The OK International DX-250 is a versatile and advanced dispensing system designed for high-precision fluid applications in various industries, including electronics, automotive, aerospace, and medical devices. Known for its reliability and efficiency, the DX-250 combines state-of-the-art technology and user-friendly features to meet the evolving needs of manufacturers.One of the standout features of the DX-250 is its ability to handle a wide range of fluids, from low-viscosity adhesives to high-viscosity greases, allowing manufacturers to streamline their processes and optimize production. The system is equipped with a precision control mechanism that ensures consistent dispensing volumes, which is crucial for maintaining quality and minimizing waste.
The DX-250 incorporates advanced closed-loop feedback systems that monitor and adjust the dispensing parameters in real time. This technology enhances accuracy and reliability, significantly reducing the potential for errors during the application process. Furthermore, the system supports multiple application modes, including dot, bead, and continuous dispense, providing versatility for various assembly tasks.
The user interface of the DX-250 is designed for ease of use. It features a touchscreen display that allows operators to set parameters quickly and intuitively. The system can store multiple presets, enabling users to switch between different dispensing programs without extensive reconfiguration. This function is particularly beneficial in environments where batch sizes and fluid types may change frequently.
Additional characteristics of the DX-250 include a compact design that allows for easy integration into existing production lines, as well as lightweight materials that enhance mobility. The system's modular architecture means components can be easily replaced or upgraded, extending the overall lifespan of the equipment.
Moreover, the DX-250 comes with built-in safety features, including automatic shut-off and alerts for low fluid levels. These measures ensure that operations can continue smoothly without risking equipment damage or compromising product quality.
In summary, the OK International DX-250 is a sophisticated dispensing system that combines precision, versatility, and ease of use. With its advanced technologies and user-friendly features, it is well-suited for a variety of industrial applications, providing manufacturers with the tools they need to enhance productivity and maintain high standards of quality.