TROUBLESHOOTING
Risk of Unsafe Operation. Unit cycles automatically when power is on. When performing maintenance, you
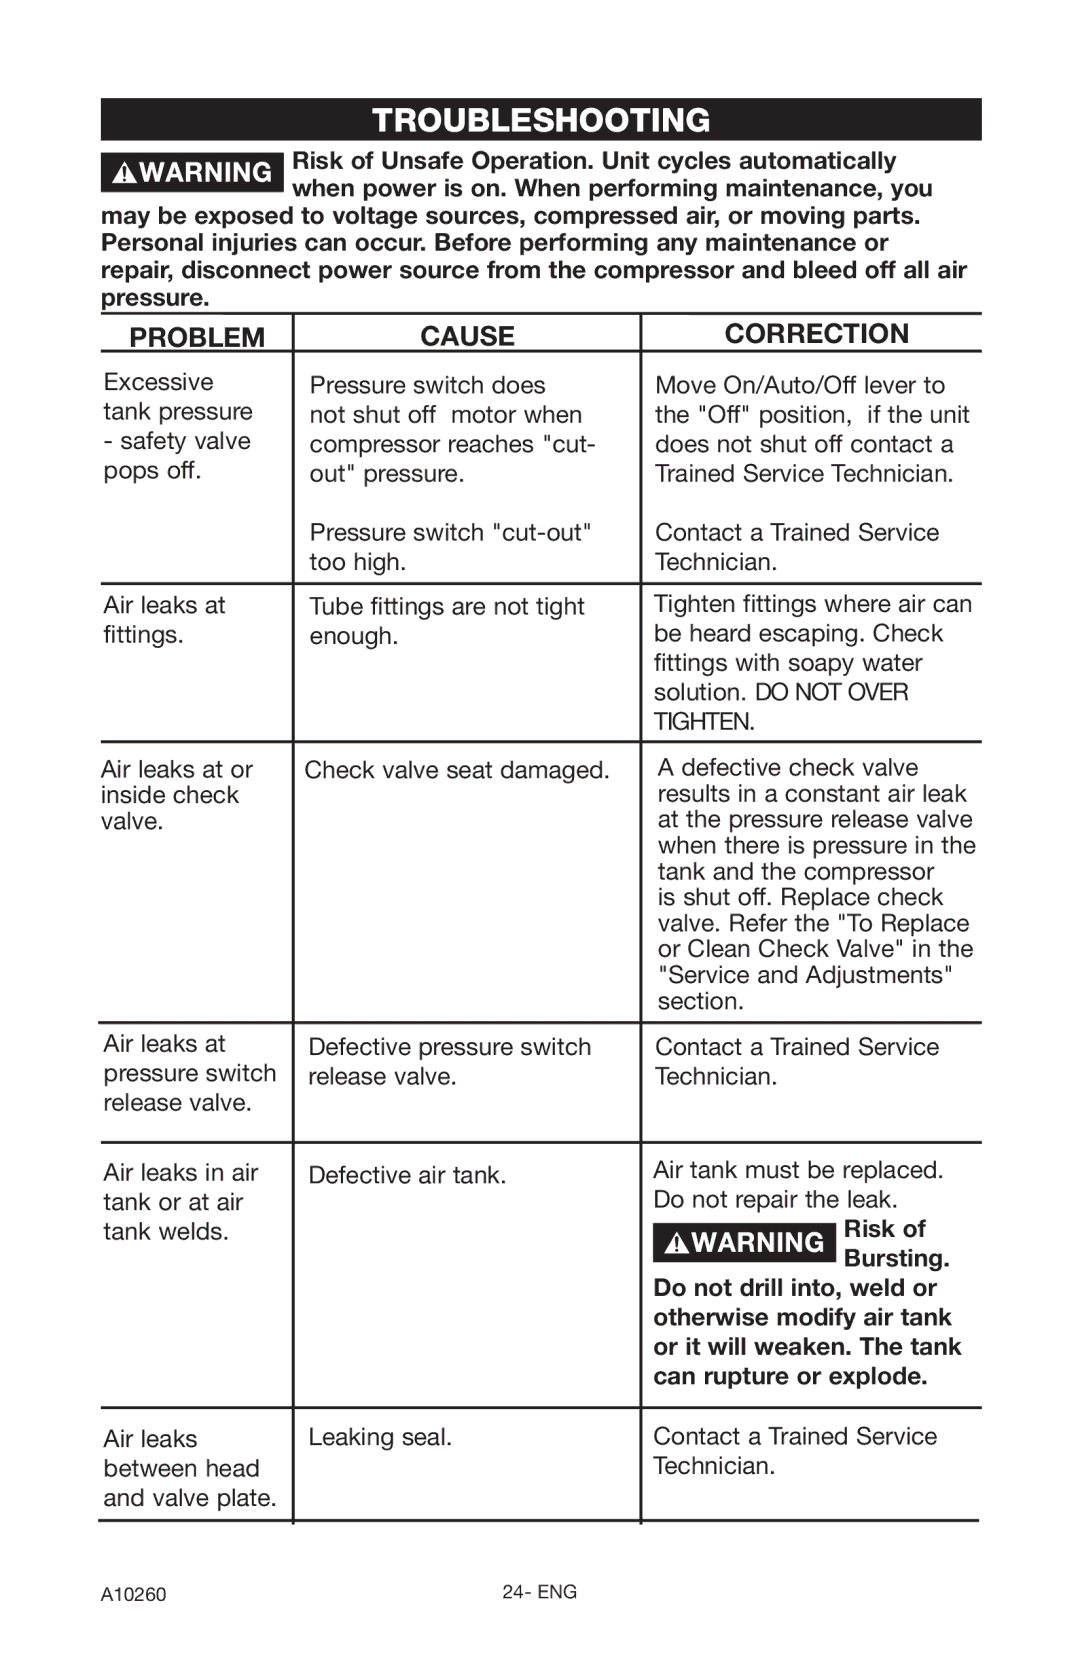
may be exposed to voltage sources, compressed air, or moving parts. Personal injuries can occur. Before performing any maintenance or repair, disconnect power source from the compressor and bleed off all air pressure.
| PROBLEM | CAUSE | CORRECTION | |
| Excessive | Pressure switch does | Move On/Auto/Off lever to | |
| tank pressure | not shut off motor when | the "Off" position, if the unit | |
| - safety valve | compressor reaches "cut- | does not shut off contact a | |
| pops off. | out" pressure. | Trained Service Technician. | |
|
| Pressure switch | Contact a Trained Service | |
|
| too high. | Technician. | |
|
|
|
|
|
| Air leaks at | Tube fittings are not tight | Tighten fittings where air can | |
| fittings. | enough. | be heard escaping. Check | |
|
|
| fittings with soapy water | |
|
|
| solution. DO NOT OVER | |
|
|
| TIGHTEN. | |
|
|
|
| |
| Air leaks at or | Check valve seat damaged. | A defective check valve | |
| inside check |
| results in a constant air leak | |
| valve. |
| at the pressure release valve | |
|
|
| when there is pressure in the | |
|
|
| tank and the compressor | |
|
|
| is shut off. Replace check | |
|
|
| valve. Refer the "To Replace | |
|
|
| or Clean Check Valve" in the | |
|
|
| "Service and Adjustments" | |
|
|
| section. | |
|
|
|
|
|
| Air leaks at | Defective pressure switch | Contact a Trained Service | |
| pressure switch | release valve. | Technician. | |
| release valve. |
|
|
|
|
|
|
|
|
| Air leaks in air | Defective air tank. | Air tank must be replaced. | |
| tank or at air |
| Do not repair the leak. | |
| tank welds. |
| Risk of | |
|
|
| Bursting. | |
|
|
| Do not drill into, weld or | |
|
|
| otherwise modify air tank | |
|
|
| or it will weaken. The tank | |
|
|
| can rupture or explode. | |
|
|
|
|
|
| Air leaks | Leaking seal. | Contact a Trained Service | |
| between head |
| Technician. | |
| and valve plate. |
|
|
|
|
|
|
|
|
|
|
|
|
|
A10260 | 24- ENG |