AB2, AB2 HTS specifications
The Omnimount AB2 and AB2 HTS are advanced mounting solutions designed for modern audio-visual equipment, providing unparalleled flexibility, durability, and ease of installation. These mounts are engineered to accommodate the needs of both commercial and residential environments, ensuring that users can enjoy their audio and video experiences without compromising on aesthetics or functionality.One of the main features of the Omnimount AB2 is its robust construction. Made from high-quality materials, the AB2 can support a wide range of television sizes and weights, making it a versatile choice for different setups. The mount offers a full-motion design, allowing users to tilt, swivel, and extend their TVs with ease. This flexibility is essential for achieving the perfect viewing angle in any room configuration, whether it be in a home theater, living room, or office space.
The AB2 HTS, or Heavy-duty Tilt and Swivel, takes the functionality of the original AB2 to a new level. It is specifically designed to support larger and heavier displays without compromising on safety or performance. The HTS combines a sturdy mount design with the ability to tilt the TV up to 15 degrees downwards, facilitating optimal viewing. This feature is particularly useful in rooms with high ceilings or for installations above fireplaces.
Both models employ innovative technologies to enhance user experience. Integrated cable management systems hide unsightly wires for a clean and organized look. This feature not only improves the aesthetics of the installation but also ensures that cables are protected from wear and tear. Additionally, the quick-release mechanism allows for easy TV detachment for servicing or replacement, making maintenance a simple process.
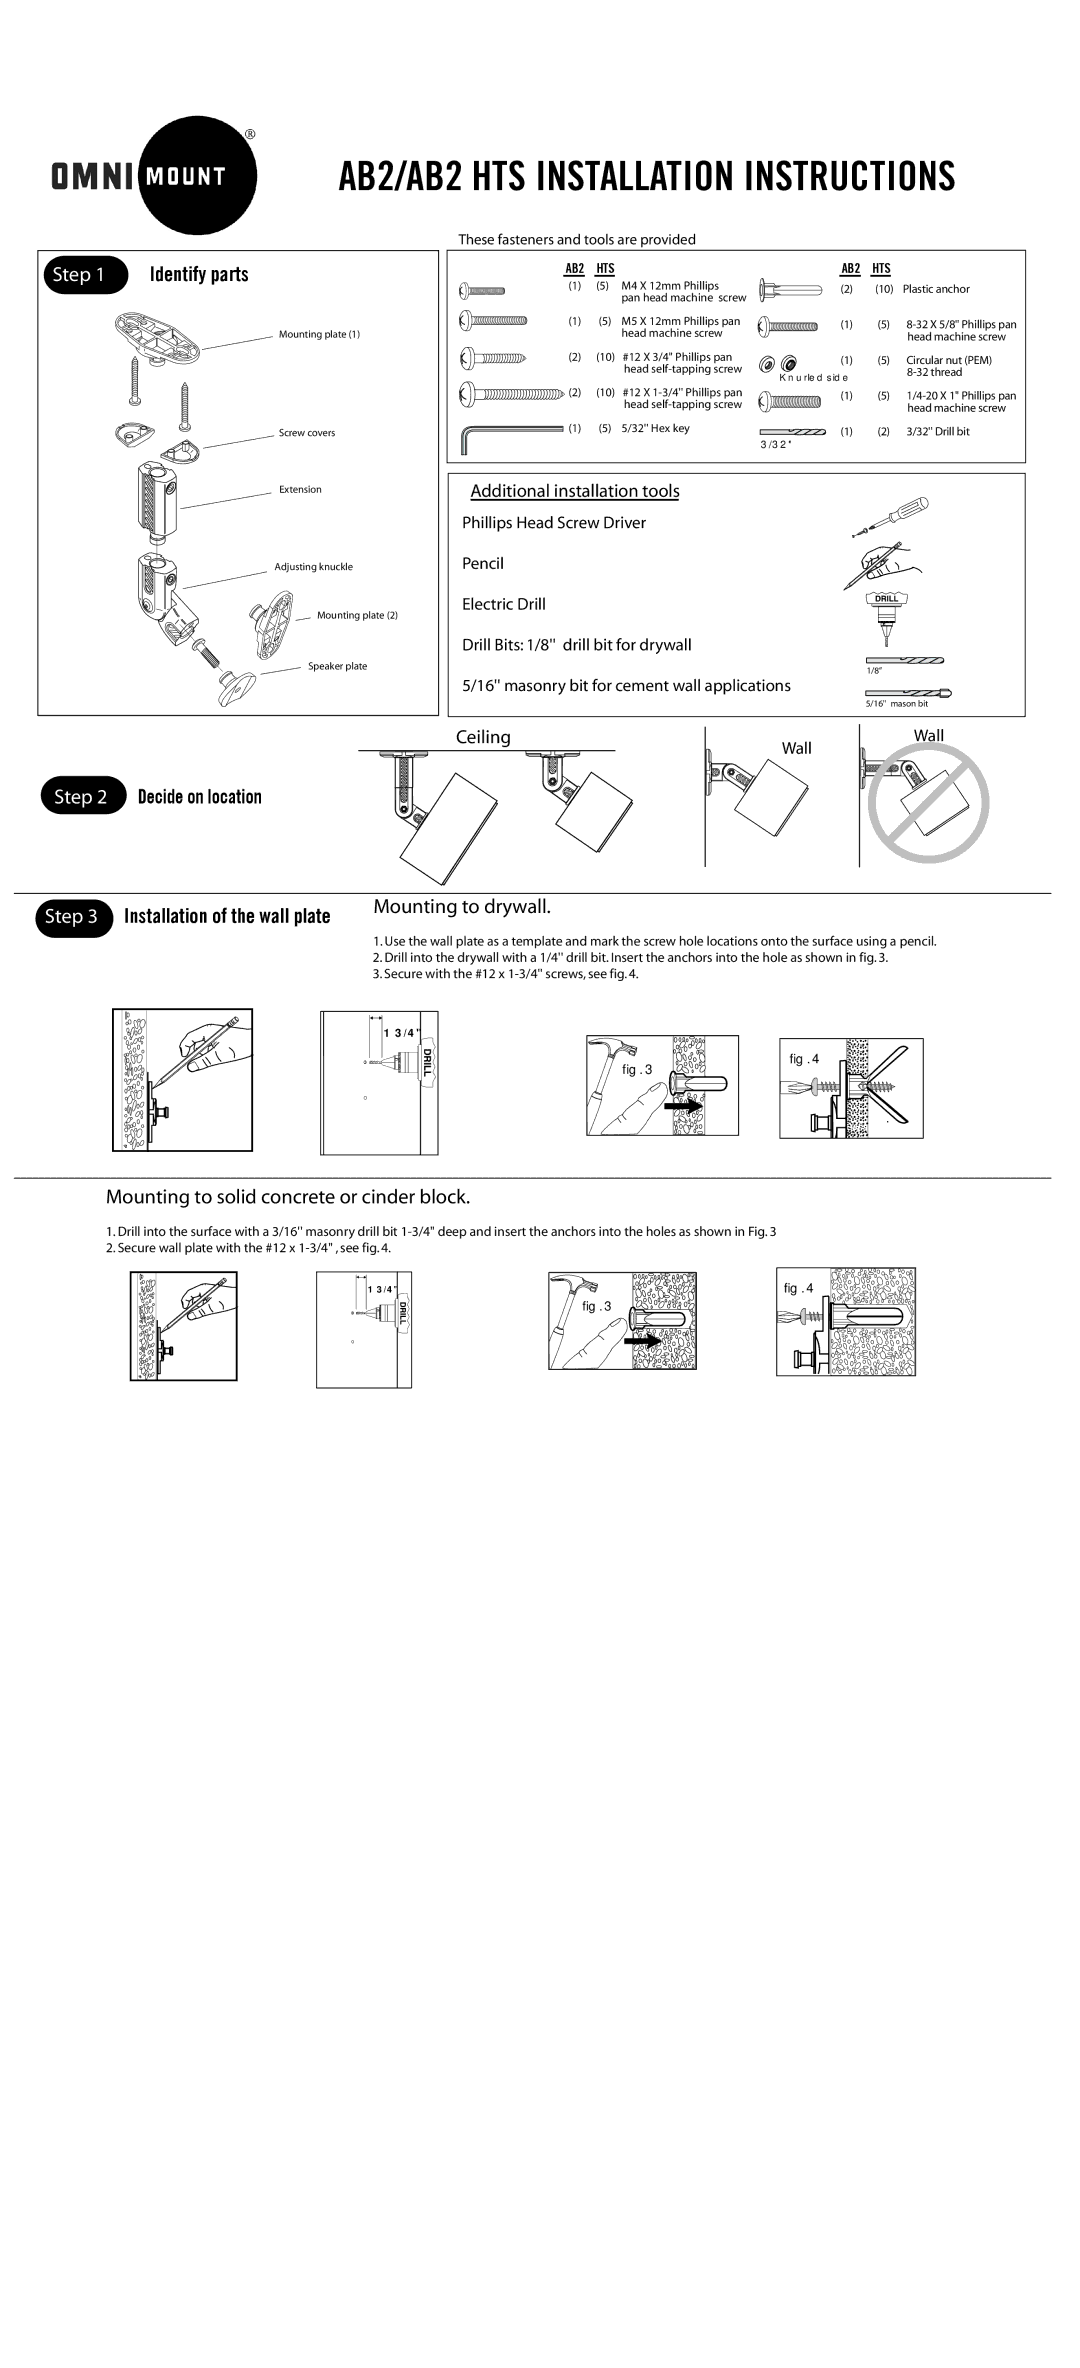
The installation process of the AB2 and AB2 HTS is user-friendly, thanks to their comprehensive mounting hardware and detailed instructions. They are compatible with a range of VESA patterns, ensuring widespread compatibility with modern television models. The mounts are also designed to be wall-friendly, minimizing the risk of damage to surfaces.
In summary, the Omnimount AB2 and AB2 HTS are exemplary mounting solutions that cater to the demands of contemporary audio-visual installations. With their focus on durability, flexibility, and ease of use, these mounts ensure that users can maximize their viewing pleasure, making them a worthwhile investment for anyone looking to enhance their entertainment setup.