
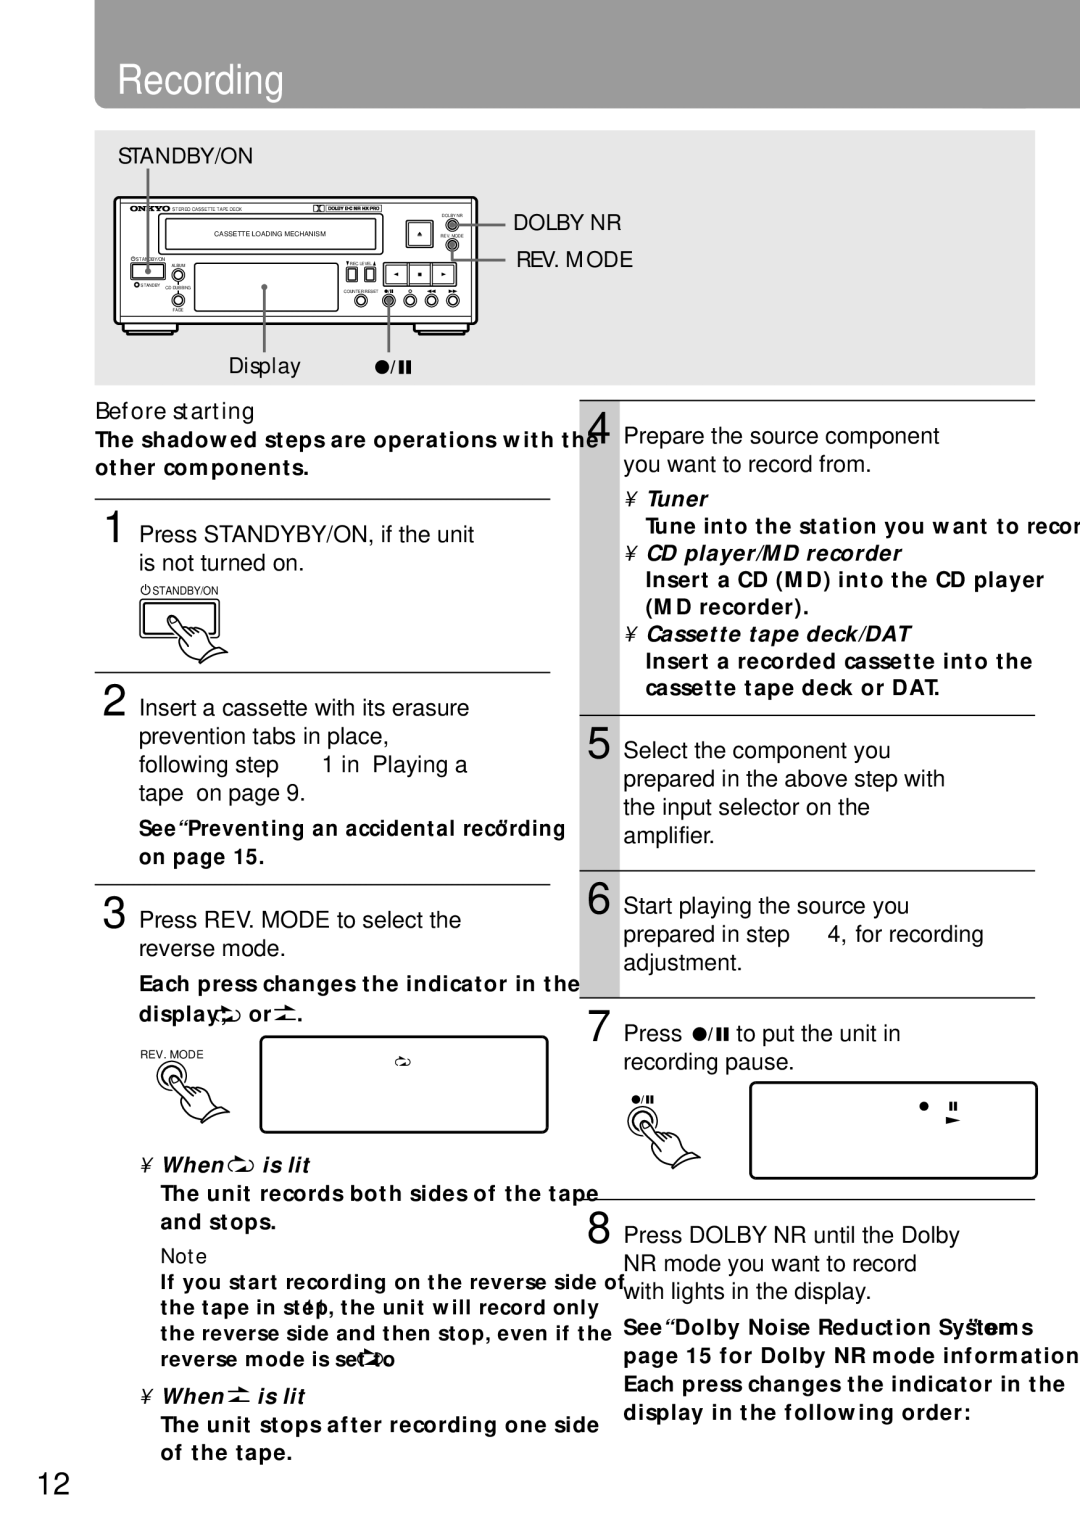
K-505TX specifications
The Onkyo K-505TX is a sophisticated cassette deck that has captured the attention of audiophiles and music enthusiasts alike. This high-fidelity tape deck offers an array of features that cater to both the nostalgia of analog recording and the precision of modern technology.One of the main highlights of the K-505TX is its dual-capstan tape transport system. This design minimizes wow and flutter, delivering unparalleled playback stability and audio fidelity. The dual-capstan mechanism ensures consistent tape tension while playing or recording, which results in a smooth and accurate reproduction of sound. It allows for head-to-head comparison of different cassette tapes, bringing out the best in analog audio.
Equipped with high-quality heads, the K-505TX utilizes a combination of ferrite and soft magnetic materials, which enhances both the recording and playback capabilities. Additionally, the use of a three-head configuration facilitates real-time monitoring of recordings. This means that users can adjust their levels and make necessary tweaks to achieve optimal sound quality as they record, a feature that is particularly beneficial for home studios and serious hobbyists.
The Onkyo K-505TX also comes with an array of advanced features designed to enhance user experience. Its auto-reverse function allows for uninterrupted playback, letting listeners enjoy lengthy recordings without the need for manual intervention. The tape deck supports a variety of tape types, including normal, chrome, and metal tapes, expanding its versatility for different recording needs and preferences.
An integrated digital counter and memory function aids in accurately locating specific tracks, a handy feature for those who wish to replay portions of their favorite recordings. In addition, the K-505TX incorporates an automatic calibration system that adjusts bias and EQ settings for optimal tape performance, ensuring that users receive the best quality playback and recording tailored to their specific tape type.
The overall design of the Onkyo K-505TX reflects a blend of elegance and functionality. Its user interface is straightforward, featuring clearly labeled buttons and knobs that facilitate ease of use. With a sleek finish, it fits seamlessly into any home entertainment setup.
In combining classic analog charm with modern technology, the Onkyo K-505TX cassette deck remains a stellar choice for anyone looking to enjoy or harness the unique qualities of cassette recordings. Whether you’re a casual listener or a dedicated audio purist, this tape deck is sure to impress with its performance and features.