T-433 specifications
The Onkyo T-433 is a high-performance FM/AM tuner that exemplifies precision and quality in audio technology. Designed for audiophiles and casual listeners alike, this tuner boasts a range of features that set it apart in the crowded world of audio equipment.One of the standout features of the Onkyo T-433 is its advanced digital processing capabilities. The tuner employs a DSP (Digital Signal Processor) that ensures clear and stable tuning, allowing users to enjoy their favorite stations without distortion or interference. The broad frequency response of the T-433 enhances sound clarity and fidelity, making it suitable for music enthusiasts who demand the best from their audio systems.
The T-433 also incorporates an analog front-end design, which traditionally offers superior reception quality for FM broadcasts. This design minimizes noise and improves selectivity, ensuring that even distant stations can be picked up with excellent clarity. Users will appreciate the tuner’s ability to lock onto stations and maintain signal strength, even in challenging environments.
Connectivity is another highlight of the Onkyo T-433. With its gold-plated RCA outputs, it can be seamlessly integrated into a variety of audio setups. The tuner features both fixed and variable outputs, providing flexibility for users looking to connect it to different amplifiers or receivers. Additionally, the T-433 comes equipped with a mono/stereo switch, enabling listeners to switch modes based on their preferences or the available signal.
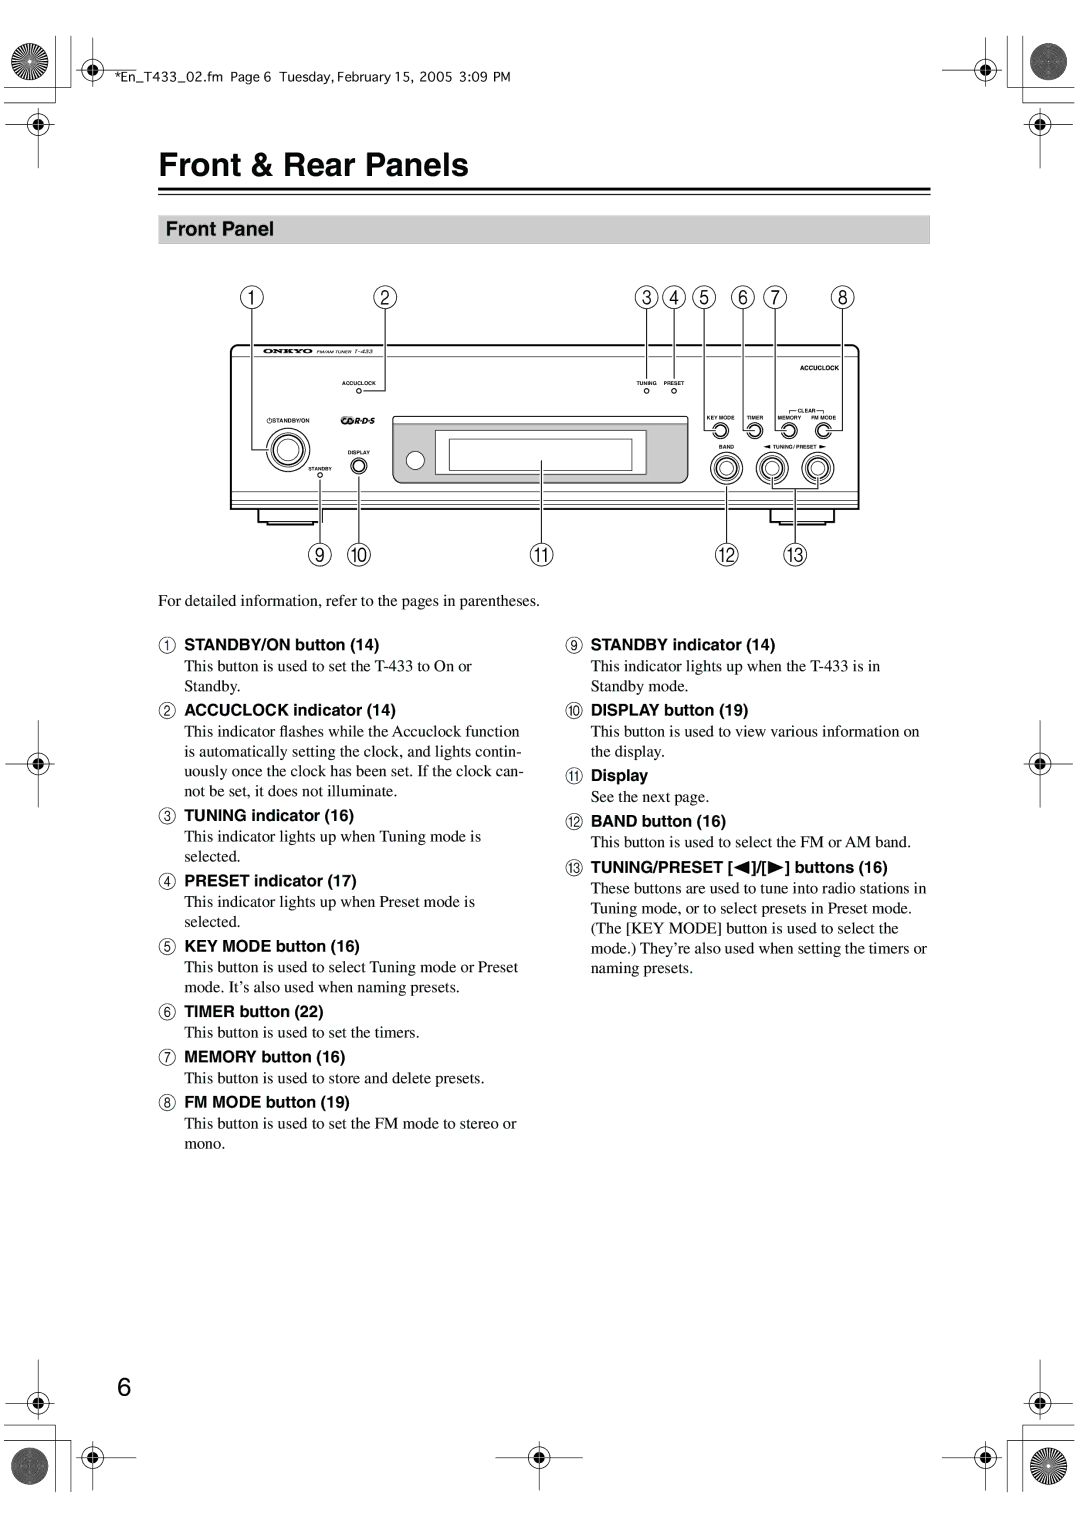
The design aesthetic of the T-433 is both classic and understated, featuring a sleek chassis that fits well into any audio setup. The front panel is user-friendly, showcasing a large LED display that provides clear information about the currently tuned station and signal strength. The unmistakable rotary dial makes it easy to navigate through available frequencies.
For those who appreciate programming capabilities, the Onkyo T-433 offers 40 preset memory slots for favorite radio stations, making it easy to access regularly enjoyed broadcasts without the hassle of manual tuning. The tuner’s scan feature allows users to quickly search for available stations, enhancing usability.
In summary, the Onkyo T-433 is a robust FM/AM tuner that combines advanced digital technology with classic analog design principles. Its superior reception quality, excellent connectivity options, and user-friendly features make it a top choice for anyone looking to enhance their listening experience with reliable and high-quality radio performance. Whether for home or professional use, the T-433 stands out as a dependable audio component.

