TX-NR579
Board above the apparatus shall be set 10 cm
Local regulations when disposing of batteries
10 cm 4 at the rear. The rear edge of the shelf or
Away from the rear panel or wall, creating a flue-like
Preventing Hearing Loss Caution
Precautions
Power
Batteries and Heat Exposure Warning
Installing the batteries
Supplied Accessories
Make sure you have the following accessories
Aiming the remote controller
Contents
Amplifier
Features
Services available may vary depending on the region
Processing
Front & Rear Panels
Front Panel
Display
For detailed information, see the pages in parentheses
See Connecting the AV Receiver for connection pages 11 to
Power cord
UREMOTE Control jack
Rear Panel
Remote Controller
Controlling the AV Receiver
Connecting the Speaker Cables
Connecting the AV Receiver
Connecting Your Speakers
Screw-type speaker terminals
Speaker Connection Precautions
Speaker Configuration
Attaching the Speaker Cable Labels
Using a Powered Subwoofer
Bi-amping the Front Speakers
AV Cables and Jacks
Connecting AV components
About AV Connections
Hdmi cable
Audio Return Channel ARC function
Connecting Components with Hdmi
Jack Components Assignable
Connecting Your Components
Jack/Port Components Assignable
How to record a video source
System On/Auto Power On
Connecting Onkyo uComponents
Connecting a Recording Component
Remote Control
Plug the power cord into an AC wall outlet
Connecting the Antennas
Connecting the Power Cord
Assembling the AM loop antenna
Turning Off
Turning On/Off the AV Receiver
Turning On
AV receiver comes on, the display lights
Playback
Controlling Contents of USB or Network Devices
Selecting the Language for the Onscreen Setup Menus
Playing the Connected Component
Playing an iPod/iPhone via USB
Understanding Icons on the Display
Enter
Playing a USB Device
Listening to Internet Radio
Registering My Favorites*1
Listening to Other Internet Radio
Top menu of Internet Radio
Playing Music Files on a Server
Windows Media Player 11 Setup
Windows Media Player 12 Setup
Remote Playback
Tuning into Radio Stations
Using Remote Playback
Using the Tuner
Listening to AM/FM Radio
Using RDS
Presetting AM/FM Stations
Mode
Finding Stations by Type PTY
Displaying Radio Text RT
Listening to Traffic News TP
Using the Automatic Speaker Setup
Using Basic Functions
Measurement procedure
` Cancel
When you’ve finished making the settings, press
When prompted, repeat step
Use q/wto select a target, and use e/rto change the setting
Error Messages
Changing the Speaker Setup Manually
Using the Listening Modes
Selecting Listening Modes
Explanatory Notes
Following audio formats are supported by the listening mode
About Listening Modes
Input Source
Onkyo-Original DSP Listening Modes
Listening Modes
Dolby Pro Logic IIz
Resolution Audio
Dolby Pro Logic
Height
Use this mode with any stereo movie e.g., TV, DVD, VHS
Listening Mode Description Input Speaker Source Layout Neo6
That fully envelops the listener
Using the Sleep Timer
Using the Home Menu
Setting the Display Brightness
Muting the AV Receiver
Displaying Source Information
Changing the Input Display
VCR/DVR
Recording
Using Headphones
AV Recording
On-screen Setup Menus Common Procedures in Setup Menu
Advanced Setup
Explanatory Notes
Monitor Out
Resolution
Input/Output Assign
Hdmi Input
Component Video Input
Speaker Setup
Input selector Default assignment
Digital Audio Input
Speaker Settings
Double Bass
Speaker Distance
Level Calibration
Unit
Multiplex/Mono
Audio Adjust
Dolby
Theater-Dimensional
Source Setup
Audyssey
Dynamic Volume
Reference Level
Sync
IntelliVolume
Name Edit
Picture Adjust
Charge Mode
Audio Selector
Miscellaneous
Listening Mode Preset
Volume Setup
DTS/DTS-ES/DTS-HD
Remote ID
Hardware Setup
OSD Setup
Tuner
Auto Standby
Network
Firmware Update
Dhcp
Lock Setup
Remote Controller Setup
Using the Audio Settings
Music Optimizer
Late Night
CinemaFILTER
Zone
Connecting Your Zone 2 Speakers Directly to the AV receiver
Connecting the Zone Speakers to an Additional Amplifier
Making Zone 2 Connections
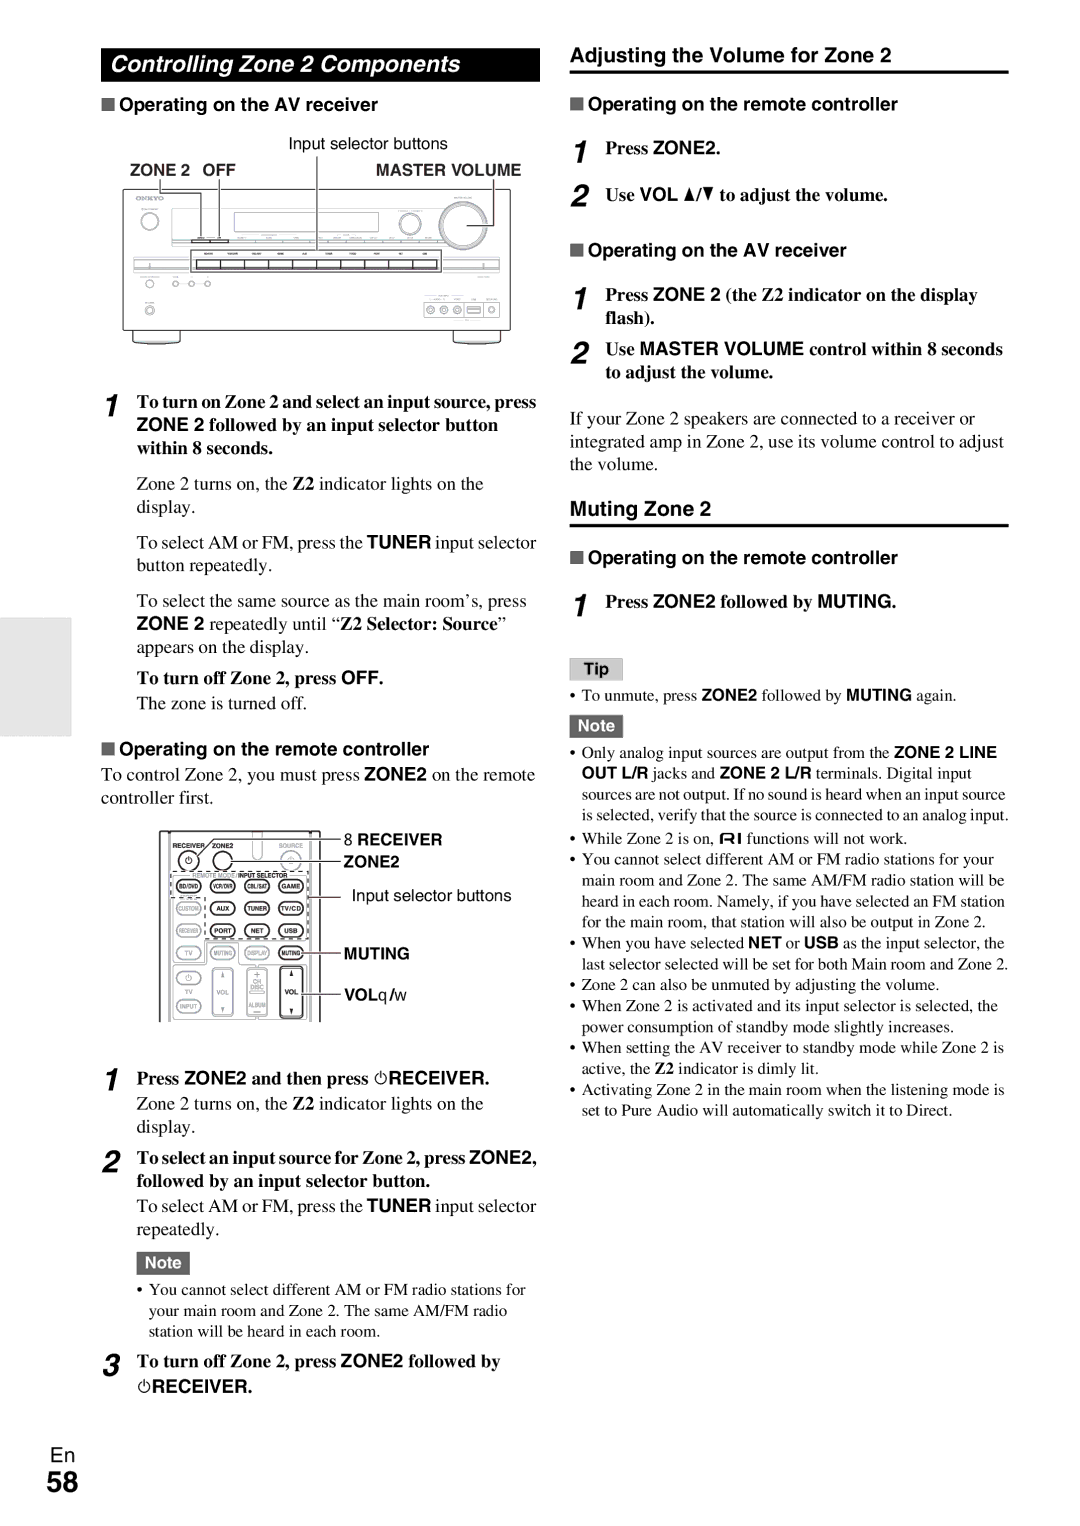
Controlling Zone 2 Components
Adjusting the Volume for Zone
Operating on the remote controller
Muting Zone
IPod/iPhone Playback via Onkyo Dock
Using the Onkyo Dock
UP-A1 Dock
Controlling Your iPod/iPhone
RI Dock
Available buttons
Entering Remote Control Codes
Preprogrammed Remote Control Codes
Looking up for Remote Control Code
Controlling Other Components
Resetting the Remote Controller
Remote Control Codes for Onkyo Components Connected via u
Resetting Remote Mode Buttons
Controlling Other Components
Guide
Setup
Buttons Input TV VOL q / w
Search
Power
Troubleshooting
Audio
Speaker volume cannot be set as required
There’s no sound with a certain signal format
Can’t select the Pure Audio listening mode
About DTS signals
Video
Remote Controller
Tuner
Zone
UP-A1 Dock for iPod/iPhone
Recording
Music Server and Internet Radio
USB Device Playback
Others
Important Note Regarding Video Playback
Component Video OUT
Connecting to the Network
Network/USB Features
Network Requirements
Server playback
Server Requirements
USB Device Requirements
Remote playback
Supported Audio File Formats
About Dlna
Updating the Firmware via Network
Firmware Update
Update procedure
Before you start
Error Code Description
Troubleshooting
Errors during an update via network
Updating the Firmware via USB
Errors during an update via USB
Signal Selection
Connection Tips and Video Signal Path
Video Connection Formats
Audio Connection Formats
OUT
Supported Audio Formats
About Hdmi
About Copyright Protection
About p-compatible components
Using an RIHD-compatible TV, Player, or Recorder
Operations that can be performed with Connection
Confirm the settings
How to connect and setup
Confirm the connecting and setting
Operate with the remote controller
General
Specifications
Amplifier Section
Video Section
Output
Video Resolution Chart
Available resolutions 3840 ⋅ 2160 24/25/30 Hz
1080p 1080i 720p 480p/576p 480i/576i Component Composite
Onkyo Europe Electronics GmbH
Onkyo Europe Electronics GmbH UK Branch