Preparing Your Receiver
Connecting Program Sources
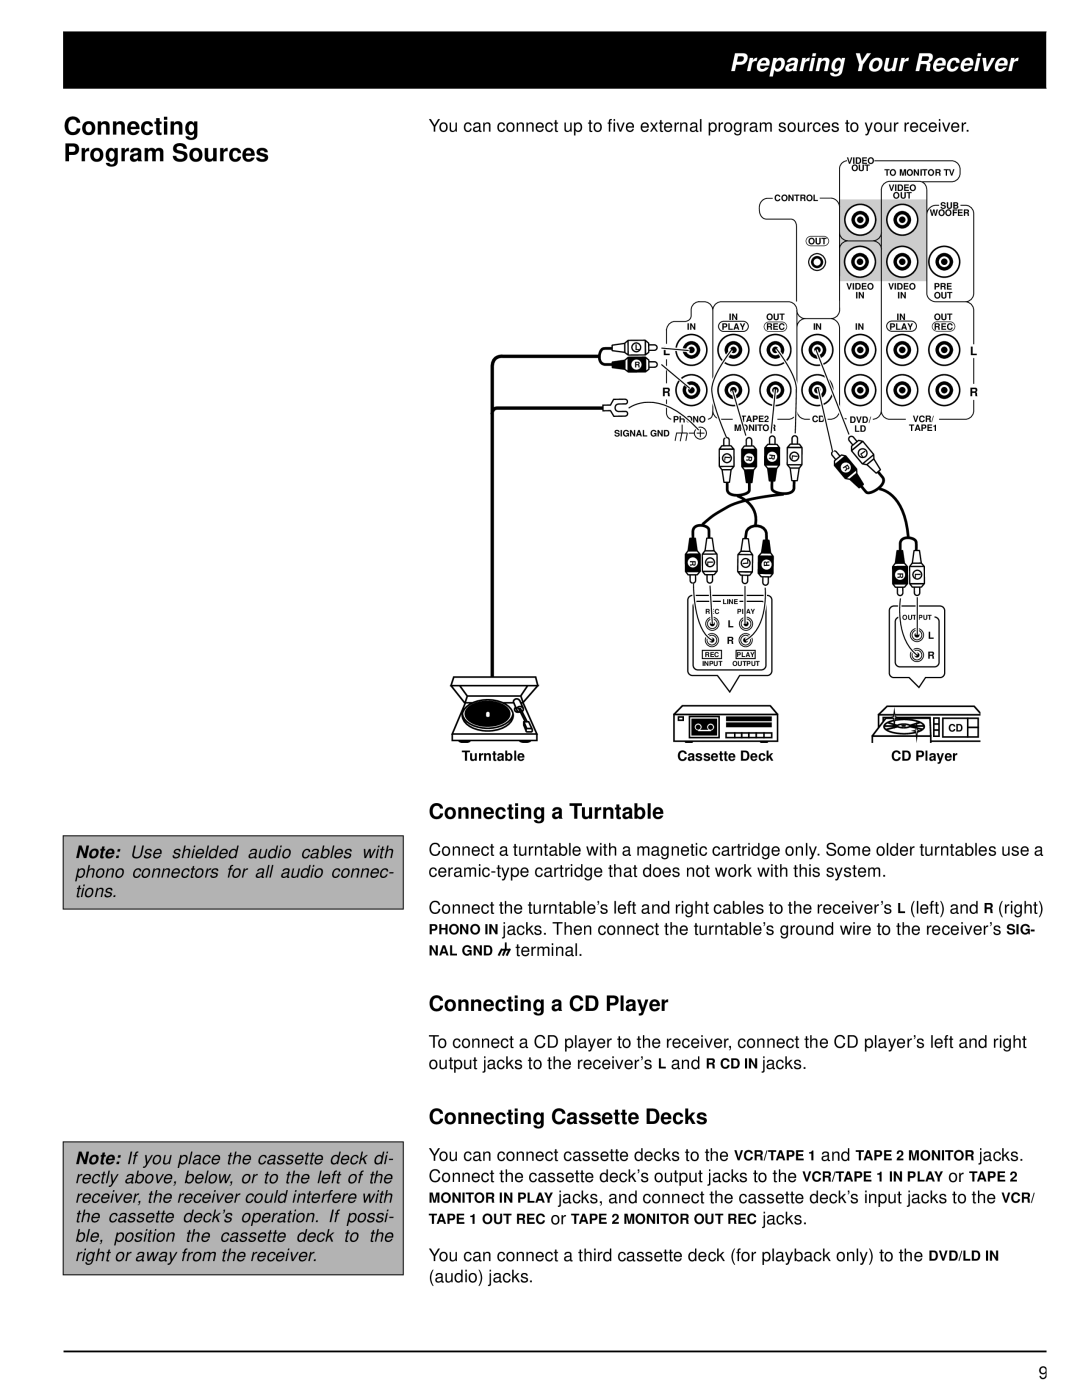
You can connect up to five external program sources to your receiver.
| VIDEO |
|
| OUT | TO MONITOR TV |
|
| |
|
| VIDEO |
CONTROL |
| OUT |
| SUB | |
|
| |
|
| WOOFER |
OUT
VIDEO VIDEO PRE
IN IN OUT
IN | OUT | IN | OUT |
L R
IN | PLAY | REC | IN |
L |
|
|
|
IN PLAY REC
L
R ![]()
![]()
![]()
![]()
![]()
![]()
![]() R
R
PHONO
SIGNAL GND ![]()
L
TAPE2
MONITOR
R | R |
L
CD | DVD/ | VCR/ |
| LD | TAPE1 |
| L |
|
| R |
|
R | L | L |
| ||
|
| LINE |
| REC | PLAY |
|
| L |
|
| R |
| REC | PLAY |
| INPUT | OUTPUT |
R
R | L |
OUT PUT
![]() L
L
![]() R
R
CD |
Turntable | Cassette Deck | CD Player |
Connecting a Turntable
Note: Use shielded audio cables with phono connectors for all audio connec- tions.
Connect a turntable with a magnetic cartridge only. Some older turntables use a
Connect the turntable’s left and right cables to the receiver’s L (left) and R (right) PHONO IN jacks. Then connect the turntable’s ground wire to the receiver’s SIG- NAL GND ![]()
![]()
![]()
![]() terminal.
terminal.
Note: If you place the cassette deck di- rectly above, below, or to the left of the receiver, the receiver could interfere with the cassette deck’s operation. If possi- ble, position the cassette deck to the right or away from the receiver.
Connecting a CD Player
To connect a CD player to the receiver, connect the CD player’s left and right output jacks to the receiver’s L and R CD IN jacks.
Connecting Cassette Decks
You can connect cassette decks to theand
Connect the cassette deck’s output jacks to the VCR/TAPE 1 IN PLAY or TAPE 2 jacks, and connect the cassette deck’s input jacks to the VCR/
orjacks.
You can connect a third cassette deck (for playback only) to the DVD/LD IN (audio) jacks.
9