Appendices
Ceiling Mount Installation
Please note that damage resulting from incorrect installation will void the warranty.
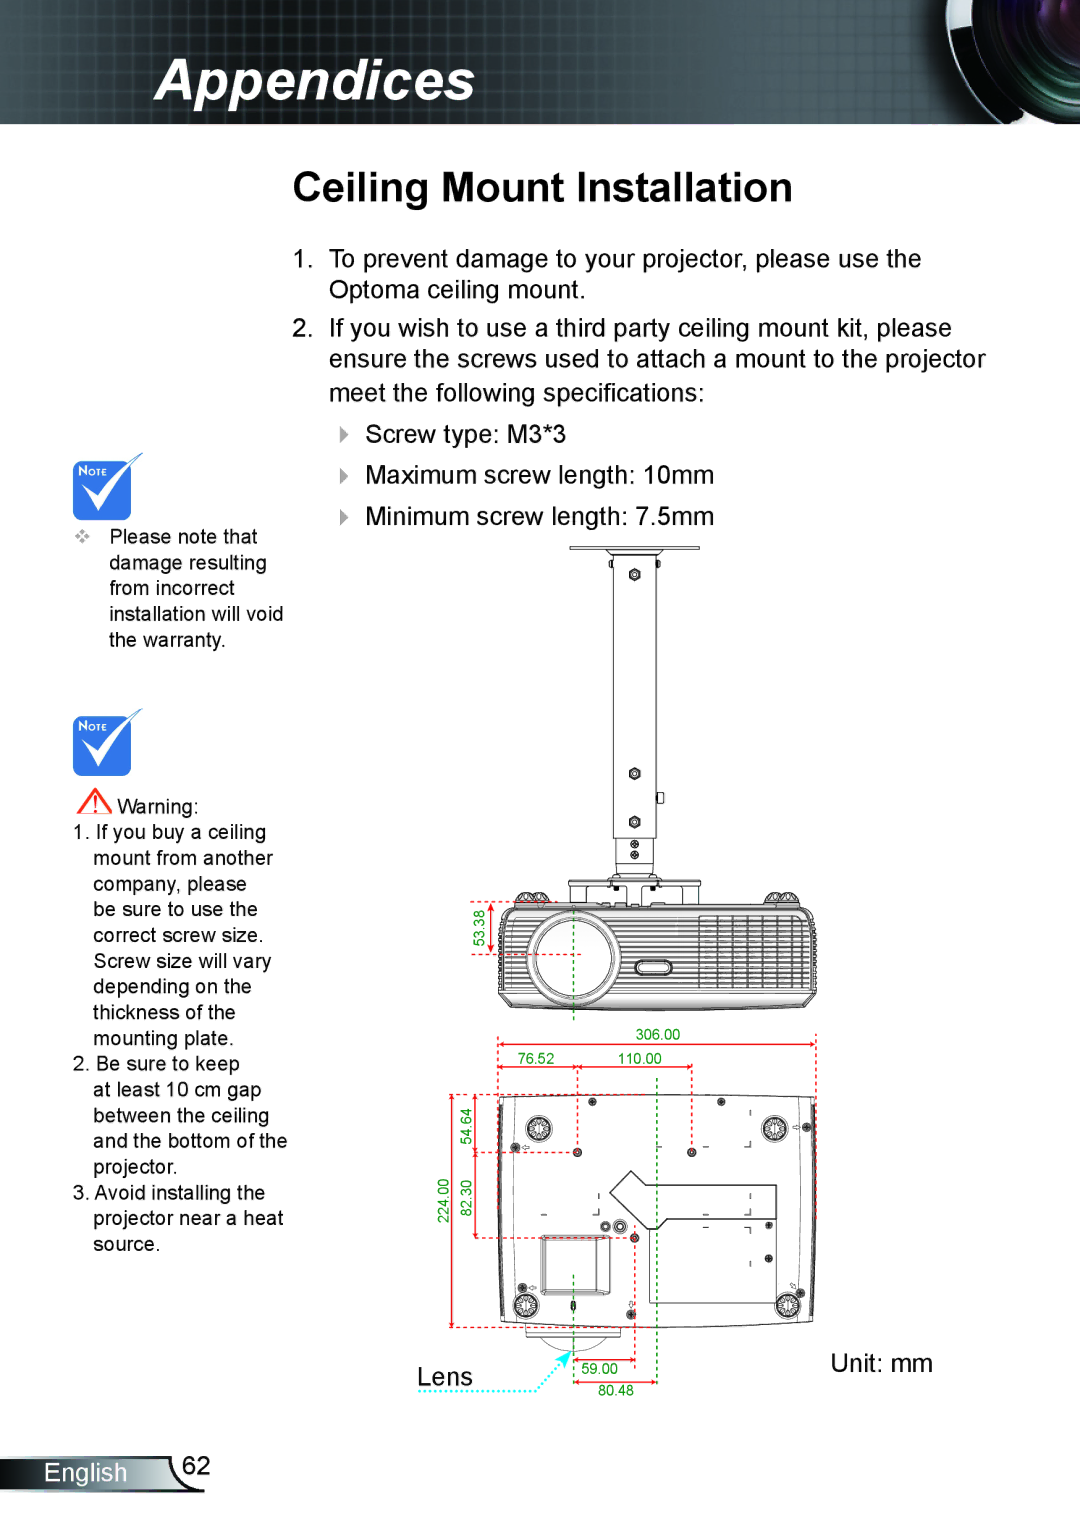
1.To prevent damage to your projector, please use the Optoma ceiling mount.
2.If you wish to use a third party ceiling mount kit, please ensure the screws used to attach a mount to the projector meet the following specifications:
Screw type: M3*3
Maximum screw length: 10mm
Minimum screw length: 7.5mm
![]() Warning:
Warning:
1.If you buy a ceiling mount from another company, please be sure to use the correct screw size. Screw size will vary depending on the thickness of the mounting plate.
2.Be sure to keep at least 10 cm gap between the ceiling and the bottom of the projector.
3.Avoid installing the projector near a heat source.
53.38![]()
![]()
![]()
![]()
![]()

![]()
![]()
![]()
![]()
![]()
![]()
![]()
![]()
![]()
![]()
![]()
![]()
![]()
![]()
![]()
![]()
![]()
![]()
![]()
![]()
|
| 306.00 |
| 76.52 | 110.00 |
| 54.64 |
|
224.00 | 82.30 |
|
Lens | 59.00 | |
80.48 | ||
|
Unit: mm
English 62