AT18_manual_UK_31Jan2007 2/2/07 6:14 PM Page 5
17.LCD display
18.ON/OFF & Enter button
19.Movie shutter button
20.Menu button
21.Microphone
22.
23.AV port
24.SD card slot
25.SD card (not included)
26.Battery door
27.Batteries (not included)
7
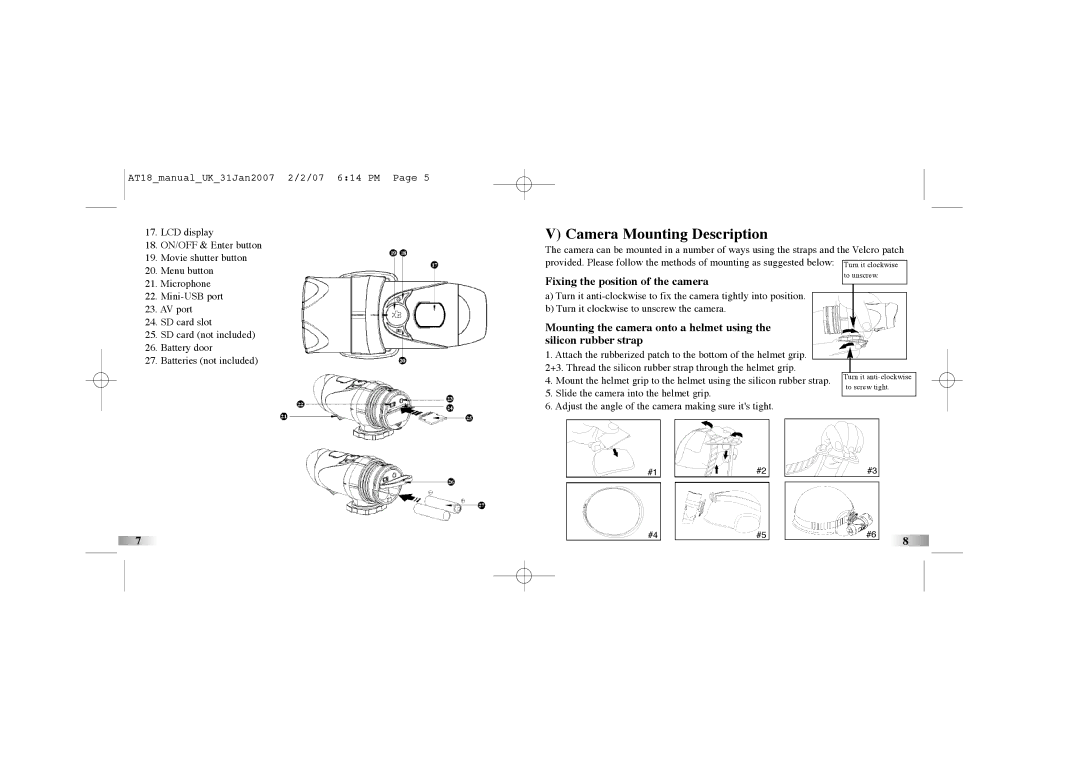
V) Camera Mounting Description
The camera can be mounted in a number of ways using the straps and the Velcro patch provided. Please follow the methods of mounting as suggested below:
Fixing the position of the camera
a)Turn it
b)Turn it clockwise to unscrew the camera.
Mounting the camera onto a helmet using the silicon rubber strap
1. Attach the rubberized patch to the bottom of the helmet grip.
2+3. Thread the silicon rubber strap through the helmet grip.
4. Mount the helmet grip to the helmet using the silicon rubber strap.
5.Slide the camera into the helmet grip.
6.Adjust the angle of the camera making sure it's tight.
#1#2
#4 | #5 | #6 | 8 |
|
|
|