
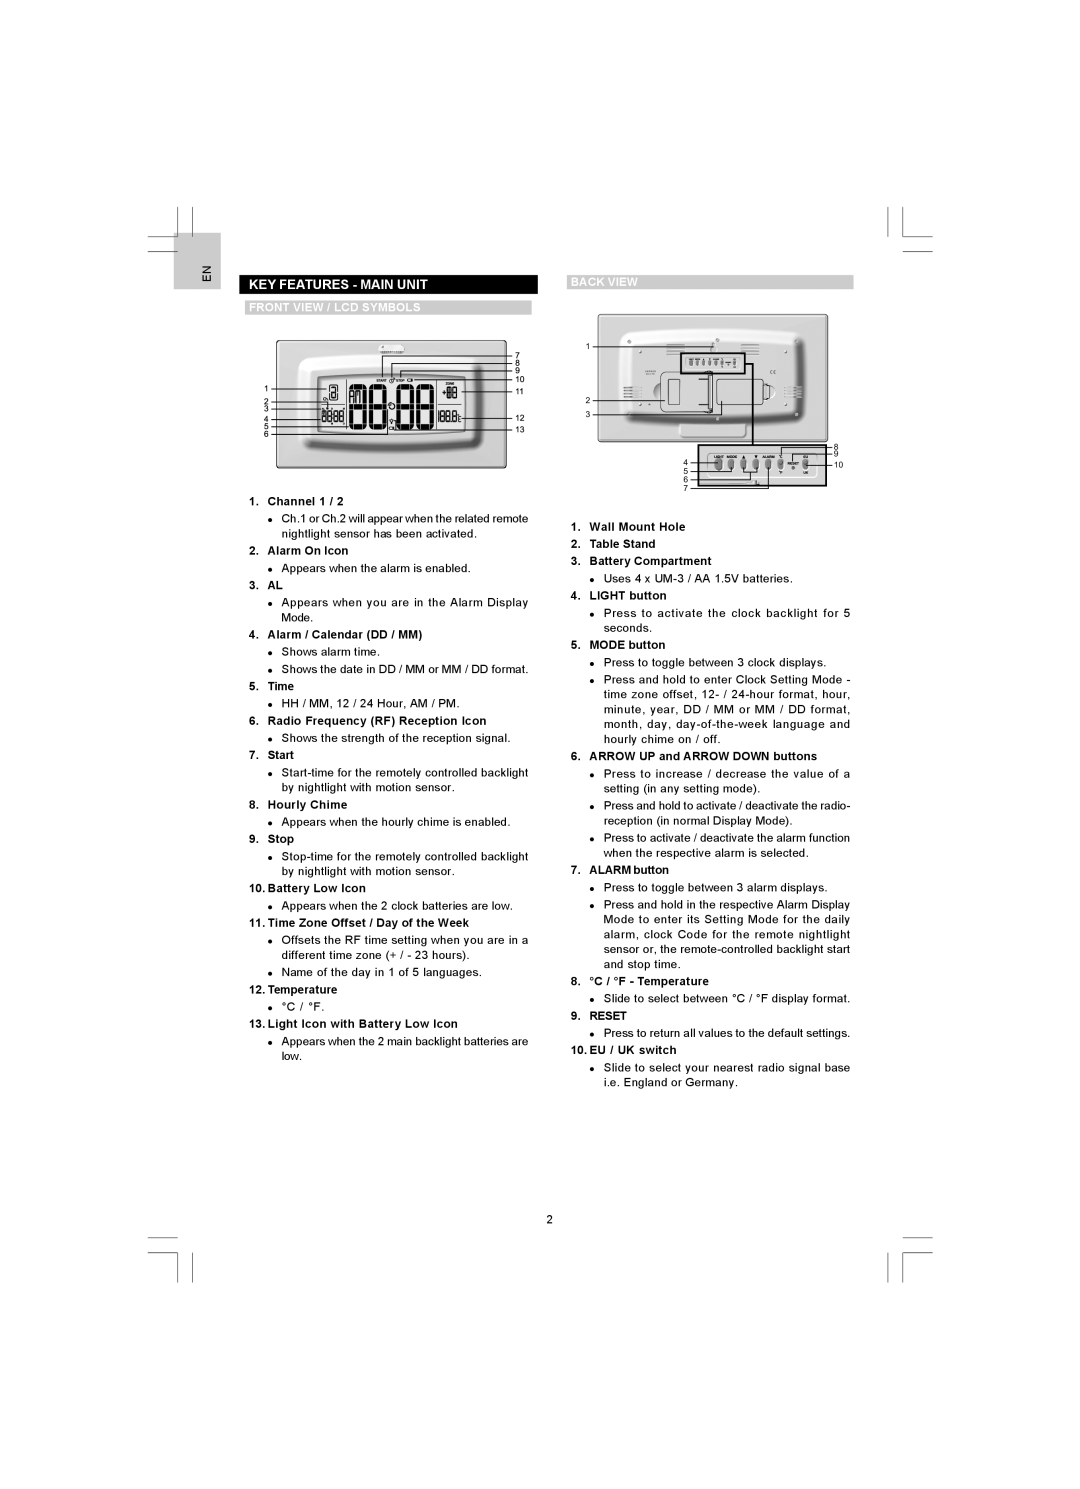
NR868, JMR868 specifications
The Oregon Scientific JMR868 and NR868 are innovative weather stations designed for both enthusiasts and everyday users seeking accurate and reliable weather data. These devices bring together advanced technology and user-friendly features, making them an essential addition to any home or office environment.One of the standout features of the JMR868 and NR868 is their multi-channel wireless technology, which enables users to monitor weather data from different locations simultaneously. This is particularly useful for users needing to track conditions in various outdoor areas such as gardens, backyards, or remote properties. The stations can connect with up to three wireless sensors, allowing for a comprehensive understanding of local weather conditions.
These weather stations boast an impressive array of measurements, including temperature, humidity, wind speed, and rainfall. The JMR868 displays both indoor and outdoor temperature and humidity readings, which are vital for monitoring overall comfort levels. In addition, they incorporate advanced algorithms to ensure accuracy in data collection and reporting, providing users with real-time updates and forecasts.
Another significant feature is the integrated alarm system, which can notify users of extreme weather conditions. This is particularly useful for those living in areas prone to sudden weather changes, as it helps to ensure timely preparations and responses. Additionally, the stations often include a barometric pressure sensor, giving insights into atmospheric changes and helping predict upcoming weather patterns.
The design of the JMR868 and NR868 is both sleek and functional, ensuring they fit nicely into any space. The digital display is easy to read, with backlighting for clear visibility in low light conditions. Users can easily navigate through the various settings and options, making it simple to customize alerts and monitor specific weather variables.
Furthermore, both devices are equipped with data storage capabilities, allowing users to track historical weather trends over time. This data can be invaluable for research, gardening, and other activities where weather plays a critical role.
Overall, the Oregon Scientific JMR868 and NR868 enhance everyday living with their combination of advanced technology, ease of use, and sleek design. Ideal for both casual users and serious weather watchers, these stations provide comprehensive weather information that empowers individuals to make informed decisions based on real-time data. With their reliability and advanced features, the JMR868 and NR868 stand out as premier choices in the realm of personal weather stations.