2.Double click the Orion AmCap icon now installed on your computer’s desktop.
3.Orion AmCap will automatically connect directly to your camera with a Live Video Window. Your Live Video Window will only show light and dark before the camera is coupled to your telescope.
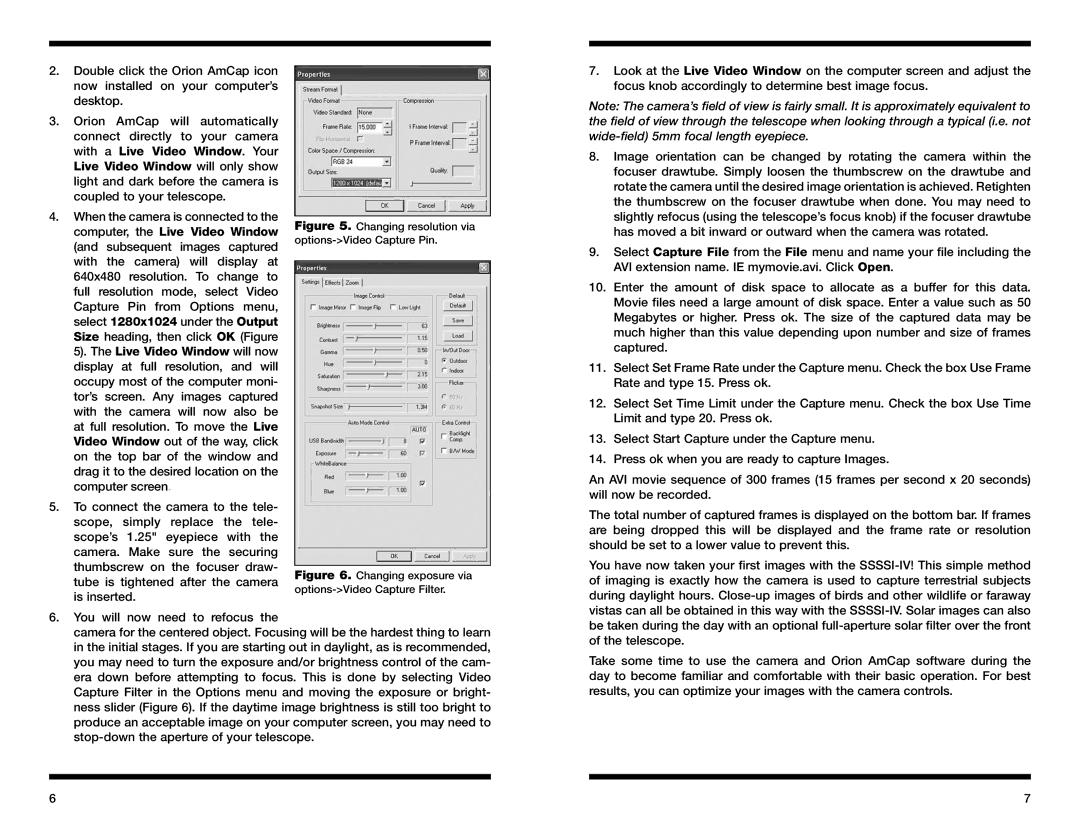
4.When the camera is connected to the computer, the Live Video Window (and subsequent images captured with the camera) will display at 640x480 resolution. To change to full resolution mode, select Video Capture Pin from Options menu, select 1280x1024 under the Output Size heading, then click OK (Figure 5). The Live Video Window will now display at full resolution, and will occupy most of the computer moni- tor’s screen. Any images captured with the camera will now also be at full resolution. To move the Live Video Window out of the way, click on the top bar of the window and drag it to the desired location on the computer screen.
5.To connect the camera to the tele- scope, simply replace the tele- scope’s 1.25" eyepiece with the camera. Make sure the securing thumbscrew on the focuser draw- tube is tightened after the camera is inserted.
Figure 5. Changing resolution via options->Video Capture Pin.
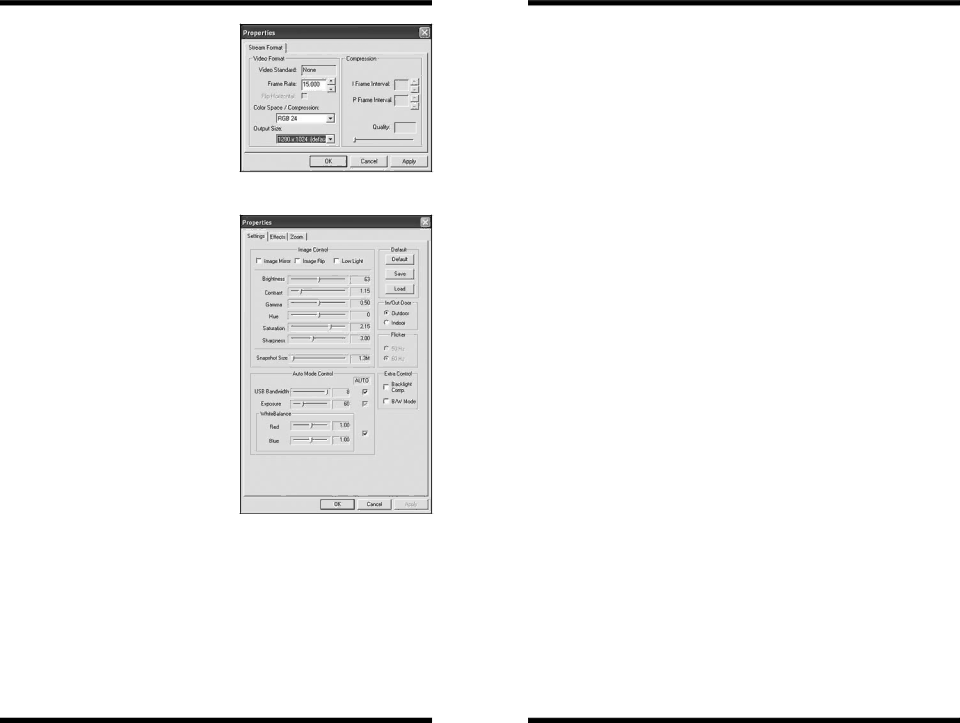
Figure 6. Changing exposure via options->Video Capture Filter.
7.Look at the Live Video Window on the computer screen and adjust the focus knob accordingly to determine best image focus.
Note: The camera’s field of view is fairly small. It is approximately equivalent to the field of view through the telescope when looking through a typical (i.e. not
8.Image orientation can be changed by rotating the camera within the focuser drawtube. Simply loosen the thumbscrew on the drawtube and rotate the camera until the desired image orientation is achieved. Retighten the thumbscrew on the focuser drawtube when done. You may need to slightly refocus (using the telescope’s focus knob) if the focuser drawtube has moved a bit inward or outward when the camera was rotated.
9.Select Capture File from the File menu and name your file including the AVI extension name. IE mymovie.avi. Click Open.
10.Enter the amount of disk space to allocate as a buffer for this data. Movie files need a large amount of disk space. Enter a value such as 50 Megabytes or higher. Press ok. The size of the captured data may be much higher than this value depending upon number and size of frames captured.
11.Select Set Frame Rate under the Capture menu. Check the box Use Frame Rate and type 15. Press ok.
12.Select Set Time Limit under the Capture menu. Check the box Use Time Limit and type 20. Press ok.
13.Select Start Capture under the Capture menu.
14.Press ok when you are ready to capture Images.
An AVI movie sequence of 300 frames (15 frames per second x 20 seconds) will now be recorded.
The total number of captured frames is displayed on the bottom bar. If frames are being dropped this will be displayed and the frame rate or resolution should be set to a lower value to prevent this.
You have now taken your first images with the
6.You will now need to refocus the
camera for the centered object. Focusing will be the hardest thing to learn in the initial stages. If you are starting out in daylight, as is recommended, you may need to turn the exposure and/or brightness control of the cam- era down before attempting to focus. This is done by selecting Video Capture Filter in the Options menu and moving the exposure or bright- ness slider (Figure 6). If the daytime image brightness is still too bright to produce an acceptable image on your computer screen, you may need to
be taken during the day with an optional
Take some time to use the camera and Orion AmCap software during the day to become familiar and comfortable with their basic operation. For best results, you can optimize your images with the camera controls.
6 | 7 |