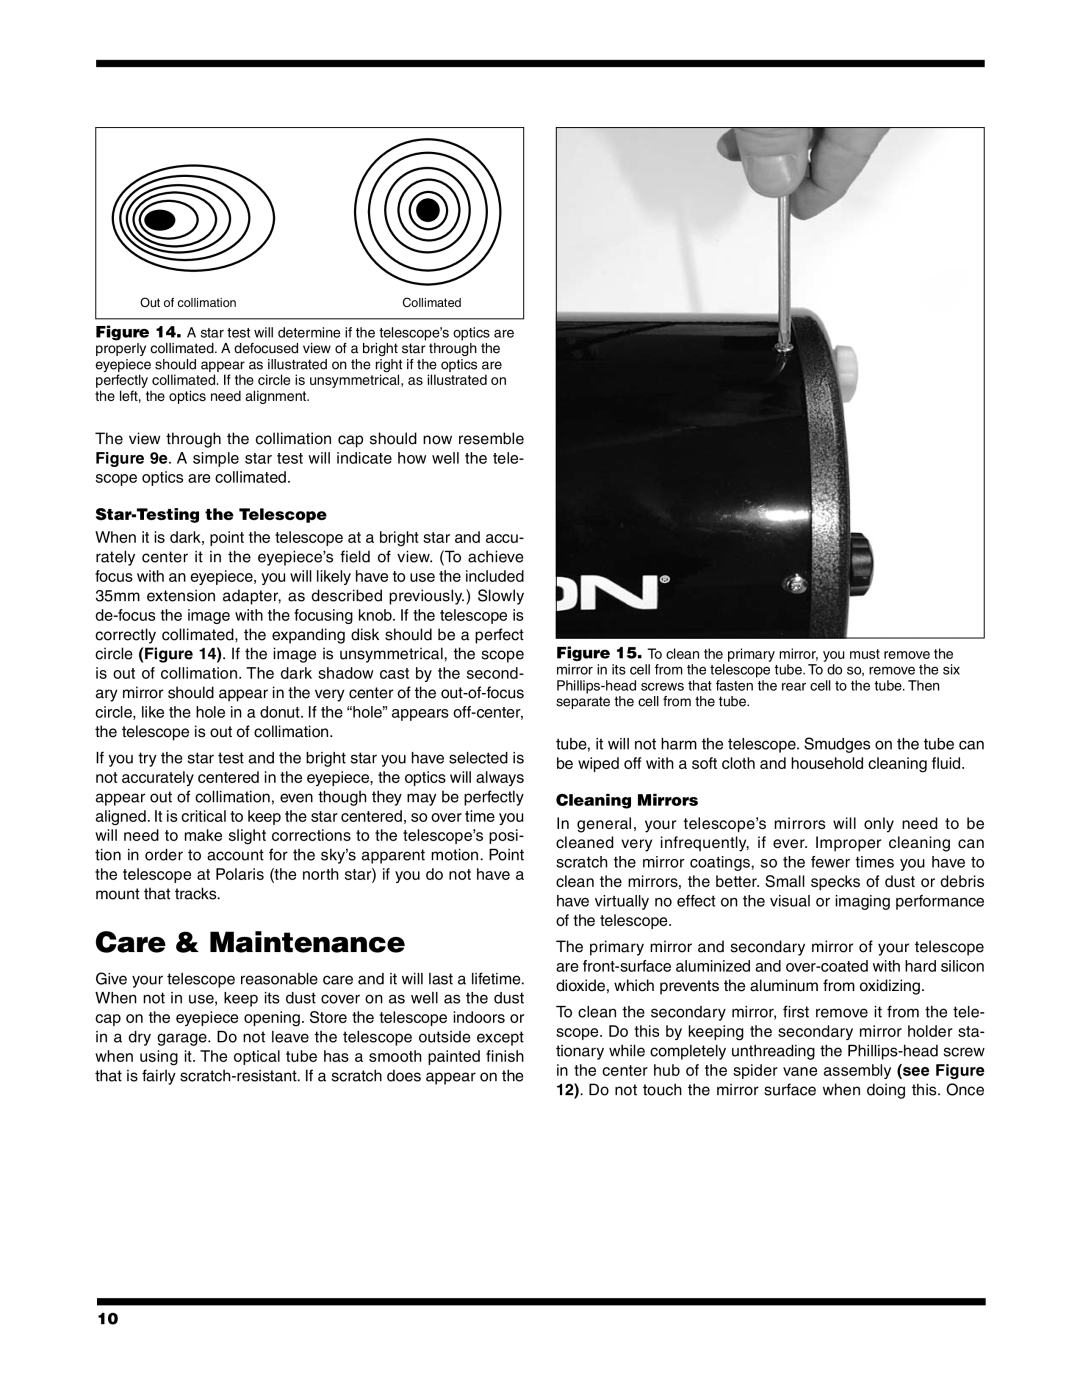
Out of collimation | Collimated |
Figure 14. A star test will determine if the telescope’s optics are properly collimated. A defocused view of a bright star through the eyepiece should appear as illustrated on the right if the optics are perfectly collimated. If the circle is unsymmetrical, as illustrated on the left, the optics need alignment.
The view through the collimation cap should now resemble Figure 9e. A simple star test will indicate how well the tele- scope optics are collimated.
Star-Testing the Telescope
When it is dark, point the telescope at a bright star and accu- rately center it in the eyepiece’s field of view. (To achieve focus with an eyepiece, you will likely have to use the included 35mm extension adapter, as described previously.) Slowly
If you try the star test and the bright star you have selected is not accurately centered in the eyepiece, the optics will always appear out of collimation, even though they may be perfectly aligned. It is critical to keep the star centered, so over time you will need to make slight corrections to the telescope’s posi- tion in order to account for the sky’s apparent motion. Point the telescope at Polaris (the north star) if you do not have a mount that tracks.
Care & Maintenance
Give your telescope reasonable care and it will last a lifetime. When not in use, keep its dust cover on as well as the dust cap on the eyepiece opening. Store the telescope indoors or in a dry garage. Do not leave the telescope outside except when using it. The optical tube has a smooth painted finish that is fairly
Figure 15. To clean the primary mirror, you must remove the mirror in its cell from the telescope tube. To do so, remove the six Phillips-head screws that fasten the rear cell to the tube. Then separate the cell from the tube.
tube, it will not harm the telescope. Smudges on the tube can be wiped off with a soft cloth and household cleaning fluid.
Cleaning Mirrors
In general, your telescope’s mirrors will only need to be cleaned very infrequently, if ever. Improper cleaning can scratch the mirror coatings, so the fewer times you have to clean the mirrors, the better. Small specks of dust or debris have virtually no effect on the visual or imaging performance of the telescope.
The primary mirror and secondary mirror of your telescope are
To clean the secondary mirror, first remove it from the tele- scope. Do this by keeping the secondary mirror holder sta- tionary while completely unthreading the
10
