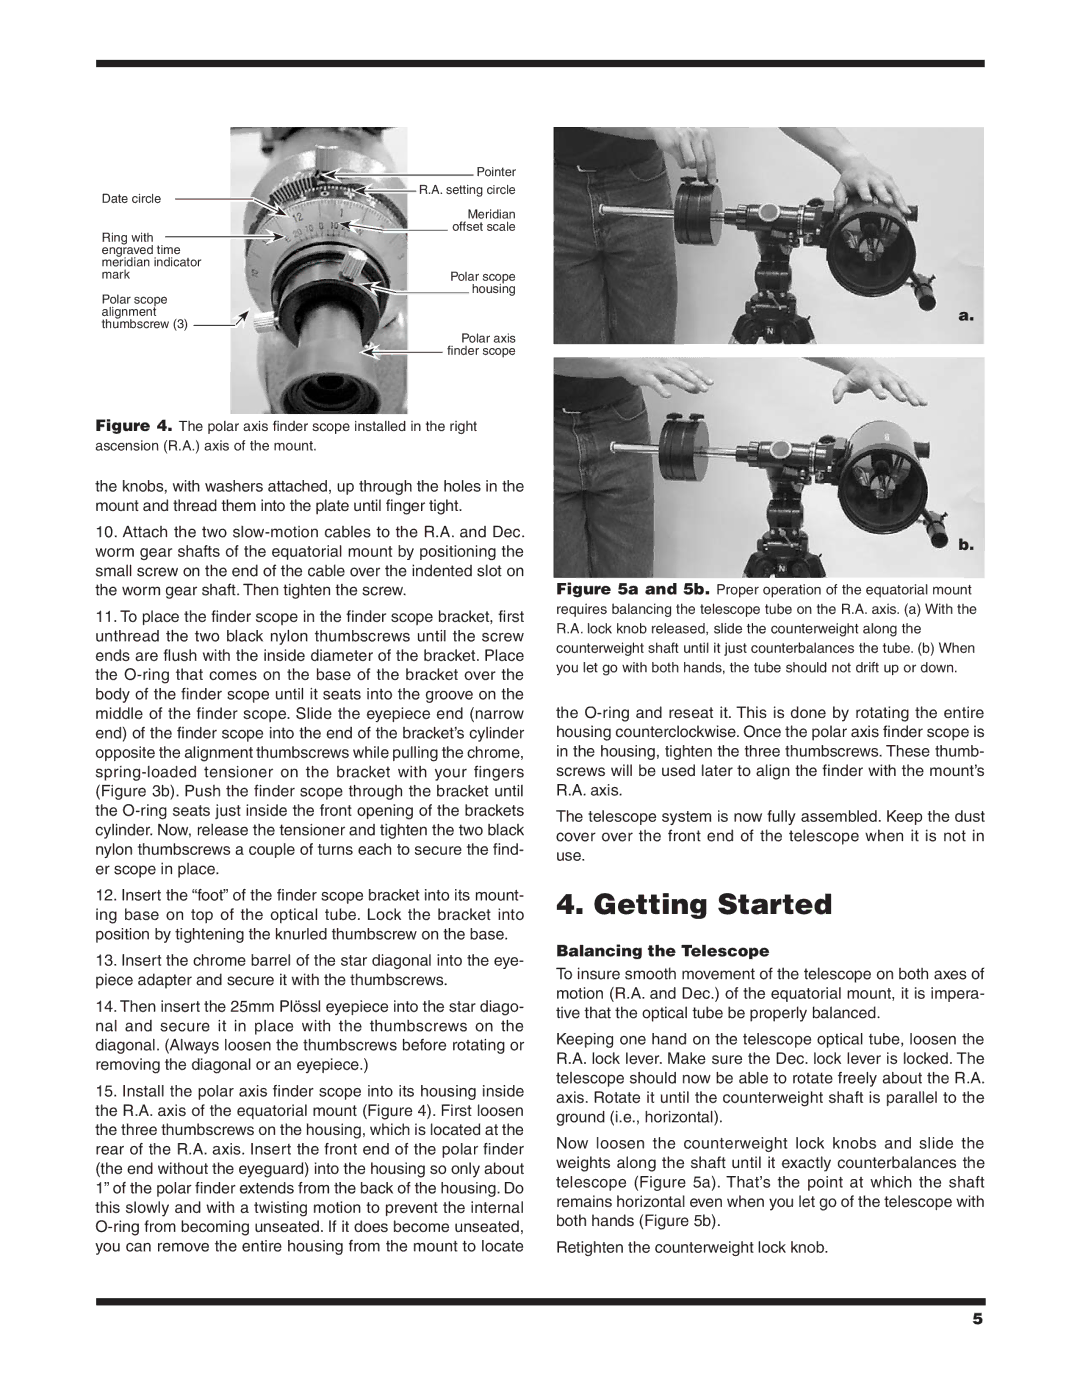
Date circle
Ring with engraved time meridian indicator mark
Polar scope alignment thumbscrew (3) ![]()
![]()
Pointer
![]() R.A. setting circle
R.A. setting circle
Meridian offset scale
Polar scope ![]()
![]() housing
housing
Polar axis finder scope
a.
Figure 4. The polar axis finder scope installed in the right ascension (R.A.) axis of the mount.
the knobs, with washers attached, up through the holes in the mount and thread them into the plate until finger tight.
10.Attach the two
11.To place the finder scope in the finder scope bracket, first unthread the two black nylon thumbscrews until the screw ends are flush with the inside diameter of the bracket. Place the
12.Insert the “foot” of the finder scope bracket into its mount- ing base on top of the optical tube. Lock the bracket into position by tightening the knurled thumbscrew on the base.
13.Insert the chrome barrel of the star diagonal into the eye- piece adapter and secure it with the thumbscrews.
14.Then insert the 25mm Plössl eyepiece into the star diago- nal and secure it in place with the thumbscrews on the diagonal. (Always loosen the thumbscrews before rotating or removing the diagonal or an eyepiece.)
15.Install the polar axis finder scope into its housing inside the R.A. axis of the equatorial mount (Figure 4). First loosen the three thumbscrews on the housing, which is located at the rear of the R.A. axis. Insert the front end of the polar finder (the end without the eyeguard) into the housing so only about 1” of the polar finder extends from the back of the housing. Do this slowly and with a twisting motion to prevent the internal
b.
Figure 5a and 5b. Proper operation of the equatorial mount requires balancing the telescope tube on the R.A. axis. (a) With the R.A. lock knob released, slide the counterweight along the counterweight shaft until it just counterbalances the tube. (b) When you let go with both hands, the tube should not drift up or down.
the
The telescope system is now fully assembled. Keep the dust cover over the front end of the telescope when it is not in use.
4. Getting Started
Balancing the Telescope
To insure smooth movement of the telescope on both axes of motion (R.A. and Dec.) of the equatorial mount, it is impera- tive that the optical tube be properly balanced.
Keeping one hand on the telescope optical tube, loosen the R.A. lock lever. Make sure the Dec. lock lever is locked. The telescope should now be able to rotate freely about the R.A. axis. Rotate it until the counterweight shaft is parallel to the ground (i.e., horizontal).
Now loosen the counterweight lock knobs and slide the weights along the shaft until it exactly counterbalances the telescope (Figure 5a). That’s the point at which the shaft remains horizontal even when you let go of the telescope with both hands (Figure 5b).
Retighten the counterweight lock knob.
5