Welcome
Congratulations on your purchase of your Oster® Versa™ Performance Blender. If
you have any comments, questions or inquiries about this revolutionary product, please call
Learning About Your Product Features and Assembly
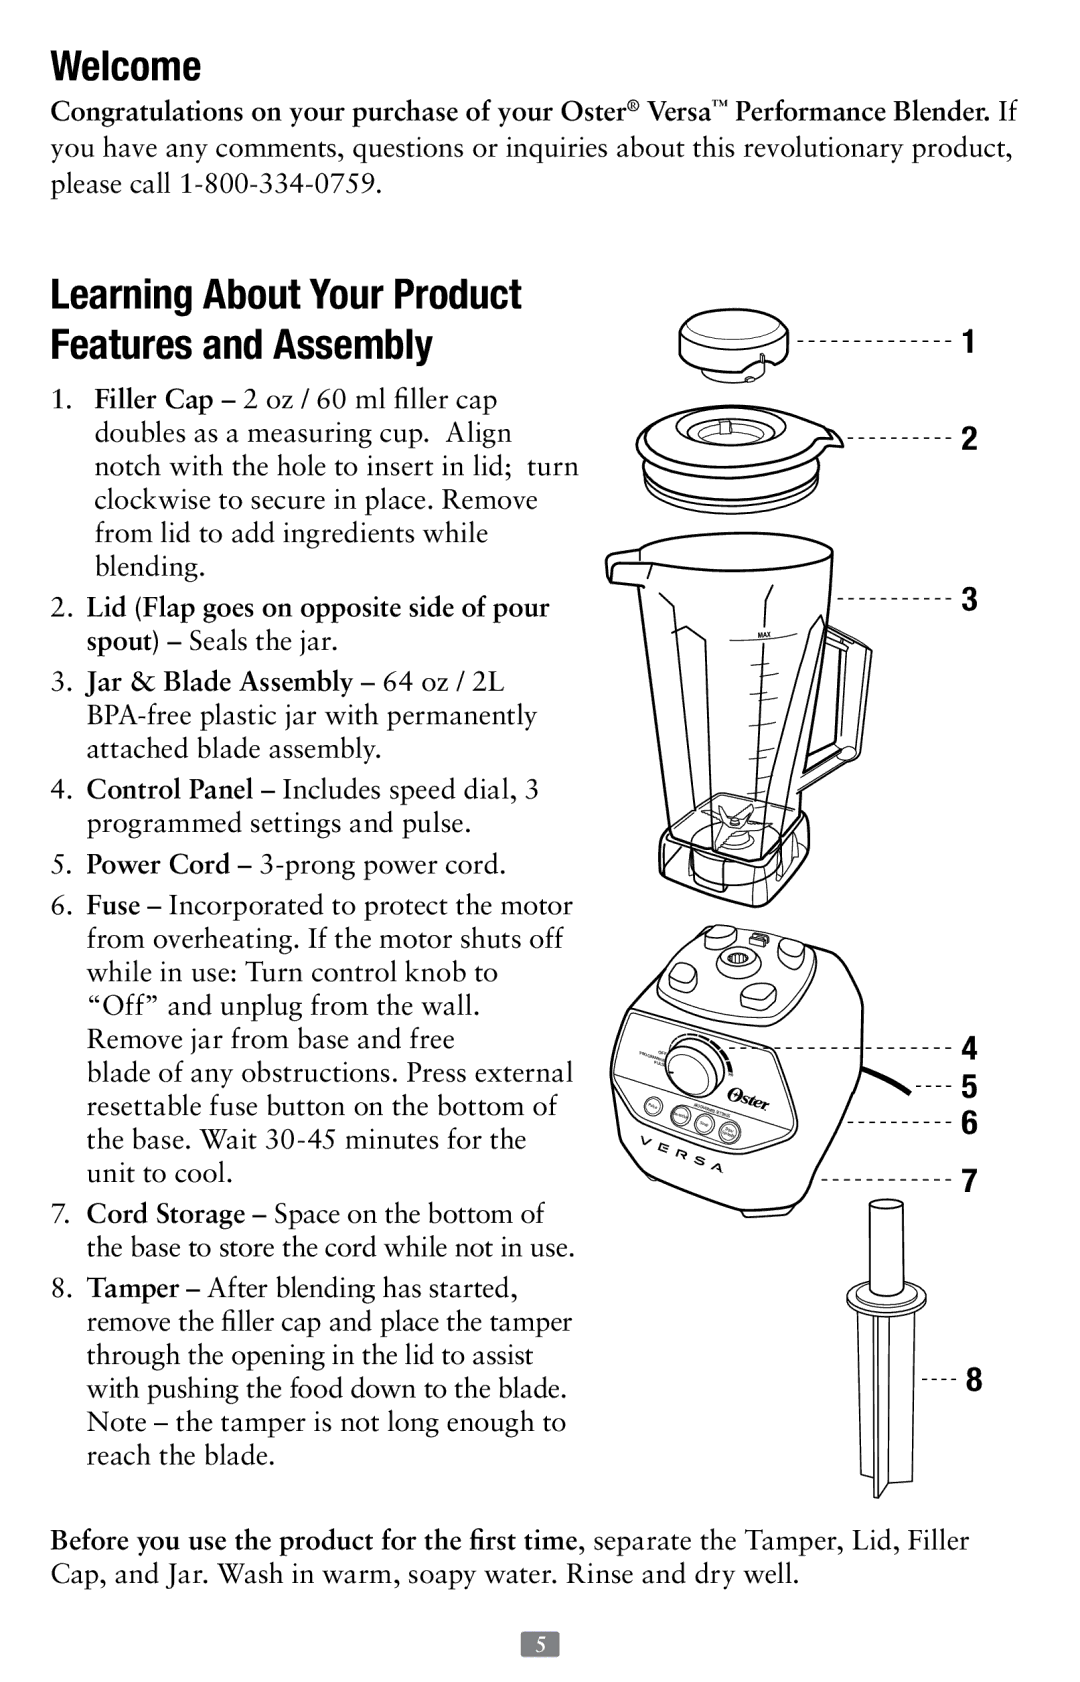
1. | Filler Cap – 2 oz / 60 ml filler cap |
| doubles as a measuring cup. Align |
| notch with the hole to insert in lid; turn |
| clockwise to secure in place. Remove |
| from lid to add ingredients while |
| blending. |
2. Lid (Flap goes on opposite side of pour | |
| spout) – Seals the jar. |
3. | Jar & Blade Assembly – 64 oz / 2L |
| |
| attached blade assembly. |
4. | Control Panel – Includes speed dial, 3 |
| programmed settings and pulse. |
5. | Power Cord – |
6. Fuse – Incorporated to protect the motor | |
| from overheating. If the motor shuts off |
| while in use: Turn control knob to |
| “Off” and unplug from the wall. |
![]()
![]() 1
1 ![]()
![]() 2
2
3
| Remove jar from base and free |
| blade of any obstructions. Press external |
| resettable fuse button on the bottom of |
| the base. Wait |
| unit to cool. |
7. | Cord Storage – Space on the bottom of |
| the base to store the cord while not in use. |
8. | Tamper – After blending has started, |
| remove the filler cap and place the tamper |
| through the opening in the lid to assist |
PROGRAMMEDOFF![]() PULSE
PULSE ![]()
Pulse |
| PROGRAMMED |
| Smoothie | Soup |
|
|
HI
SETTINGS
Dips/
Spreads
4 ![]()
![]() 5 6
5 6
7
with pushing the food down to the blade. |
Note – the tamper is not long enough to |
reach the blade. |
8
Before you use the product for the first time, separate the Tamper, Lid, Filler Cap, and Jar. Wash in warm, soapy water. Rinse and dry well.
5