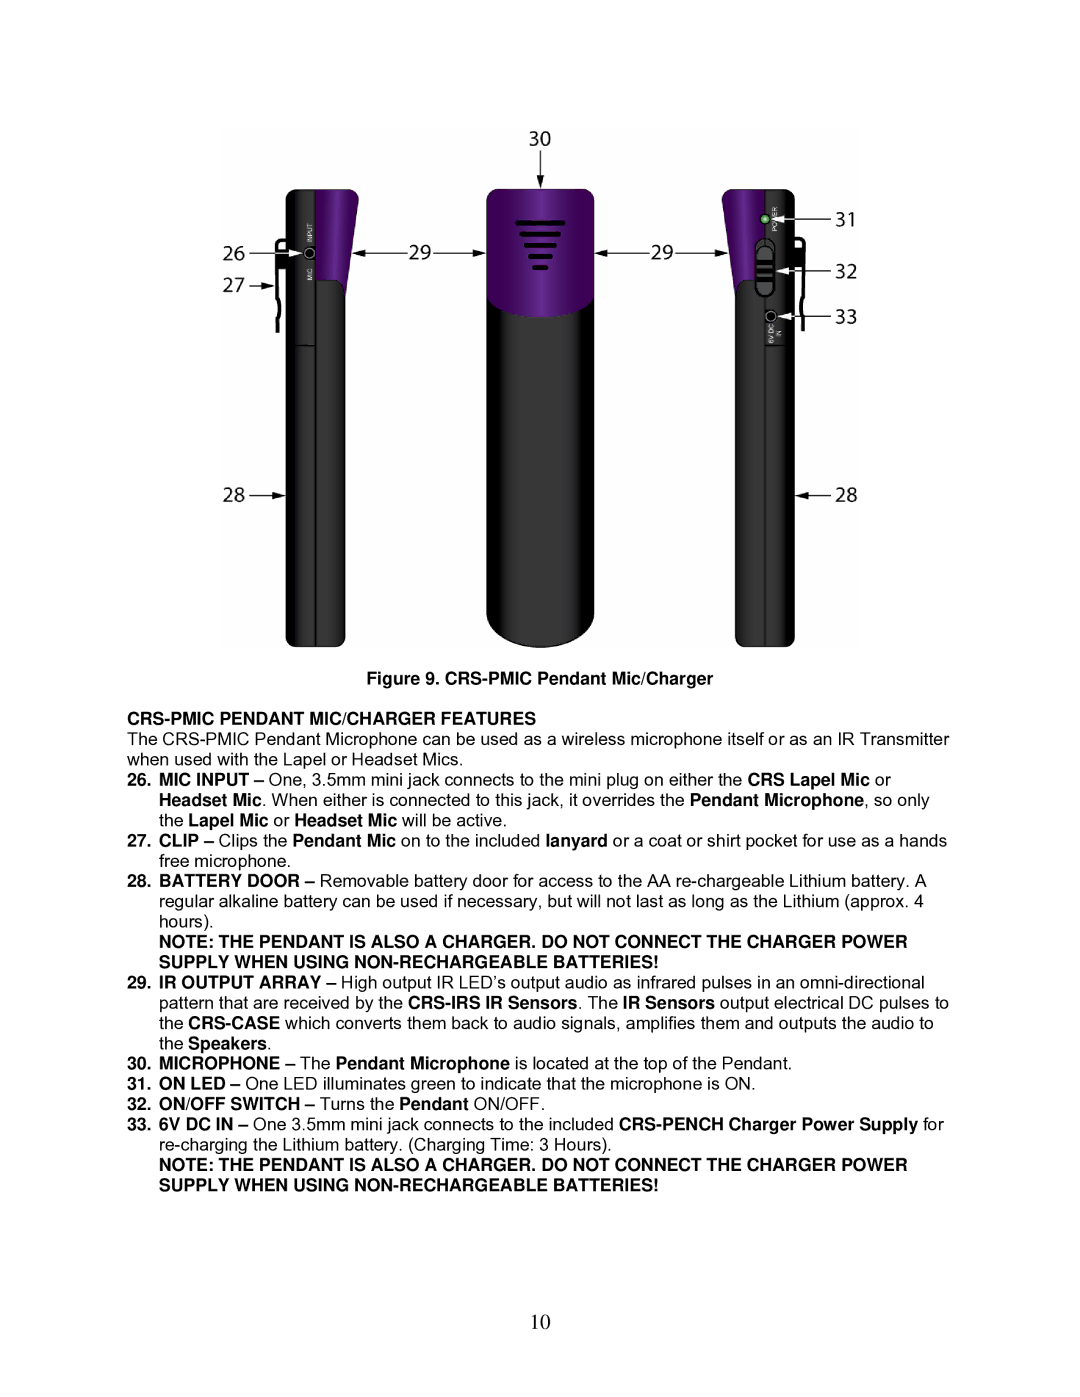
Figure 9. CRS-PMIC Pendant Mic/Charger
CRS-PMIC PENDANT MIC/CHARGER FEATURES
The
26.MIC INPUT – One, 3.5mm mini jack connects to the mini plug on either the CRS Lapel Mic or Headset Mic. When either is connected to this jack, it overrides the Pendant Microphone, so only the Lapel Mic or Headset Mic will be active.
27.CLIP – Clips the Pendant Mic on to the included lanyard or a coat or shirt pocket for use as a hands free microphone.
28.BATTERY DOOR – Removable battery door for access to the AA
NOTE: THE PENDANT IS ALSO A CHARGER. DO NOT CONNECT THE CHARGER POWER SUPPLY WHEN USING
29.IR OUTPUT ARRAY – High output IR LED’s output audio as infrared pulses in an
30.MICROPHONE – The Pendant Microphone is located at the top of the Pendant.
31.ON LED – One LED illuminates green to indicate that the microphone is ON.
32.ON/OFF SWITCH – Turns the Pendant ON/OFF.
33.6V DC IN – One 3.5mm mini jack connects to the included
NOTE: THE PENDANT IS ALSO A CHARGER. DO NOT CONNECT THE CHARGER POWER SUPPLY WHEN USING
10