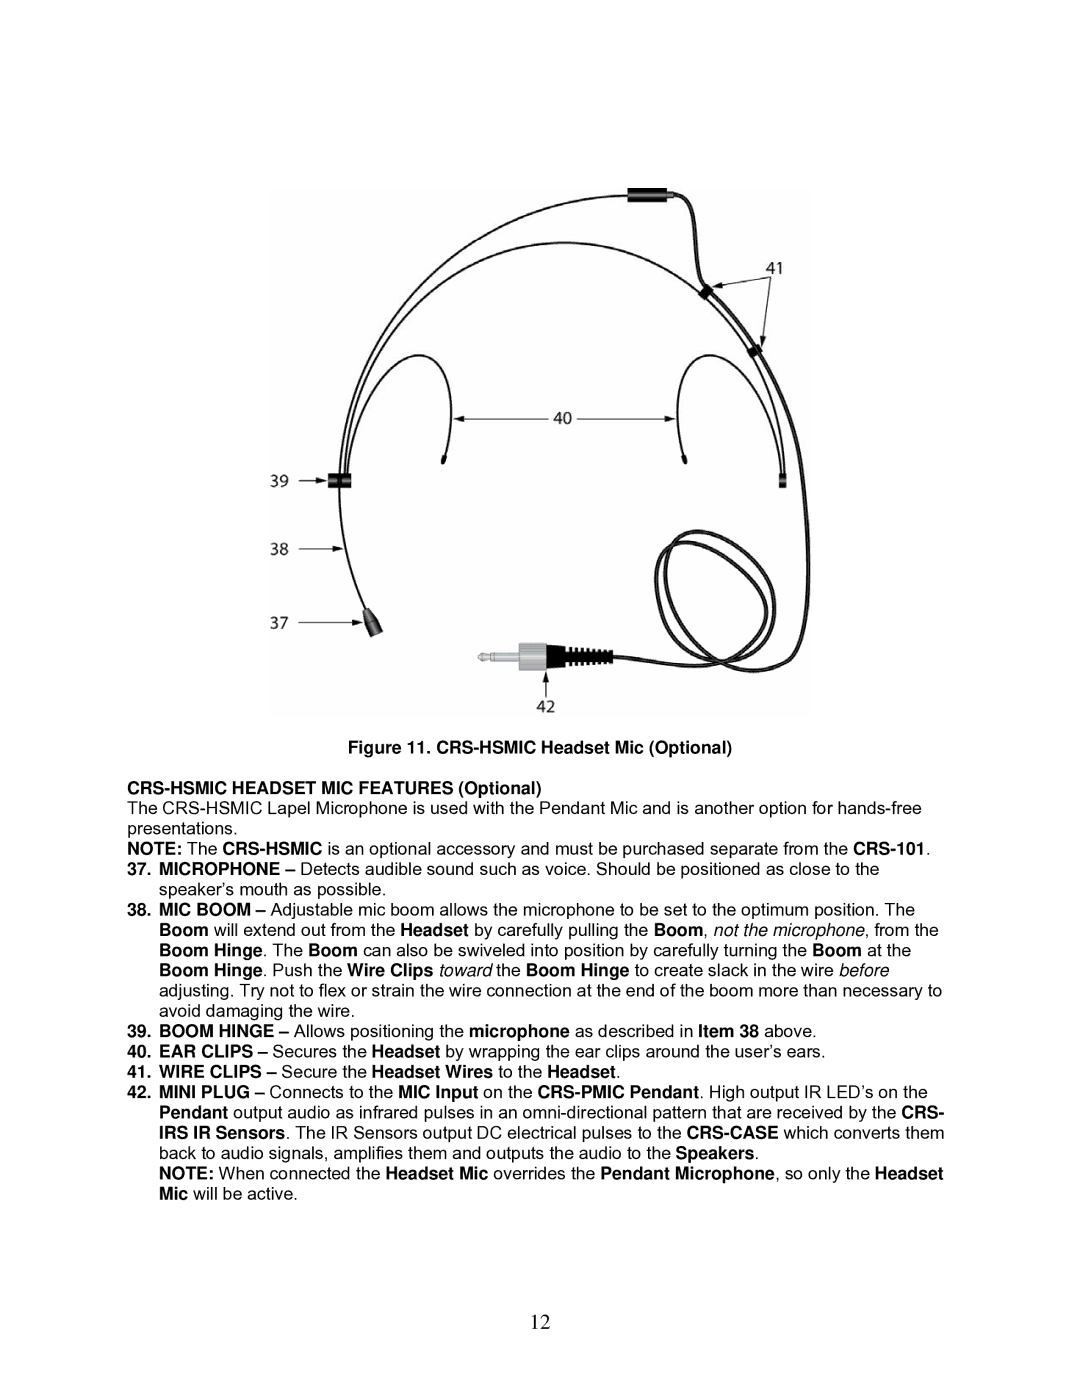
Figure 11. CRS-HSMIC Headset Mic (Optional)
CRS-HSMIC HEADSET MIC FEATURES (Optional)
The
NOTE: The
37.MICROPHONE – Detects audible sound such as voice. Should be positioned as close to the speaker’s mouth as possible.
38.MIC BOOM – Adjustable mic boom allows the microphone to be set to the optimum position. The Boom will extend out from the Headset by carefully pulling the Boom, not the microphone, from the Boom Hinge. The Boom can also be swiveled into position by carefully turning the Boom at the Boom Hinge. Push the Wire Clips toward the Boom Hinge to create slack in the wire before adjusting. Try not to flex or strain the wire connection at the end of the boom more than necessary to avoid damaging the wire.
39.BOOM HINGE – Allows positioning the microphone as described in Item 38 above.
40.EAR CLIPS – Secures the Headset by wrapping the ear clips around the user’s ears.
41.WIRE CLIPS – Secure the Headset Wires to the Headset.
42.MINI PLUG – Connects to the MIC Input on the
NOTE: When connected the Headset Mic overrides the Pendant Microphone, so only the Headset Mic will be active.
12