GN | Power and Sound Controls | ||
E |
|
|
|
L |
|
|
|
I |
|
|
|
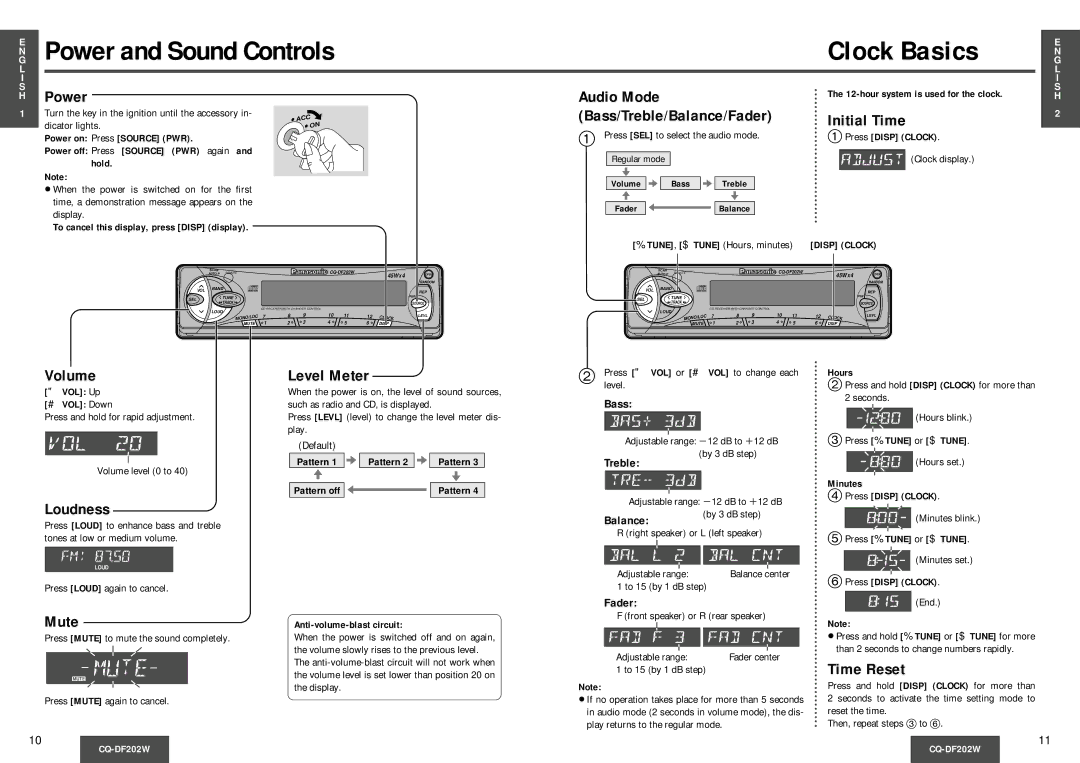
S | Power |
|
|
H |
|
| |
1 | Turn the key in the ignition until the accessory in- | AC | C |
| dicator lights. | ON | |
|
| ||
|
|
| |
Power on: Press [SOURCE] (PWR).
Power off: Press [SOURCE] (PWR) again and hold.
Note:
≥When the power is switched on for the first time, a demonstration message appears on the display.
To cancel this display, press [DISP] (display).
SCAN |
|
|
| |
AUTO·P | REMOTE | 45W X 4 | OPEN |
RANDOM
| VOL | BAND |
|
|
|
|
|
|
| REP |
|
|
|
|
|
|
|
|
|
| |
SEL |
| TUNE |
|
|
|
|
|
|
| PWR |
|
|
|
|
|
|
|
|
| ||
| TRACK |
|
|
|
|
|
|
| SOURCE | |
|
|
|
|
|
|
|
|
| ||
|
| LOUD | CD RECEIVER WITH CHANGER CONTROL |
|
|
|
|
| ||
|
| 7 | 8 | 9 | 10 | 11 | 12 |
| LEVL | |
|
| MONO/LOC | CLOCK | |||||||
|
| MUTE | 1 | 2 | 3 | 4 | 5 | 6 | DISP |
|
|
|
|
|
|
|
|
|
| Clock Basics | G | |
|
|
|
|
|
|
|
|
|
|
| E |
|
|
|
|
|
|
|
|
|
|
| N |
|
|
|
|
|
|
|
|
|
|
| L |
|
|
|
|
|
|
|
|
|
|
| I |
Audio Mode |
|
|
|
|
|
| The | S | |||
|
|
|
|
|
| H | |||||
(Bass/Treble/Balance/Fader) |
|
|
| Initial Time | 2 | ||||||
|
|
|
|
|
|
|
|
|
|
| |
1 Press [SEL] to select the audio mode. |
|
|
| 1Press [DISP] (CLOCK). |
| ||||||
Regular mode |
|
|
|
|
|
|
| (Clock display.) |
| ||
Volume |
| Bass |
| Treble |
|
|
|
|
|
|
|
Fader |
|
|
| Balance |
|
|
|
|
|
|
|
[% TUNE], [$ TUNE] (Hours, minutes) | [DISP] (CLOCK) |
| |||||||||
|
| SCAN |
|
|
|
|
|
|
| ||
|
| AUTO·P REMOTE |
|
|
|
| 45W X 4 | OPEN |
| ||
|
|
|
|
|
|
|
|
|
| RANDOM |
|
| VOL | BAND |
|
|
|
|
|
|
| REP |
|
|
|
|
|
|
|
|
|
|
| ||
|
|
|
|
|
|
|
|
|
|
| |
SEL |
| TUNE |
|
|
|
|
|
|
| PWR |
|
|
|
|
|
|
|
|
|
|
| ||
| TRACK |
|
|
|
|
|
|
| SOURCE |
| |
|
|
|
|
|
|
|
|
|
| ||
|
| LOUD | CD RECEIVER WITH CHANGER CONTROL |
|
|
|
|
|
| ||
|
|
| 8 | 9 | 10 | 11 |
|
| LEVL |
| |
|
| MONO/LOC 7 | 12 | CLOCK |
| ||||||
|
| MUTE | 1 | 2 | 3 | 4 | 5 | 6 | DISP |
|
|
Volume | Level Meter |
[" VOL]: Up | When the power is on, the level of sound sources, |
[# VOL]: Down | such as radio and CD, is displayed. |
Press and hold for rapid adjustment. | Press [LEVL] (level) to change the level meter dis- |
| play. |
| (Default) |
|
|
|
|
Volume level (0 to 40) | Pattern 1 |
| Pattern 2 |
| Pattern 3 |
|
|
|
|
| |
|
|
|
|
|
|
| Pattern off |
|
|
| Pattern 4 |
2Press [" VOL] or [# VOL] to change each level.
Bass:
Adjustable range: j12 dB to i12 dB (by 3 dB step)
Treble:
Hours
2Press and hold [DISP] (CLOCK) for more than 2 seconds.
(Hours blink.)
3Press [% TUNE] or [$ TUNE].
![]() (Hours set.)
(Hours set.)
Minutes
Loudness
Press [LOUD] to enhance bass and treble tones at low or medium volume.
LOUD
Press [LOUD] again to cancel.
Mute
Press [MUTE] to mute the sound completely.
MUTE
Press [MUTE] again to cancel.
Anti-volume-blast circuit:
When the power is switched off and on again, the volume slowly rises to the previous level. The
Adjustable range: j12 dB to i12 dB
Balance: | (by 3 dB step) |
|
R (right speaker) or L (left speaker)
Adjustable range: | Balance center |
1 to 15 (by 1 dB step) |
|
Fader:
F (front speaker) or R (rear speaker)
Adjustable range: | Fader center |
1 to 15 (by 1 dB step) |
|
Note:
≥If no operation takes place for more than 5 seconds in audio mode (2 seconds in volume mode), the dis- play returns to the regular mode.
(Minutes blink.)
5Press [% TUNE] or [$ TUNE]. ![]() (Minutes set.)
(Minutes set.)
6Press [DISP] (CLOCK).
![]() (End.)
(End.)
Note:
≥Press and hold [% TUNE] or [$ TUNE] for more than 2 seconds to change numbers rapidly.
Time Reset
Press and hold [DISP] (CLOCK) for more than 2 seconds to activate the time setting mode to reset the time.
Then, repeat steps 3 to 6.
10
11