14.2 Breakdown Self Diagnosis Function

14.2.1Self Diagnosis Function (Three Digits Alphanumeric Code)

Once error occurred during operation, the unit will stop its operation, and Timer LED blinks.

Although Timer LED goes off when power supply is turned off, if the unit is operated under a breakdown condition, the LED will ON again.

In operation after breakdown repair, the Timer LED will not blink. The last error code (abnormality) will be stored in IC memory.

14.2.2To Make a Diagnosis

1Timer LED starts to blink and the unit automatically stops the operation.

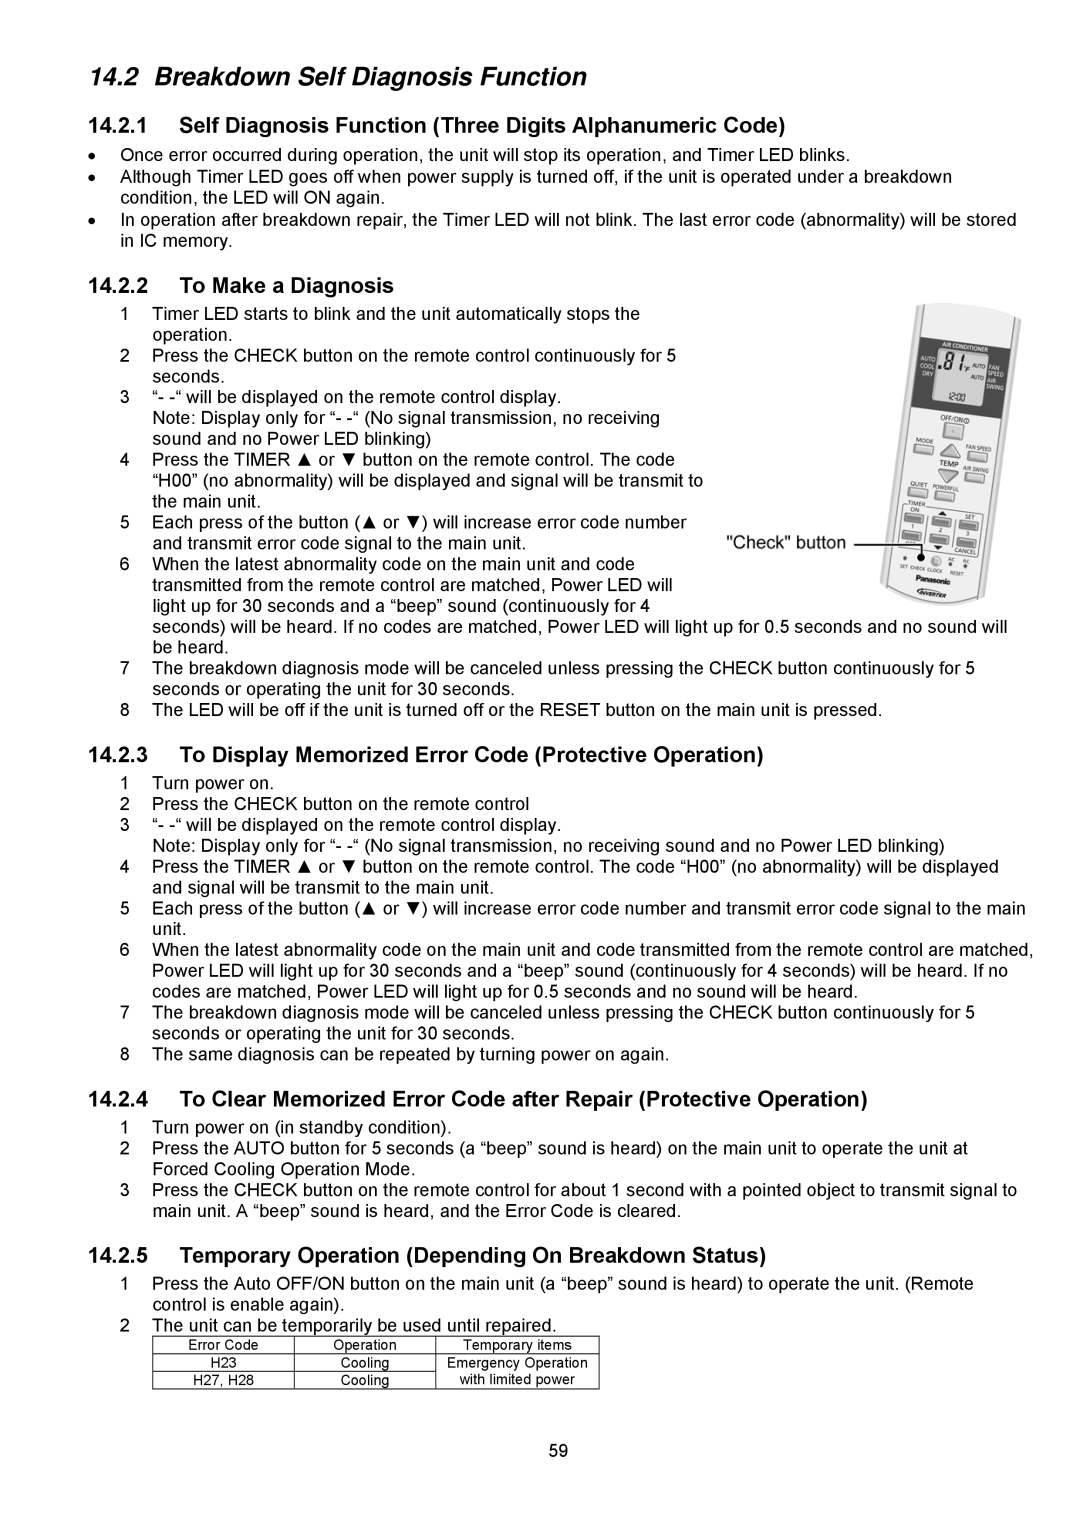
2Press the CHECK button on the remote control continuously for 5 seconds.

3“- -“ will be displayed on the remote control display.

Note: Display only for “- -“ (No signal transmission, no receiving sound and no Power LED blinking)

4Press the TIMER ▲ or ▼ button on the remote control. The code “H00” (no abnormality) will be displayed and signal will be transmit to the main unit.

5Each press of the button (▲ or ▼) will increase error code number and transmit error code signal to the main unit.

6When the latest abnormality code on the main unit and code transmitted from the remote control are matched, Power LED will light up for 30 seconds and a “beep” sound (continuously for 4

seconds) will be heard. If no codes are matched, Power LED will light up for 0.5 seconds and no sound will be heard.

7The breakdown diagnosis mode will be canceled unless pressing the CHECK button continuously for 5 seconds or operating the unit for 30 seconds.

8The LED will be off if the unit is turned off or the RESET button on the main unit is pressed.

14.2.3To Display Memorized Error Code (Protective Operation)

1Turn power on.

2Press the CHECK button on the remote control

3“- -“ will be displayed on the remote control display.

Note: Display only for “- -“ (No signal transmission, no receiving sound and no Power LED blinking)

4Press the TIMER ▲ or ▼ button on the remote control. The code “H00” (no abnormality) will be displayed and signal will be transmit to the main unit.

5Each press of the button (▲ or ▼) will increase error code number and transmit error code signal to the main unit.

6When the latest abnormality code on the main unit and code transmitted from the remote control are matched, Power LED will light up for 30 seconds and a “beep” sound (continuously for 4 seconds) will be heard. If no codes are matched, Power LED will light up for 0.5 seconds and no sound will be heard.

7The breakdown diagnosis mode will be canceled unless pressing the CHECK button continuously for 5 seconds or operating the unit for 30 seconds.

8The same diagnosis can be repeated by turning power on again.

14.2.4To Clear Memorized Error Code after Repair (Protective Operation)

1Turn power on (in standby condition).

2Press the AUTO button for 5 seconds (a “beep” sound is heard) on the main unit to operate the unit at Forced Cooling Operation Mode.

3Press the CHECK button on the remote control for about 1 second with a pointed object to transmit signal to main unit. A “beep” sound is heard, and the Error Code is cleared.

14.2.5Temporary Operation (Depending On Breakdown Status)

1Press the Auto OFF/ON button on the main unit (a “beep” sound is heard) to operate the unit. (Remote control is enable again).

2The unit can be temporarily be used until repaired.

Error Code

Operation

Temporary items

H23

Cooling

Emergency Operation

H27, H28

Cooling

with limited power

59

Page 59
Image 59
Panasonic CS-S9NKUW-1 Breakdown Self Diagnosis Function, Self Diagnosis Function Three Digits Alphanumeric Code

CS-S9NKUW-1, CS-S22NKU-1, CU-S18NKU-1, CS-S18NKU-1, CS-S12NKUW-1 specifications

Panasonic has long been a leader in the HVAC industry, and its latest range of air conditioning units—including the CU-S9NKU-1, CU-S12NKU-1, CU-S22NKU-1, CS-S12NKUW-1, and CS-S18NKU-1—showcases innovative features and robust technologies designed to enhance home comfort while reducing energy consumption.

The CU-S9NKU-1 model is notable for its compact design, making it ideal for smaller spaces without sacrificing performance. It boasts advanced inverter technology, enabling precise temperature control and energy efficiency. The built-in air purification system ensures that indoor air quality remains high, filtering out allergens and pollutants.

Similarly, the CU-S12NKU-1 variant provides a balance of power and efficiency for medium-sized rooms. This model incorporates a quiet operation feature, making it a perfect choice for bedrooms and living areas where noise levels need to be minimized. The adjustable airflow louvers ensure that air is distributed evenly throughout the space.

For larger spaces, the CU-S22NKU-1 stands out with its high cooling and heating capacity. This model is equipped with a dual inverter compressor that enhances both efficiency and performance, providing rapid cooling or heating when needed. The user-friendly remote control and smart connectivity options allow homeowners to adjust settings conveniently, even when they’re away from home.

The CS-S12NKUW-1 model features a sleek design and additional functionalities like the Eco Mode and Sleep Mode. Eco Mode adjusts the power consumption based on the user’s preferences, while Sleep Mode operates at low noise levels, promoting a restful environment during nighttime hours.

Lastly, the CS-S18NKU-1 combines innovative technology with aesthetic appeal. Its modern design is meant to complement contemporary interiors, and its high seasonal energy efficiency ratio (SEER) indicates strong performance in cooling seasons. Additionally, this model includes several energy-saving modes that adapt to changing thermal loads, ensuring that energy wastage is minimized.

Overall, Panasonic’s CU and CS series air conditioning units offer an impressive blend of technology and design, making them suitable for various needs and spaces while focusing on energy efficiency and user comfort. Whether for residential or light commercial use, these models provide reliable, effective solutions for climate control.