
CW-XC122VU specifications
The Panasonic CW-XC122VU is a state-of-the-art portable air conditioner designed to provide optimal cooling solutions for homes and small spaces. With its modern design and innovative features, this unit stands out in the competitive HVAC market.One of the notable features of the CW-XC122VU is its powerful cooling capacity. It is equipped with a cooling output of 12,000 BTU, making it suitable for rooms up to 550 square feet. This capacity ensures that the air conditioner can effectively cool the space quickly and maintain a comfortable temperature even during the hottest summer days.
The CW-XC122VU utilizes advanced inverter technology that not only enhances cooling performance but also improves energy efficiency. By adjusting the compressor speed to maintain the desired temperature, the unit reduces energy consumption, leading to lower utility bills. This eco-friendly feature aligns with Panasonic’s commitment to sustainability and environmental responsibility.
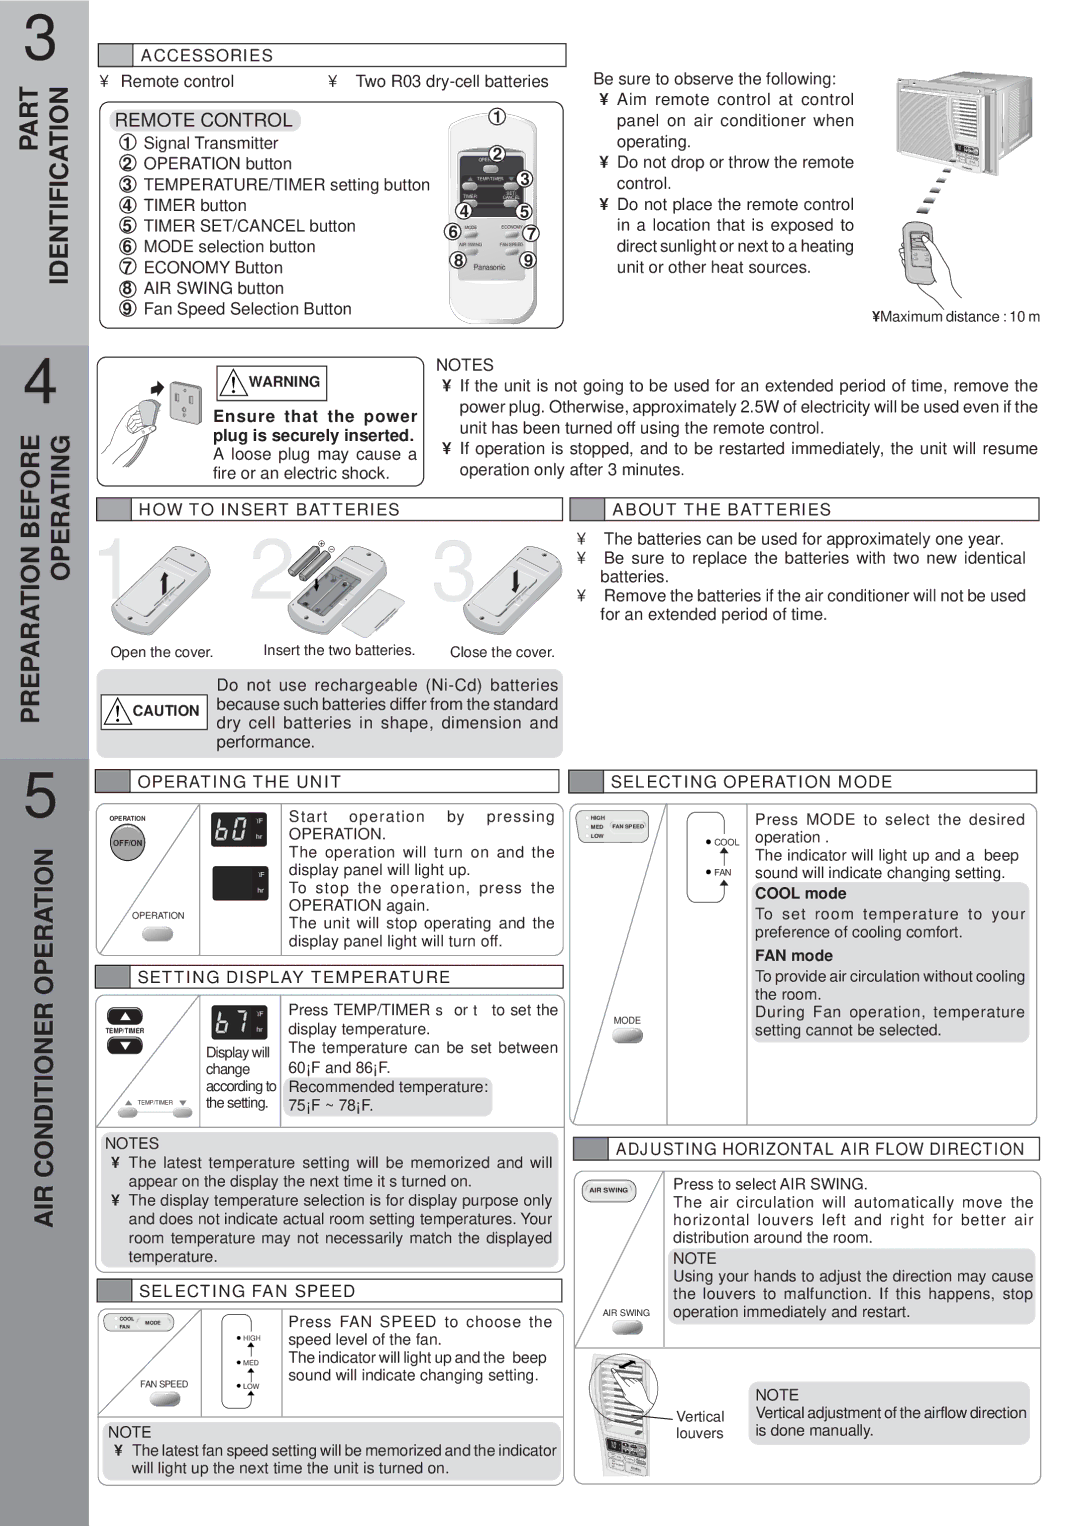
Another significant characteristic of the CW-XC122VU is its user-friendly interface. The air conditioner comes with a remote control that allows users to adjust settings from a distance, including temperature, fan speed, and operating modes. Additionally, the unit features an easy-to-read LED display, making it simple to monitor and adjust configurations.
The CW-XC122VU is also designed with enhanced filtration technology, which helps improve indoor air quality by capturing dust, allergens, and other particles. The washable filters are easy to maintain, ensuring that the unit operates efficiently and effectively over time.
For added convenience, this portable air conditioner includes a dehumidifying function, which can remove excess moisture from the air. This feature is especially beneficial in humid climates, as it helps create a more comfortable living environment.
Furthermore, the Panasonic CW-XC122VU is designed for portability, featuring built-in caster wheels that make it easy to move from room to room. Its compact design allows for flexible placement without taking up too much space, making it an ideal choice for renters and homeowners alike.
In summary, the Panasonic CW-XC122VU is an innovative and efficient portable air conditioner that combines powerful cooling capabilities with advanced technology and user-friendly features. Whether for a bedroom, living room, or office, this unit delivers comfort and convenience, making it an excellent addition to any space.