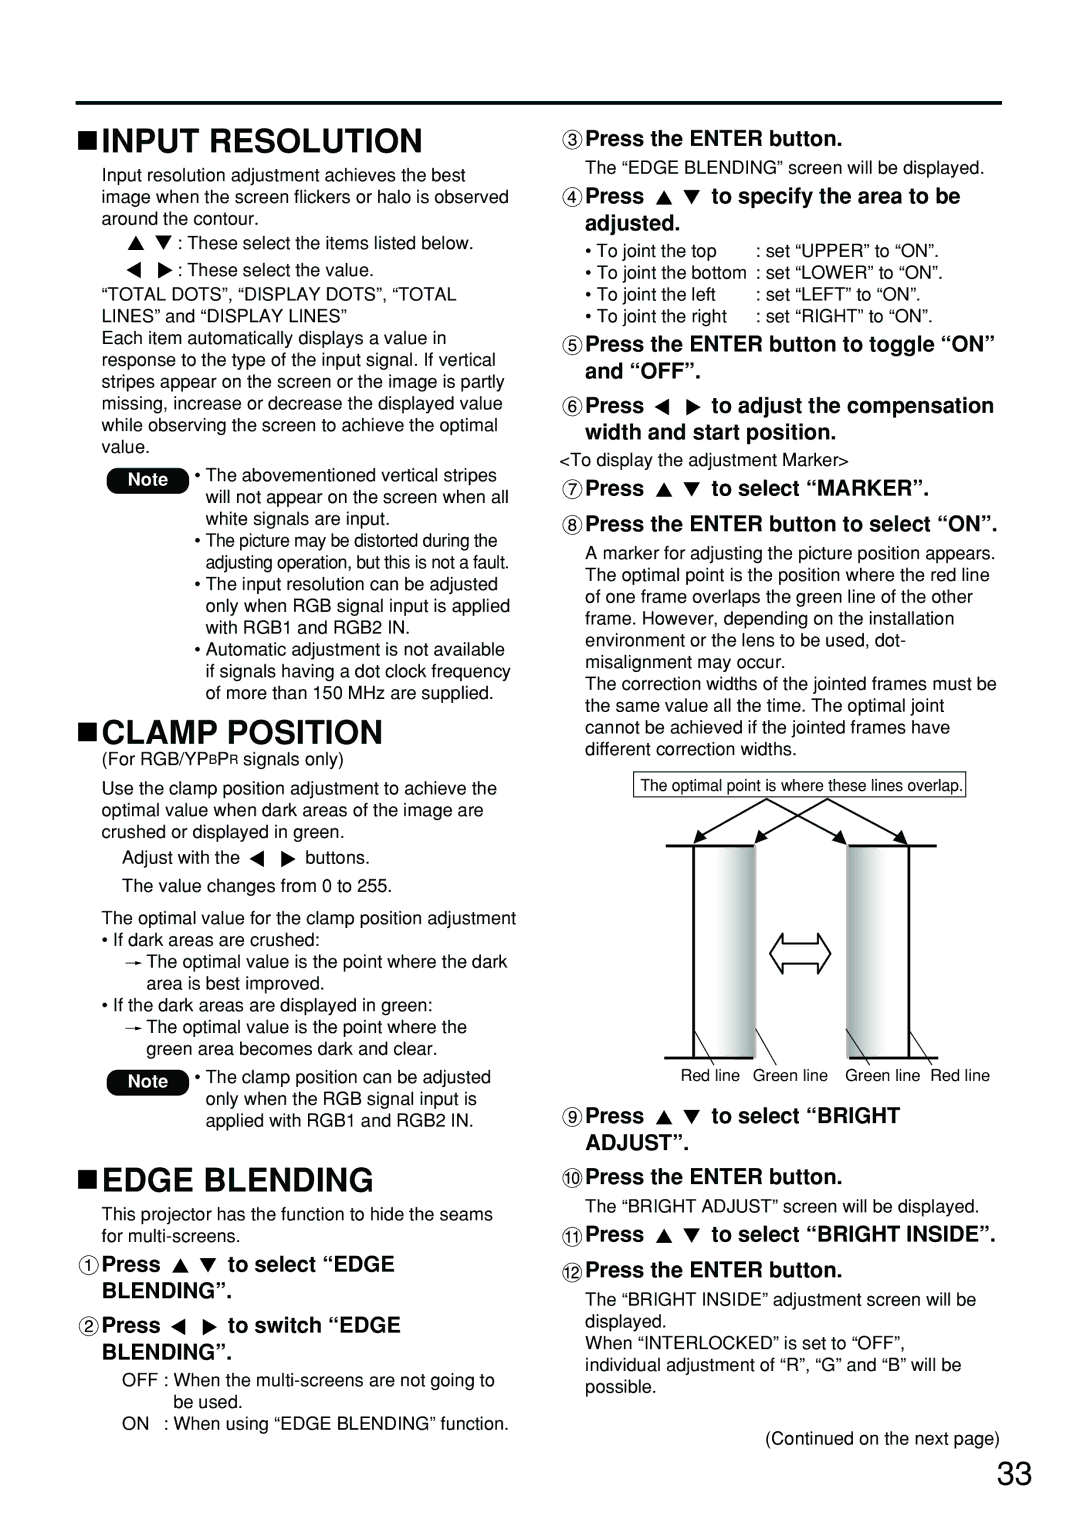
INPUT RESOLUTION

Input resolution adjustment achieves the best image when the screen flickers or halo is observed around the contour.

: These select the items listed below.

: These select the value.

“TOTAL DOTS”, “DISPLAY DOTS”, “TOTAL LINES” and “DISPLAY LINES”

Each item automatically displays a value in response to the type of the input signal. If vertical stripes appear on the screen or the image is partly missing, increase or decrease the displayed value while observing the screen to achieve the optimal value.

Note • The abovementioned vertical stripes will not appear on the screen when all white signals are input.

The picture may be distorted during the adjusting operation, but this is not a fault.

The input resolution can be adjusted only when RGB signal input is applied with RGB1 and RGB2 IN.

Automatic adjustment is not available if signals having a dot clock frequency of more than 150 MHz are supplied.

CLAMP POSITION

(For RGB/YPBPR signals only)

Use the clamp position adjustment to achieve the optimal value when dark areas of the image are crushed or displayed in green.

Adjust with the buttons. The value changes from 0 to 255.

The optimal value for the clamp position adjustment

If dark areas are crushed:

The optimal value is the point where the dark area is best improved.

If the dark areas are displayed in green:

The optimal value is the point where the green area becomes dark and clear.

Note • The clamp position can be adjusted only when the RGB signal input is applied with RGB1 and RGB2 IN.

EDGE BLENDING

This projector has the function to hide the seams for multi-screens.

Press to select “EDGE

BLENDING”.

Press to switch “EDGE

BLENDING”.

OFF : When the multi-screens are not going to be used.

ON : When using “EDGE BLENDING” function.

Press the ENTER button.

The “EDGE BLENDING” screen will be displayed.

Press to specify the area to be adjusted.

• To joint the top

: set “UPPER” to “ON”.

To joint the bottom : set “LOWER” to “ON”.

• To joint the left

: set “LEFT” to “ON”.

• To joint the right

: set “RIGHT” to “ON”.

Press the ENTER button to toggle “ON” and “OFF”.

Press to adjust the compensation width and start position.

<To display the adjustment Marker>

Press to select “MARKER”. Press the ENTER button to select “ON”.

A marker for adjusting the picture position appears. The optimal point is the position where the red line of one frame overlaps the green line of the other frame. However, depending on the installation environment or the lens to be used, dot- misalignment may occur.

The correction widths of the jointed frames must be the same value all the time. The optimal joint cannot be achieved if the jointed frames have different correction widths.

The optimal point is where these lines overlap.

Red line Green line Green line Red line

Press to select “BRIGHT ADJUST”.

Press the ENTER button.

The “BRIGHT ADJUST” screen will be displayed.

Press to select “BRIGHT INSIDE”. Press the ENTER button.

The “BRIGHT INSIDE” adjustment screen will be displayed.

When “INTERLOCKED” is set to “OFF”, individual adjustment of “R”, “G” and “B” will be possible.

(Continued on the next page)

33

Page 33
Image 33
Panasonic DW5100UL, PT-D5700UL, PT-DW5100U operating instructions Input Resolution, Clamp Position, Edge Blending

PT-DW5100U, PT-D5700U, DW5100UL, PT-D5700UL specifications

Panasonic, a leader in innovative projection technology, offers a range of high-performance projectors including the PT-D5700UL, DW5100UL, PT-D5700U, and PT-DW5100U. These models are designed for environments that require high brightness, excellent color accuracy, and advanced features for seamless integration into various applications.

The PT-D5700UL and PT-D5700U are renowned for their high brightness of up to 7,000 lumens, making them ideal for large venues such as auditoriums, conference rooms, and outdoor events. They utilize a dual-lamp system, which not only enhances brightness but also provides reliability and longevity. The unique Dual Lamp Drive system ensures that if one lamp fails, the other continues to function, minimizing downtime and maintenance concerns.

Both projectors feature a WUXGA resolution of 1920 x 1200, providing sharp, detailed images that are essential for professional presentations. Their RGB booster technology enhances color reproduction, delivering vivid and realistic colors that captivate audiences. Additionally, these models feature a contrast ratio of up to 20,000:1, allowing presentations to have deep blacks and bright highlights, critical for effective visual storytelling.

On the other hand, the DW5100UL and PT-DW5100U models are specifically tailored for applications requiring exceptional brightness and excellent color fidelity, boasting a brightness of 5,000 lumens. They offer WXGA resolution (1280 x 800), making them suitable for a wide variety of display needs in corporate, educational, and entertainment settings. The incorporation of Panasonic’s Daylight View technology significantly enhances visibility even in brightly lit environments.

All four projectors are equipped with advanced connectivity options, including HDMI, DisplayPort, and LAN, allowing for easy integration into existing AV systems. They are also compatible with Crestron and AMX control systems, making them a flexible choice for complex installations.

Furthermore, the projectors utilize Panasonic's proprietary Solid Shine laser technology, which ensures consistent brightness and color quality over time while reducing maintenance requirements. With IP6X-rated dust-proof design and a cooling system that minimizes dust accumulation, users can rely on these projectors to perform optimally in challenging conditions.

In summary, Panasonic’s PT-D5700UL, DW5100UL, PT-D5700U, and PT-DW5100U projectors are engineered to deliver outstanding performance, durability, and versatility. They set a high standard for professional projection systems, equipped with cutting-edge technologies that ensure exceptional visual quality whether for business, education, or entertainment purposes.