5 FIX THE CONTROLLER CORD
English | Use the controller cord velcroes to secure the cord, leaving approximately 18 in. | |
(45 cm) of free wire. | ||
| ||
| * Confirm that there is a margin for the controller cord length when the backrest is reclined. | |
| (The illustration shows that the cord is attached to the right armrest.) | |
| Approx. 18 (45 cm) |
6 ATTACHING THE BACK CUSHION AND PILLOW
1 Attach the back cushion using the zipper. 2 Attach the pillow using the velcroes.

 FOLDING THE BACKREST FORWARD (REPACKING)
CAUTION
•Keep hands, feet, children, objects, etc., clear of openings on the unit, including seat, armrests and legrest; gaps between the unit and the floor; and the backrest’s range of movement when being folded forward.
Failure to do so could result in injury.
•The unit should not be turned on and the controls should not be operated on when the backrest is folded forward. Failure to follow these instructions could result in injury.
•The unit should not be climbed on and objects should not be placed on the unit when the backrest is folded forward.
Failure to follow these instructions could result in damage to the unit.
•In the interests of safety, the backrest should always be folded forward by two persons.
1 Press the OFF/ON button to switch off the power.
2 Slidecord. the power switch to the “off” position, lock it, and then unplug the power 3 Remove the back cushion and the pillow from the unit.
4 Remove the armrest from the unit.
Refer to “INSTALL THE ARMRESTS ON THE UNIT” on page 8 and remove them in

 BEFORE USING THE UNIT
1 CHECK THE SURROUNDING AREA |
| English |
|
| |
| Check that there is nothing around the |
|
| unit. |
|
2 POWERING UP THE UNIT
![]() See Warning No. 8 on page 1.
See Warning No. 8 on page 1.
1 Make sure the power plug is functional.
• Make sure the power plug is undamaged. Make sure the power plug is free of foreign matter and debris.
2 Plug the power plug into an electrical outlet.
3 Verify that the lock switch key is turned to the “open” position.
• If in “lock” position, turn the lock switch key to “open”.
4 Slide the power switch to the “on” position.
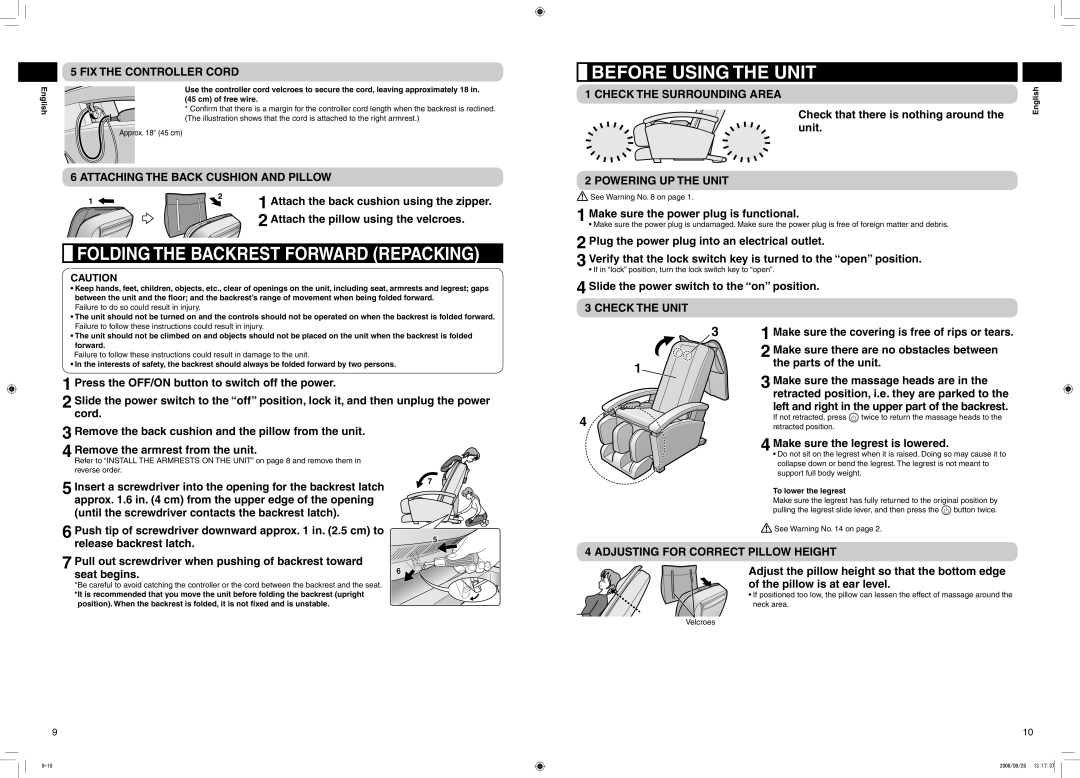
3 CHECK THE UNIT
31 Make sure the covering is free of rips or tears.
|
| 2 Make sure there are no obstacles between |
| 1 | the parts of the unit. |
| 3 Make sure the massage heads are in the | |
|
| |
|
| retracted position, i.e. they are parked to the |
|
| left and right in the upper part of the backrest. |
4 |
| If not retracted, press twice to return the massage heads to the |
| retracted position. | |
|
| 4 Make sure the legrest is lowered. |
|
| • Do not sit on the legrest when it is raised. Doing so may cause it to |
|
| collapse down or bend the legrest. The legrest is not meant to |
reverse order.
5 Insert a screwdriver into the opening for the backrest latch approx. 1.6 in. (4 cm) from the upper edge of the opening (until the screwdriver contacts the backrest latch).
6 Push tip of screwdriver downward approx. 1 in. (2.5 cm) to release backrest latch.
7 Pull out screwdriver when pushing of backrest toward seat begins.
*Be careful to avoid catching the controller or the cord between the backrest and the seat.
*It is recommended that you move the unit before folding the backrest (upright position). When the backrest is folded, it is not fixed and is unstable.
7
5
6 ![]()
support full body weight. |
|
To lower the legrest |
|
Make sure the legrest has fully returned to the original position by | |
pulling the legrest slide lever, and then press the | button twice. |
![]() See Warning No. 14 on page 2.
See Warning No. 14 on page 2.
4 ADJUSTING FOR CORRECT PILLOW HEIGHT
Adjust the pillow height so that the bottom edge of the pillow is at ear level.
• If positioned too low, the pillow can lessen the effect of massage around the neck area.
Velcroes
10
2008/08/28 13:17:37![]()
