
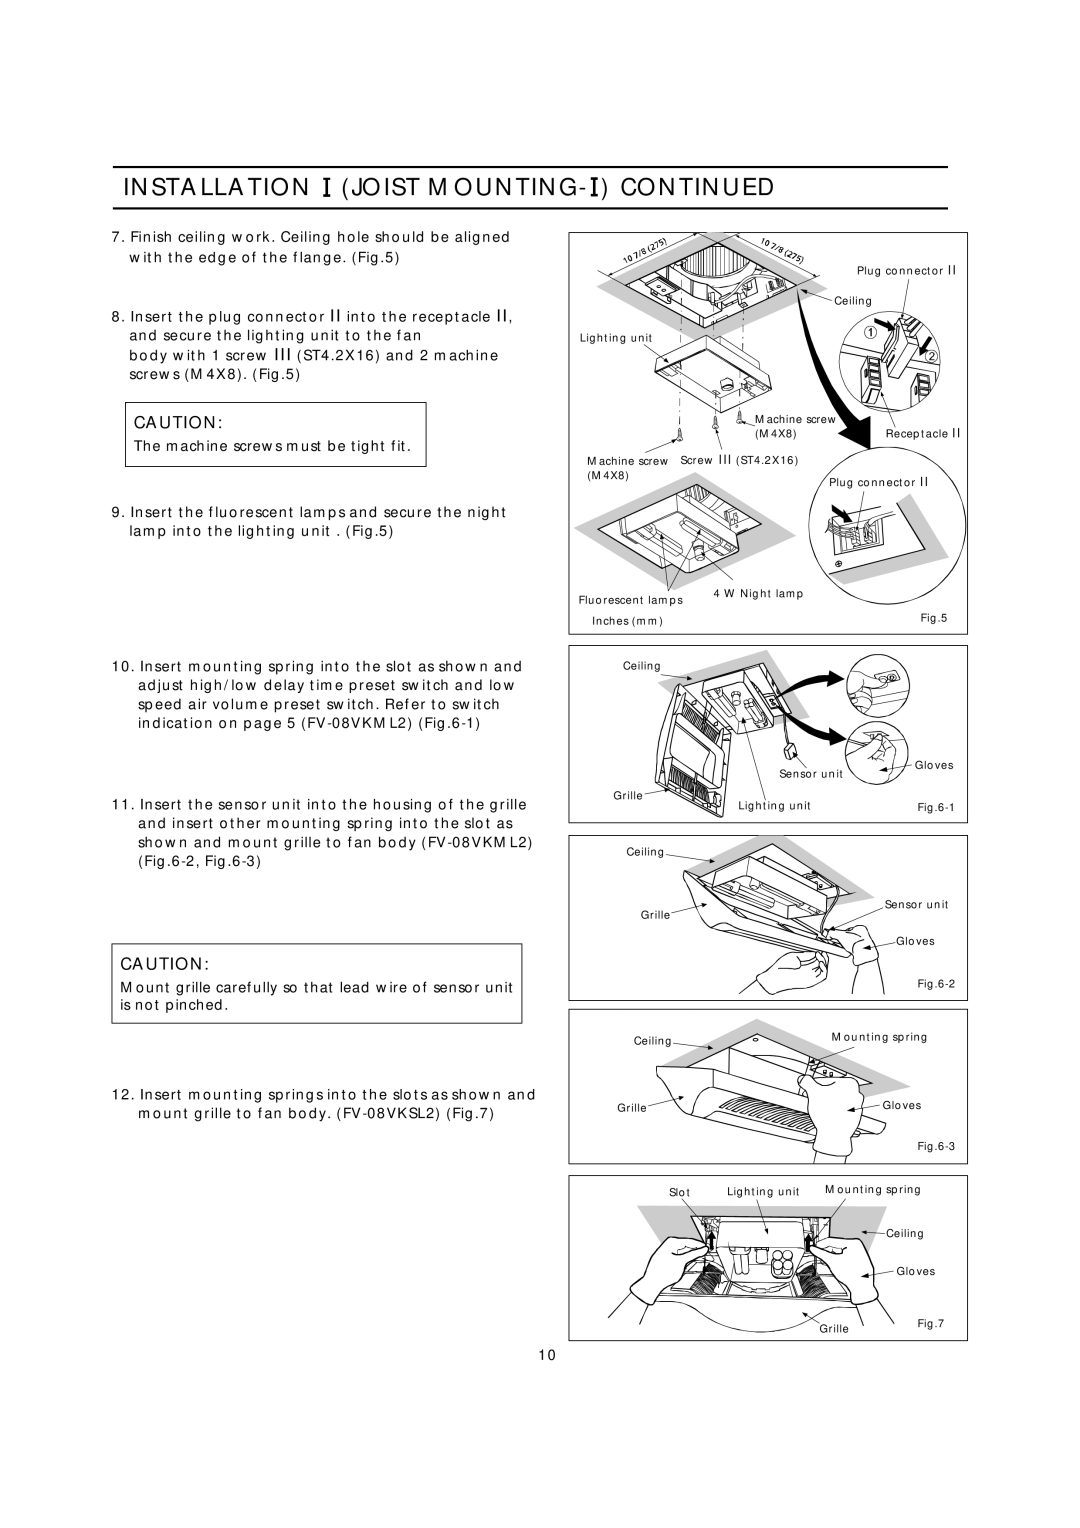
FV-08VKML2, FV-08VKSL2 specifications
The Panasonic FV-08VKML2 and FV-08VKSL2 are exceptional bathroom ventilation fans designed to provide efficient airflow while maintaining energy efficiency and low noise levels. These models are part of Panasonic's WhisperCeiling Series, renowned for their superior performance and innovative features.One of the standout characteristics of both models is their powerful yet quiet operation. With a sound level of just 0.3 sones, these fans are among the quietest in the market. This means that even when in use, they won't disturb your peace, making them ideal for areas where calm and quiet are essential.
The FV-08VKML2 model is equipped with a 100 CFM airflow capability, ensuring effective ventilation in bathrooms up to 95 square feet. In comparison, the FV-08VKSL2 offers the same airflow capacity but comes with additional features tailored for more specific applications. Both fans utilize Panasonic's ECM motor technology, which enhances energy efficiency and reduces power consumption, contributing to lower utility bills and a smaller environmental footprint.
Another significant feature of these models is the built-in smart plug and humidity sensor in the FV-08VKML2. This technology automatically activates the fan when humidity levels rise, making it perfect for preventing mold and mildew in damp environments. The FV-08VKSL2, on the other hand, provides a more standard operation without the humidity sensing capability, appealing to users who prefer manual control.
Both models are constructed with high-quality materials that ensure durability and a long lifespan. The fans are designed for easy installation; the low-profile design allows them to fit seamlessly into various ceiling spaces, and the included mounting brackets make setup straightforward.
The Panasonic FV-08VKML2 and FV-08VKSL2 also emphasize ease of maintenance. The units feature washable filters that capture dust and debris, ensuring that air quality remains high without requiring constant replacements.
In conclusion, the Panasonic FV-08VKML2 and FV-08VKSL2 are high-performance bathroom ventilation solutions that combine efficiency, quiet operation, and smart technologies to enhance air quality. Whether you're looking for automatic humidity control or a straightforward fan, these models cover a range of user needs while providing reliable ventilation for any bathroom space.