Installations and connections
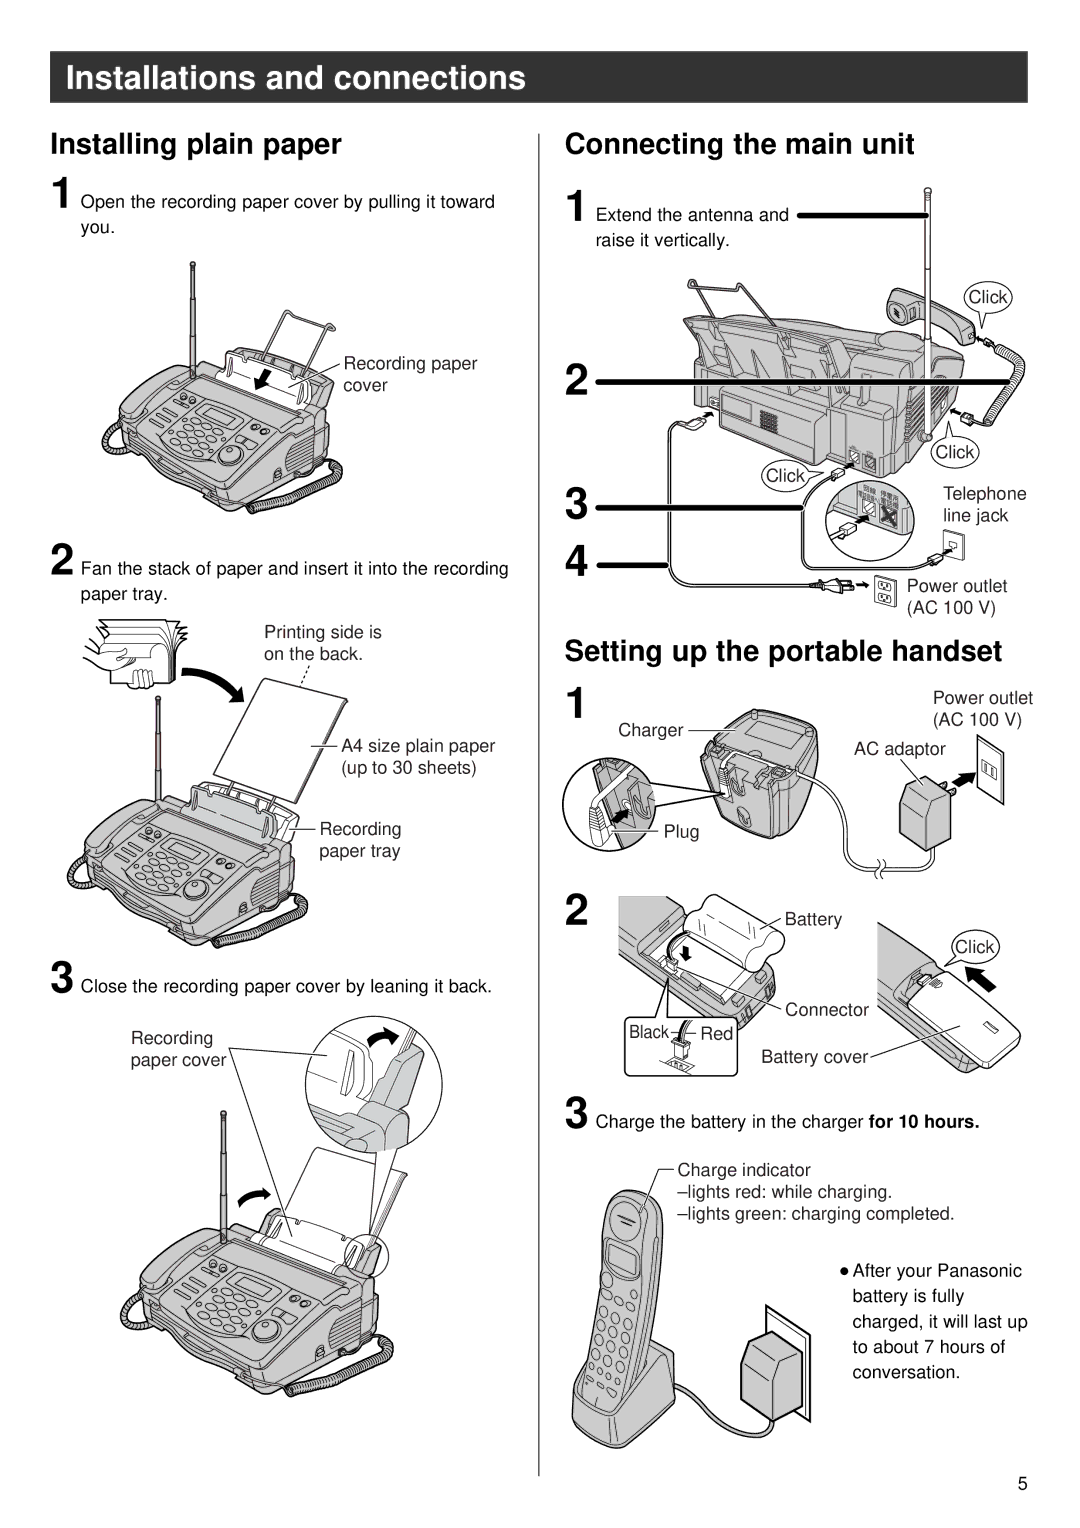
Installing plain paper
1 Open the recording paper cover by pulling it toward you.
Recording paper cover
Connecting the main unit
1 Extend the antenna and raise it vertically.
Click
2
(電回線 |
| Click |
話回線へ) | 停電用 | |
| 電話機 |
|
2 Fan the stack of paper and insert it into the recording paper tray.
3
4
Click ![]()
![]()
![]()
( | 回 | 線 | 停電 |
| |
電話回 |
| 用 | |||
|
| 線へ)電 | 話 | ||
|
|
|
| 機 | |
|
|
|
|
| |
Telephone line jack
Power outlet (AC 100 V)
Printing side is on the back.
![]() A4 size plain paper (up to 30 sheets)
A4 size plain paper (up to 30 sheets)
![]()
![]()
![]()
![]() Recording paper tray
Recording paper tray
3 Close the recording paper cover by leaning it back.
Recording paper cover
Setting up the portable handset
1 |
| Power outlet |
Charger | (AC 100 V) | |
| AC adaptor | |
|
| |
| Plug |
|
2 |
| Battery |
|
| Click |
![]() Connector
Connector
Black![]()
![]() Red
Red
Battery cover
3 Charge the battery in the charger for 10 hours.
Charge indicator
● After your Panasonic battery is fully charged, it will last up to about 7 hours of conversation.
5
