
KX-TGA520C specifications
The Panasonic KX-TGA520C is a versatile cordless telephone that combines advanced technology and user-friendly features, making it a great choice for both home and office environments. Known for its reliability and impressive performance, this model allows users to easily stay connected.One of the key features of the KX-TGA520C is its high-quality DECT (Digital Enhanced Cordless Telecommunications) technology. This technology ensures a secure and clear communication line by minimizing interference and providing long-range capabilities. With a range of up to 1,000 feet outdoors and 160 feet indoors, users can move freely without the worry of losing signal quality.
The phone boasts a large, easy-to-read backlit LCD screen, which displays information clearly, even in low light conditions. This feature enables users to see caller ID, battery status, and call information at a glance. The ergonomic design of the handset allows for comfortable handling and ease of use, making it suitable for extended conversations.
Another notable characteristic of the KX-TGA520C is its noise reduction technology, which enhances audio clarity. This feature effectively filters out background noise, allowing users to hear conversations more distinctly, even in bustling environments. Additionally, the phone offers volume control options for ringtones and earpiece settings, allowing users to customize their experience according to their preferences.
The KX-TGA520C is equipped with a built-in phonebook that can store up to 100 contacts, making it easy to keep track of important numbers. Users can also take advantage of the intercom feature, which enables communication between multiple handsets, enhancing coordination within households or teams.
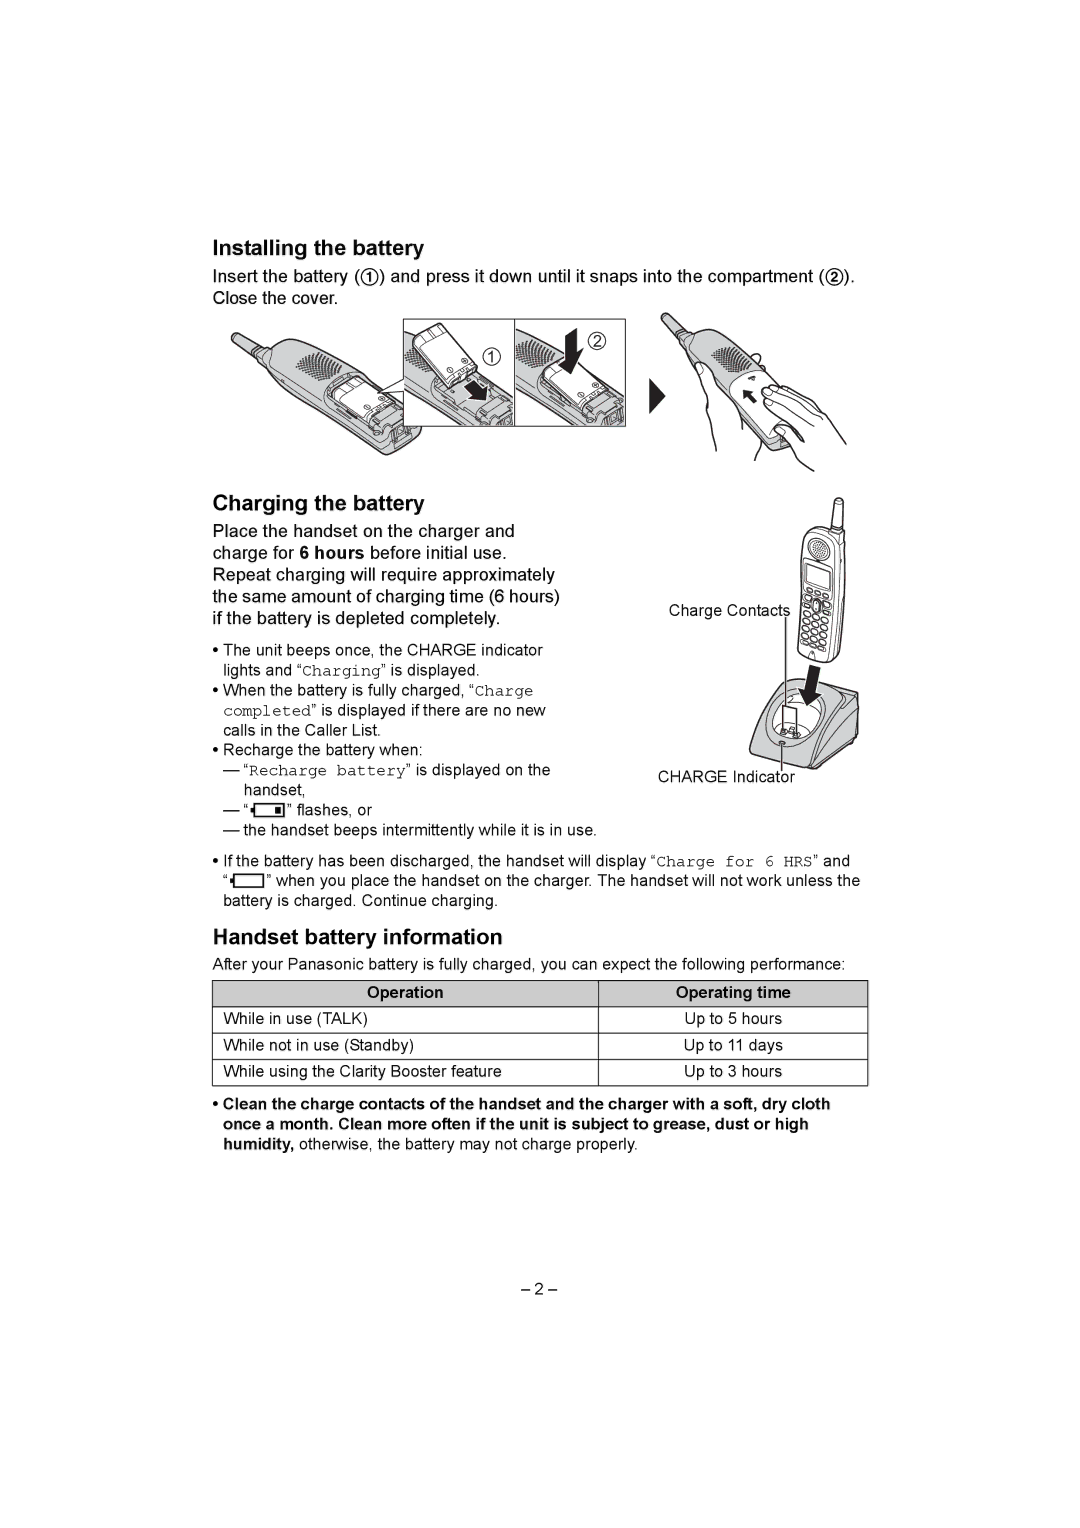
Battery life is another strong point of this Panasonic model. The phone is powered by a long-lasting rechargeable battery that can provide up to 10 hours of talk time and up to 120 hours of standby time. This ensures that users can rely on the phone for extended periods without frequent recharging.
Furthermore, the device has additional features such as call waiting, call blocking, and a redial function, which further enhance usability. Overall, the Panasonic KX-TGA520C is an excellent cordless phone that combines advanced technology with practical features, making it a valuable addition to any communication setup.