Maintenance
To prevent from fungus growth at the outer tub area.
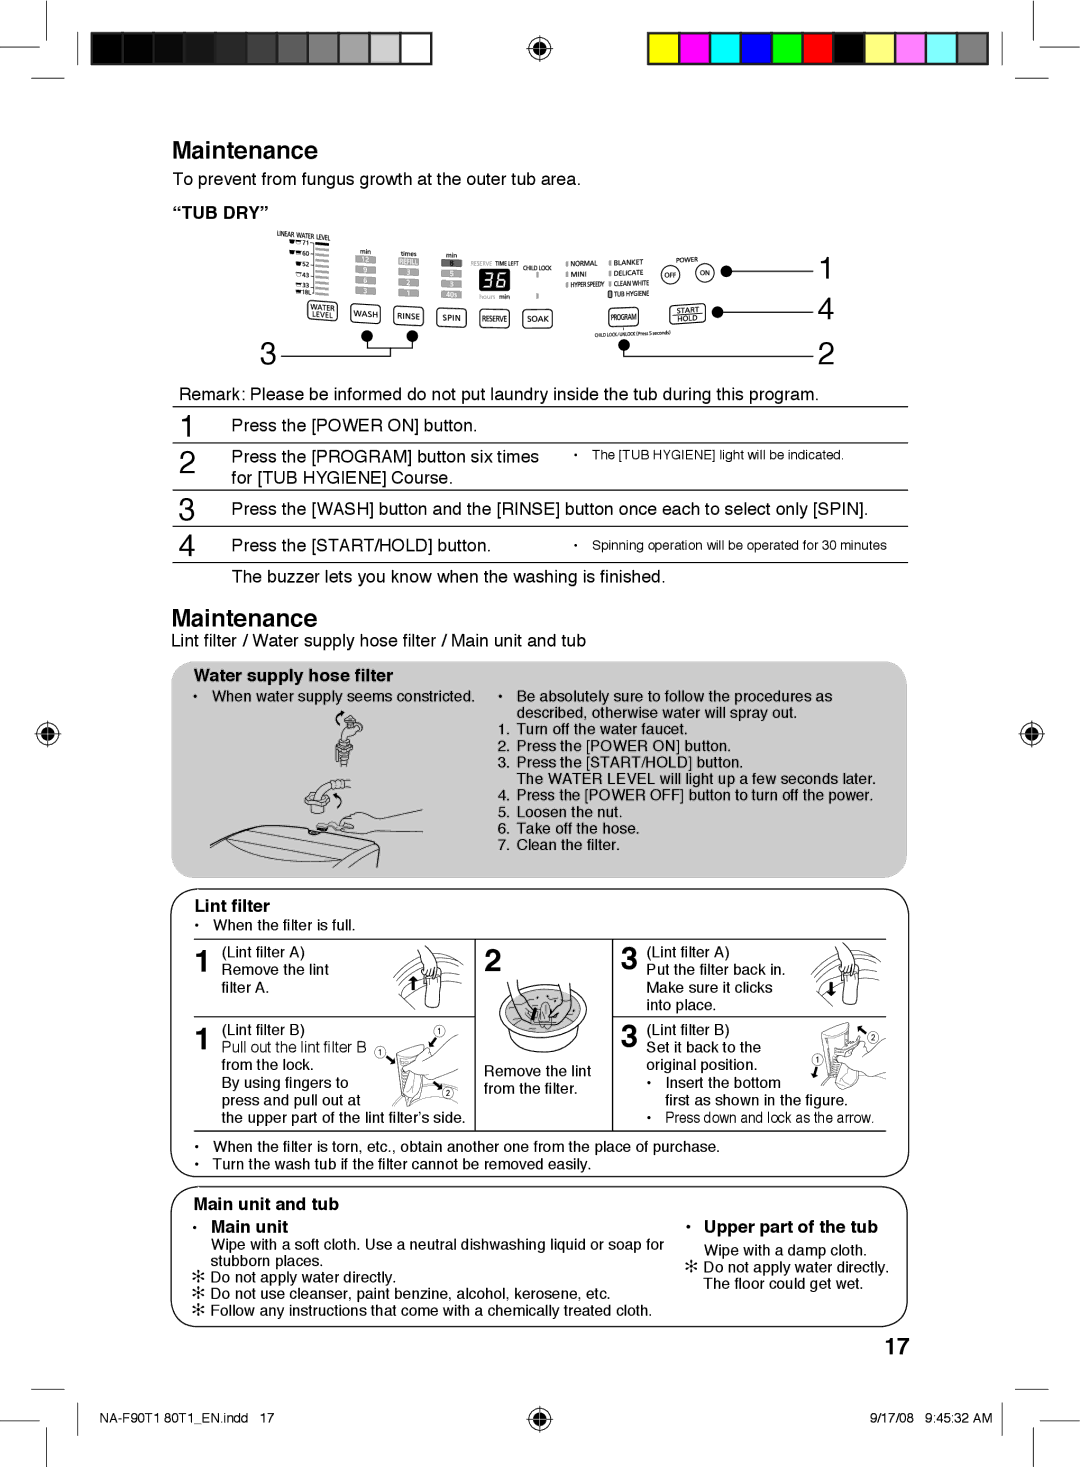
“TUB DRY”
3
1
4
2
Remark: Please be informed do not put laundry inside the tub during this program.
1 | Press the [POWER ON] button. |
|
2 | Press the [PROGRAM] button six times | • The [TUB HYGIENE] light will be indicated. |
for [TUB HYGIENE] Course. |
| |
|
| |
3 | Press the [WASH] button and the [RINSE] button once each to select only [SPIN]. | |
4 | Press the [START/HOLD] button. | • Spinning operation will be operated for 30 minutes |
| ||
The buzzer lets you know when the washing is finished.
Maintenance
Lint filter / Water supply hose filter / Main unit and tub
Water supply hose filter
• When water supply seems constricted. • | Be absolutely sure to follow the procedures as |
| described, otherwise water will spray out. |
1. | Turn off the water faucet. |
2. | Press the [POWER ON] button. |
3. | Press the [START/HOLD] button. |
4. | The WATER LEVEL will light up a few seconds later. |
Press the [POWER OFF] button to turn off the power. | |
5. | Loosen the nut. |
6. | Take off the hose. |
7. | Clean the filter. |
Lint filter
• When the filter is full.
1 | (Lint filter A) |
| 2 | 3 | (Lint filter A) |
|
|
Remove the lint |
| Put the filter back in. |
|
| |||
| filter A. |
|
|
| Make sure it clicks |
|
|
|
|
|
|
| into place. |
|
|
| (Lint filter B) | 1 |
| 3 | (Lint filter B) |
| 2 |
1 Pull out the lint filter B |
|
| Set it back to the |
| |||
1 |
| 1 |
| ||||
| from the lock. |
| Remove the lint |
| original position. |
| |
|
|
|
|
| |||
| By using fingers to |
|
| • Insert the bottom |
|
| |
| 2 | from the filter. |
|
|
| ||
| press and pull out at |
| first as shown in the figure. |
| |||
|
|
|
|
| |||
| the upper part of the lint filter’s side. |
|
| • Press down and lock as the arrow. | |||
•When the filter is torn, etc., obtain another one from the place of purchase.
•Turn the wash tub if the filter cannot be removed easily.
Main unit and tub
•Main unit
Wipe with a soft cloth. Use a neutral dishwashing liquid or soap for stubborn places.
Do not apply water directly.
Do not use cleanser, paint benzine, alcohol, kerosene, etc. Follow any instructions that come with a chemically treated cloth.
•Upper part of the tub
Wipe with a damp cloth. Do not apply water directly. The floor could get wet.
17
9/17/08 9:45:32 AM