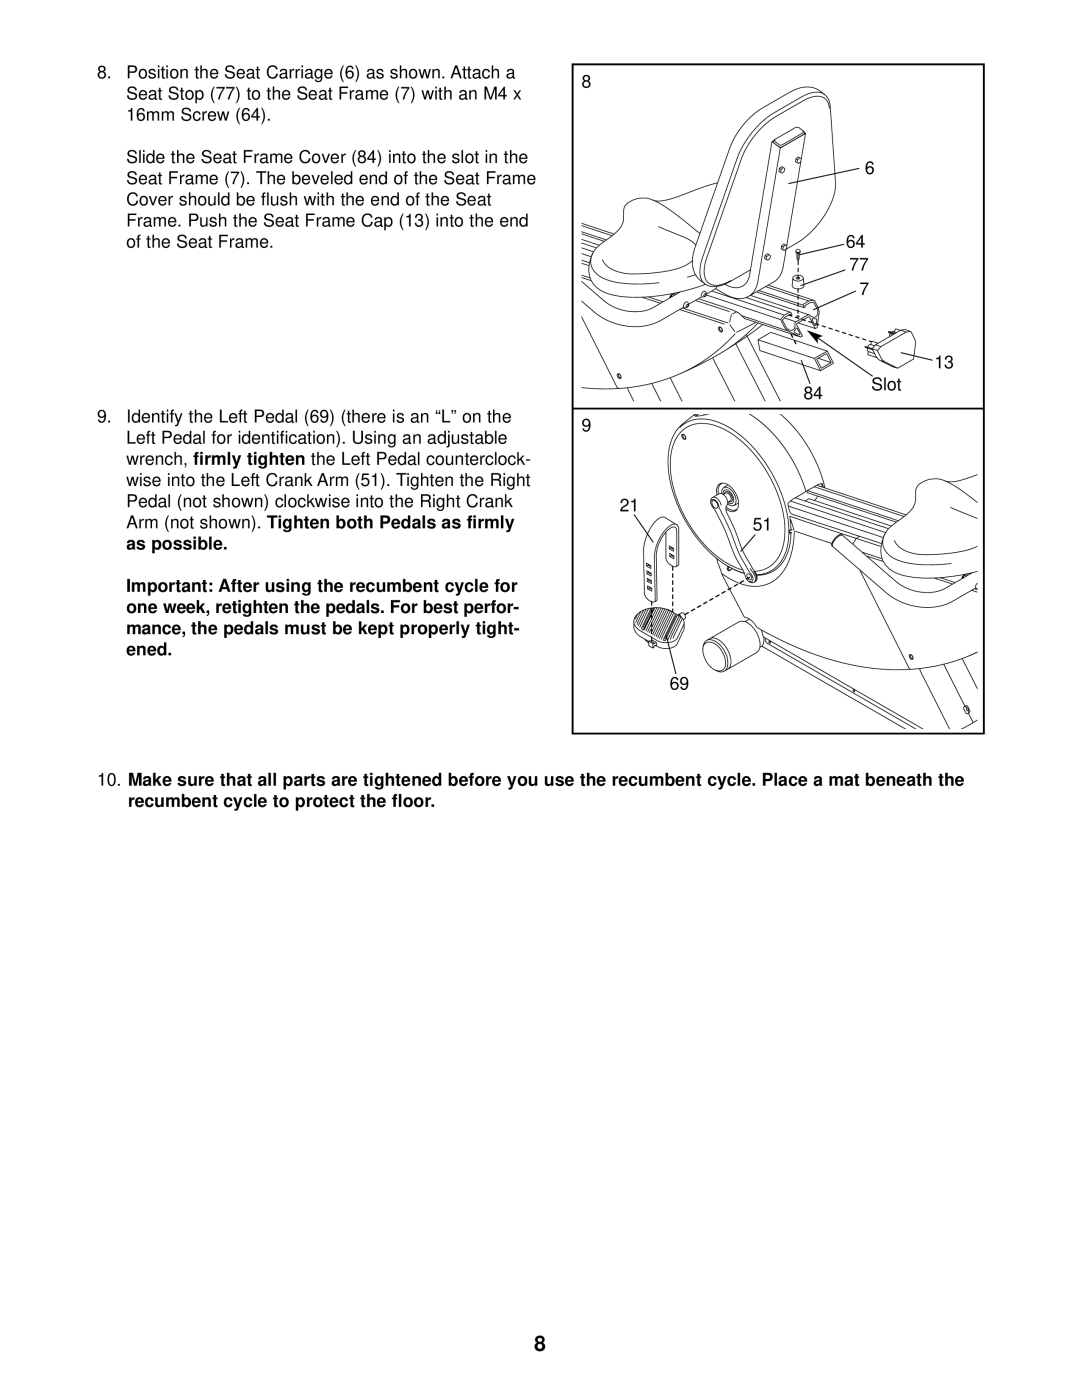
8. Position the Seat Carriage (6) as shown. Attach a | 8 |
|
Seat Stop (77) to the Seat Frame (7) with an M4 x |
| |
|
| |
16mm Screw (64). |
|
|
Slide the Seat Frame Cover (84) into the slot in the |
| 6 |
Seat Frame (7). The beveled end of the Seat Frame |
| |
|
| |
Cover should be flush with the end of the Seat |
|
|
Frame. Push the Seat Frame Cap (13) into the end |
|
|
of the Seat Frame. |
| 64 |
|
| 77 |
|
| 7 |
|
| 13 |
| 84 | Slot |
|
| |
9. Identify the Left Pedal (69) (there is an “L” on the | 9 |
|
Left Pedal for identification). Using an adjustable |
| |
|
| |
wrench, firmly tighten the Left Pedal counterclock- |
|
|
wise into the Left Crank Arm (51). Tighten the Right |
|
|
Pedal (not shown) clockwise into the Right Crank | 21 |
|
Arm (not shown). Tighten both Pedals as firmly | 51 |
|
as possible. |
|
|
Important: After using the recumbent cycle for |
|
|
one week, retighten the pedals. For best perfor- |
|
|
mance, the pedals must be kept properly tight- |
|
|
ened. |
|
|
| 69 |
|
10.Make sure that all parts are tightened before you use the recumbent cycle. Place a mat beneath the recumbent cycle to protect the floor.
8