Editing
Audio Dubbing
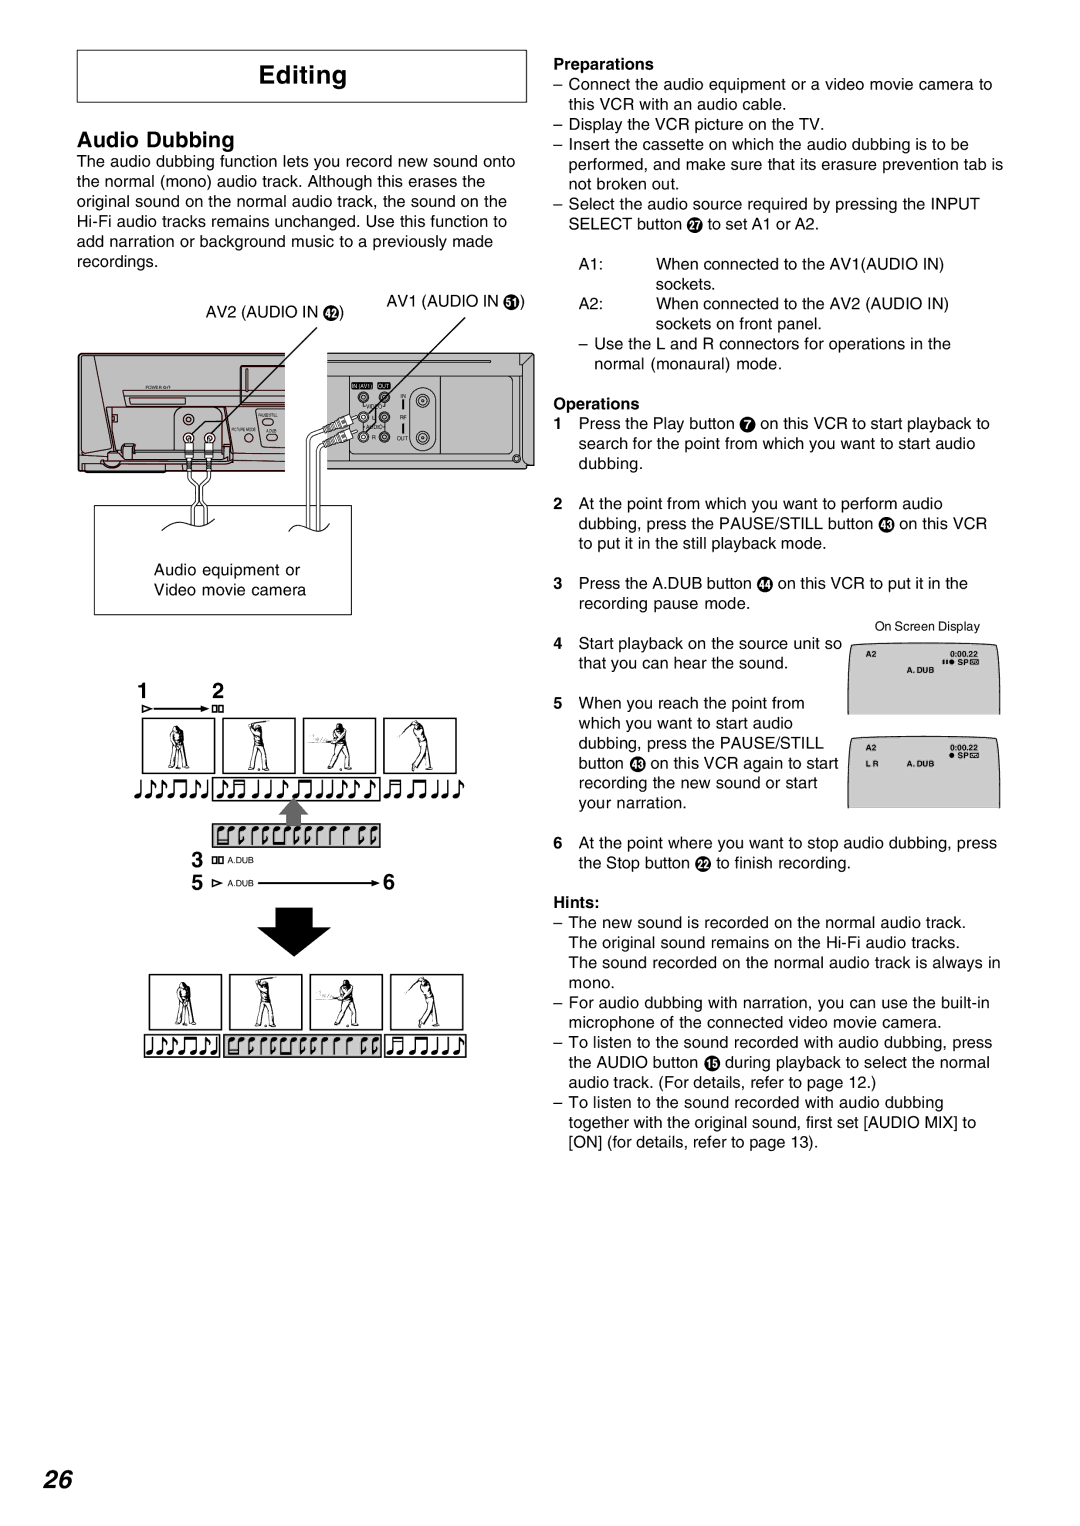
The audio dubbing function lets you record new sound onto the normal (mono) audio track. Although this erases the original sound on the normal audio track, the sound on the
Preparations
–Connect the audio equipment or a video movie camera to this VCR with an audio cable.
–Display the VCR picture on the TV.
–Insert the cassette on which the audio dubbing is to be performed, and make sure that its erasure prevention tab is not broken out.
–Select the audio source required by pressing the INPUT SELECT button K to set A1 or A2.
A1: | When connected to the AV1(AUDIO IN) |
| sockets. |
AV2 (AUDIO IN Z)
AV1 (AUDIO IN c)
A2: | When connected to the AV2 (AUDIO IN) |
| sockets on front panel. |
–Use the L and R connectors for operations in the normal (monaural) mode.
POWER |
| IN (AV1) | OUT |
|
|
| IN |
|
| VIDEO | |
| PAUSE/STILL | L | RF |
|
| ||
PICTURE MODE | A.DUB | AUDIO | |
|
| ||
|
| R | OUT |
Audio equipment or
Video movie camera
Operations
1Press the Play button 7 on this VCR to start playback to search for the point from which you want to start audio dubbing.
2At the point from which you want to perform audio dubbing, press the PAUSE/STILL button [ on this VCR to put it in the still playback mode.
3Press the A.DUB button \ on this VCR to put it in the recording pause mode.
1 2
4Start playback on the source unit so that you can hear the sound.
5When you reach the point from which you want to start audio dubbing, press the PAUSE/STILL button [ on this VCR again to start recording the new sound or start your narration.
On Screen Display
A2 | 0:00.22 |
| SP |
| A. DUB |
A2 | 0:00.22 |
| SP |
L R | A. DUB |
3 A.DUB
5![]() A.DUB
A.DUB ![]() 6
6
6At the point where you want to stop audio dubbing, press the Stop button F to finish recording.
Hints:
–The new sound is recorded on the normal audio track. The original sound remains on the
The sound recorded on the normal audio track is always in mono.
–For audio dubbing with narration, you can use the
–To listen to the sound recorded with audio dubbing, press the AUDIO button ? during playback to select the normal audio track. (For details, refer to page 12.)
–To listen to the sound recorded with audio dubbing together with the original sound, first set [AUDIO MIX] to [ON] (for details, refer to page 13).
26
