Before using
ªSelecting the remote control mode
If 2 cameras are used simultaneously, set the mode for one pair of movie camera and remote control to [VCR1] and that of the other pair to [VCR2]. This will prevent interference between the 2 pairs. (The default setting is [VCR1]. When the
1 Setting on the camera:
Set [SETUP] >> [REMOTE] >> [VCR1] or [VCR2].
2 Setting on the remote control:
STILL ADV PAUSE STILL ADV | VOL |
2 | 1 |
| STOP |
VAR
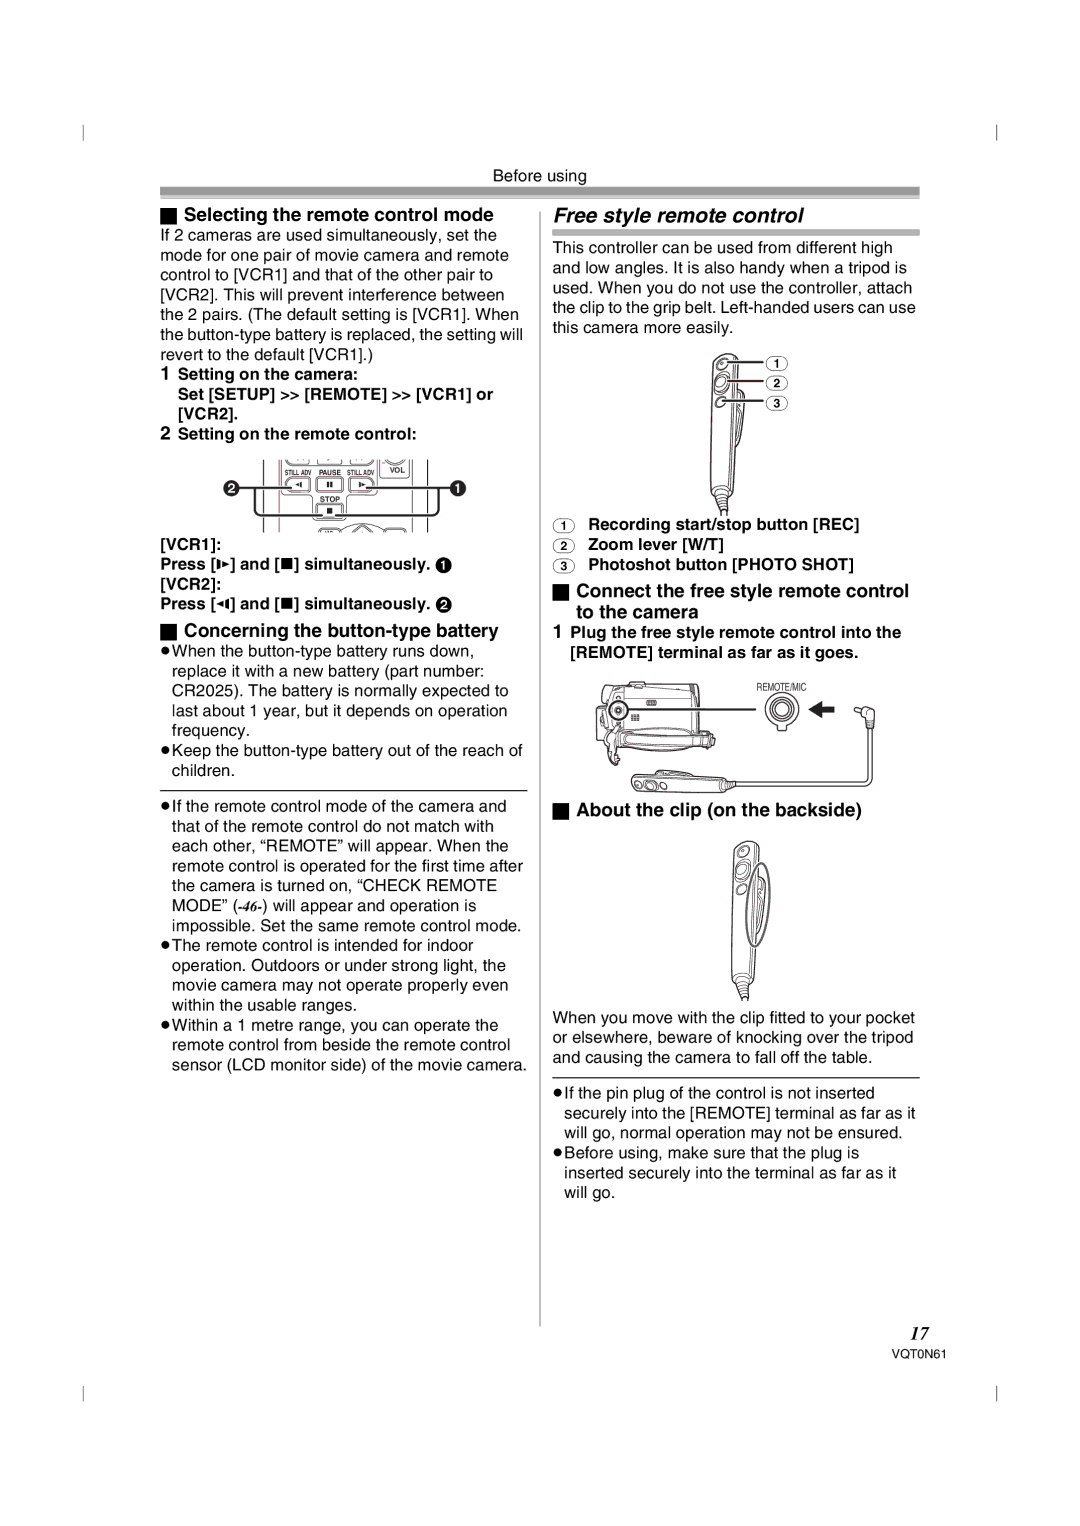
[VCR1]:
Press [D] and [∫] simultaneously. 1 [VCR2]:
Press [E] and [∫] simultaneously. 2
ªConcerning the button-type battery
≥When the
≥Keep the
≥If the remote control mode of the camera and that of the remote control do not match with each other, “REMOTE” will appear. When the remote control is operated for the first time after the camera is turned on, “CHECK REMOTE
MODE”
≥The remote control is intended for indoor operation. Outdoors or under strong light, the movie camera may not operate properly even within the usable ranges.
≥Within a 1 metre range, you can operate the remote control from beside the remote control sensor (LCD monitor side) of the movie camera.
Free style remote control
This controller can be used from different high and low angles. It is also handy when a tripod is used. When you do not use the controller, attach the clip to the grip belt.
(1)
(2)
(3)
(1)Recording start/stop button [REC]
(2)Zoom lever [W/T]
(3)Photoshot button [PHOTO SHOT]
ªConnect the free style remote control
to the camera
1Plug the free style remote control into the [REMOTE] terminal as far as it goes.
REMOTE/MIC
ªAbout the clip (on the backside)
When you move with the clip fitted to your pocket or elsewhere, beware of knocking over the tripod and causing the camera to fall off the table.
≥If the pin plug of the control is not inserted securely into the [REMOTE] terminal as far as it will go, normal operation may not be ensured.
≥Before using, make sure that the plug is inserted securely into the terminal as far as it will go.
17
VQT0N61
