1 |
| 2 |
|
| |
| TRACK. | TRACK. |
s SEARCH |
|
|
S6 |
|
|
1 |
|
|
| MENU |
|
# | TRACKINGMF/ |
|
" | FOCUS / SET |
|
High-Speed Rewinding
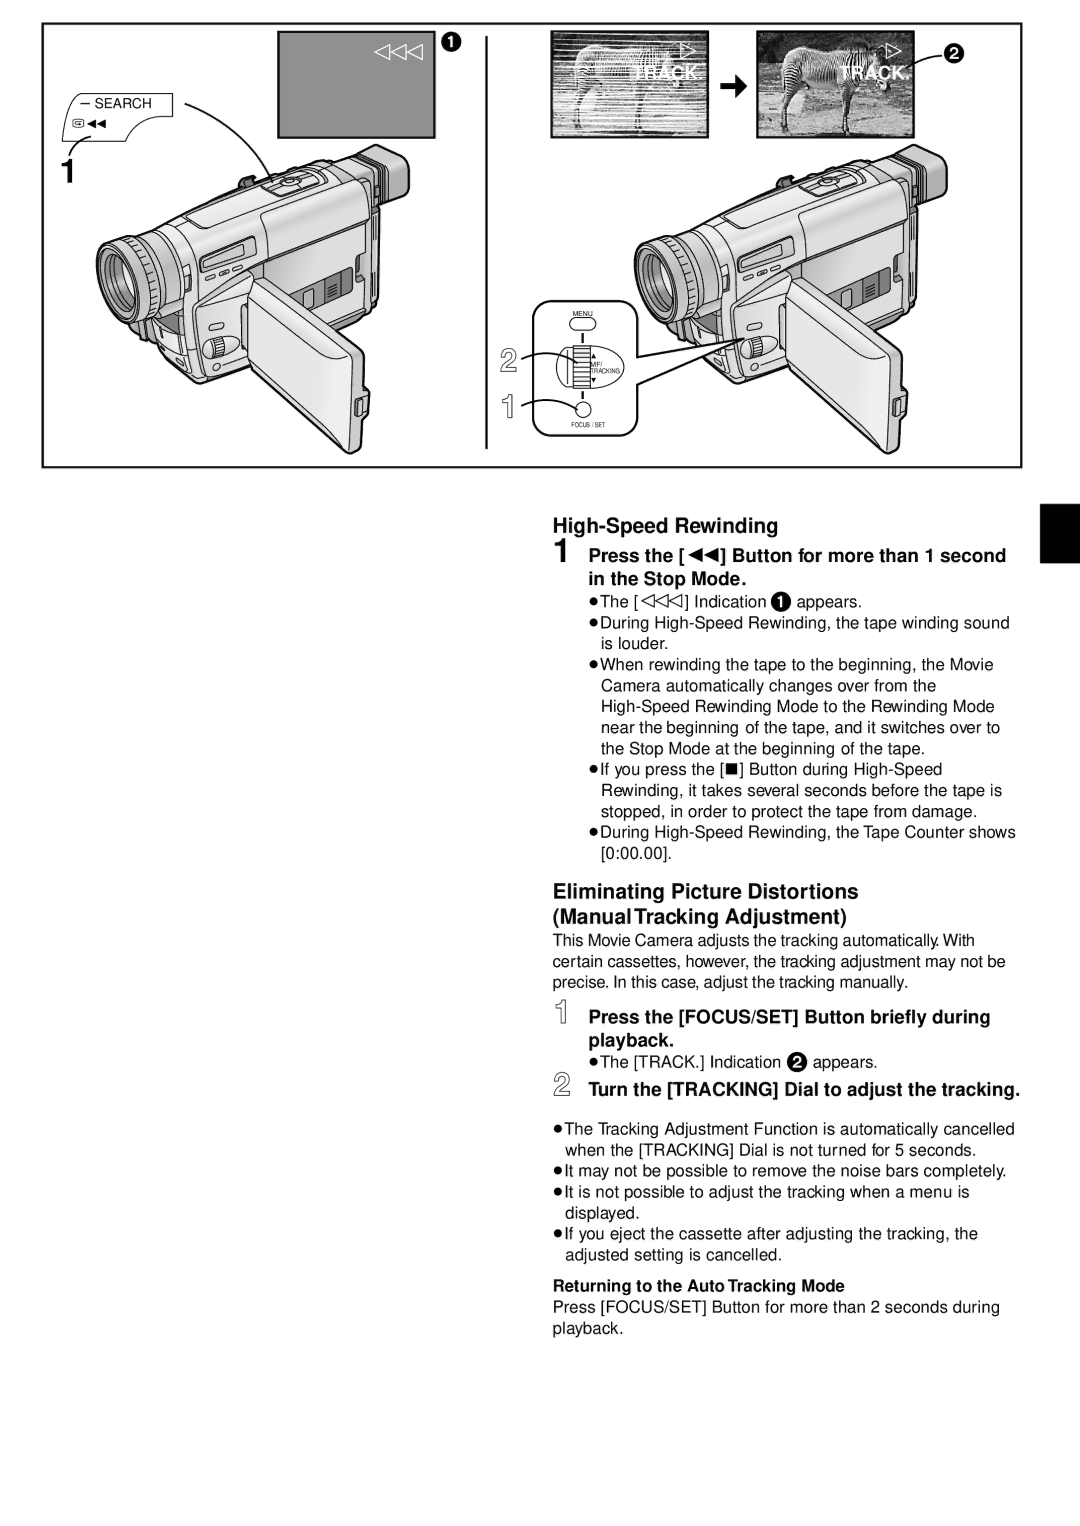
1 Press the [6] Button for more than 1 second in the Stop Mode.
≥The [≈] Indication 1 appears.
≥During
≥When rewinding the tape to the beginning, the Movie Camera automatically changes over from the
≥If you press the [∫] Button during
≥During
Eliminating Picture Distortions
(Manual Tracking Adjustment)
This Movie Camera adjusts the tracking automatically. With certain cassettes, however, the tracking adjustment may not be precise. In this case, adjust the tracking manually.
" Press the [FOCUS/SET] Button briefly during playback.
≥The [TRACK.] Indication 2 appears.
# Turn the [TRACKING] Dial to adjust the tracking.
≥The Tracking Adjustment Function is automatically cancelled when the [TRACKING] Dial is not turned for 5 seconds.
≥It may not be possible to remove the noise bars completely. ≥It is not possible to adjust the tracking when a menu is
displayed.
≥If you eject the cassette after adjusting the tracking, the adjusted setting is cancelled.
Returning to the Auto Tracking Mode
Press [FOCUS/SET] Button for more than 2 seconds during playback.
