MNL | MNL | sVOLr |
| 3 |
1 |
| |||
|
|
| ;W.B | |
|
| W | T | 2 |
|
|
|
| |
|
| 1 PROG. AE |
|
|
|
| 2 |
|
|
Recording with Manual White Balance
Adjustment
With this Movie Camera, you can also adjust the white balance manually.
Use this mode for special subjects and recording conditions, such as listed (l 53), for which the Full Auto Mode is not suitable, and for light sources outside the range 1 (l55). Use it also when you want to manually adjust the white balance for each new scene as professionals do.
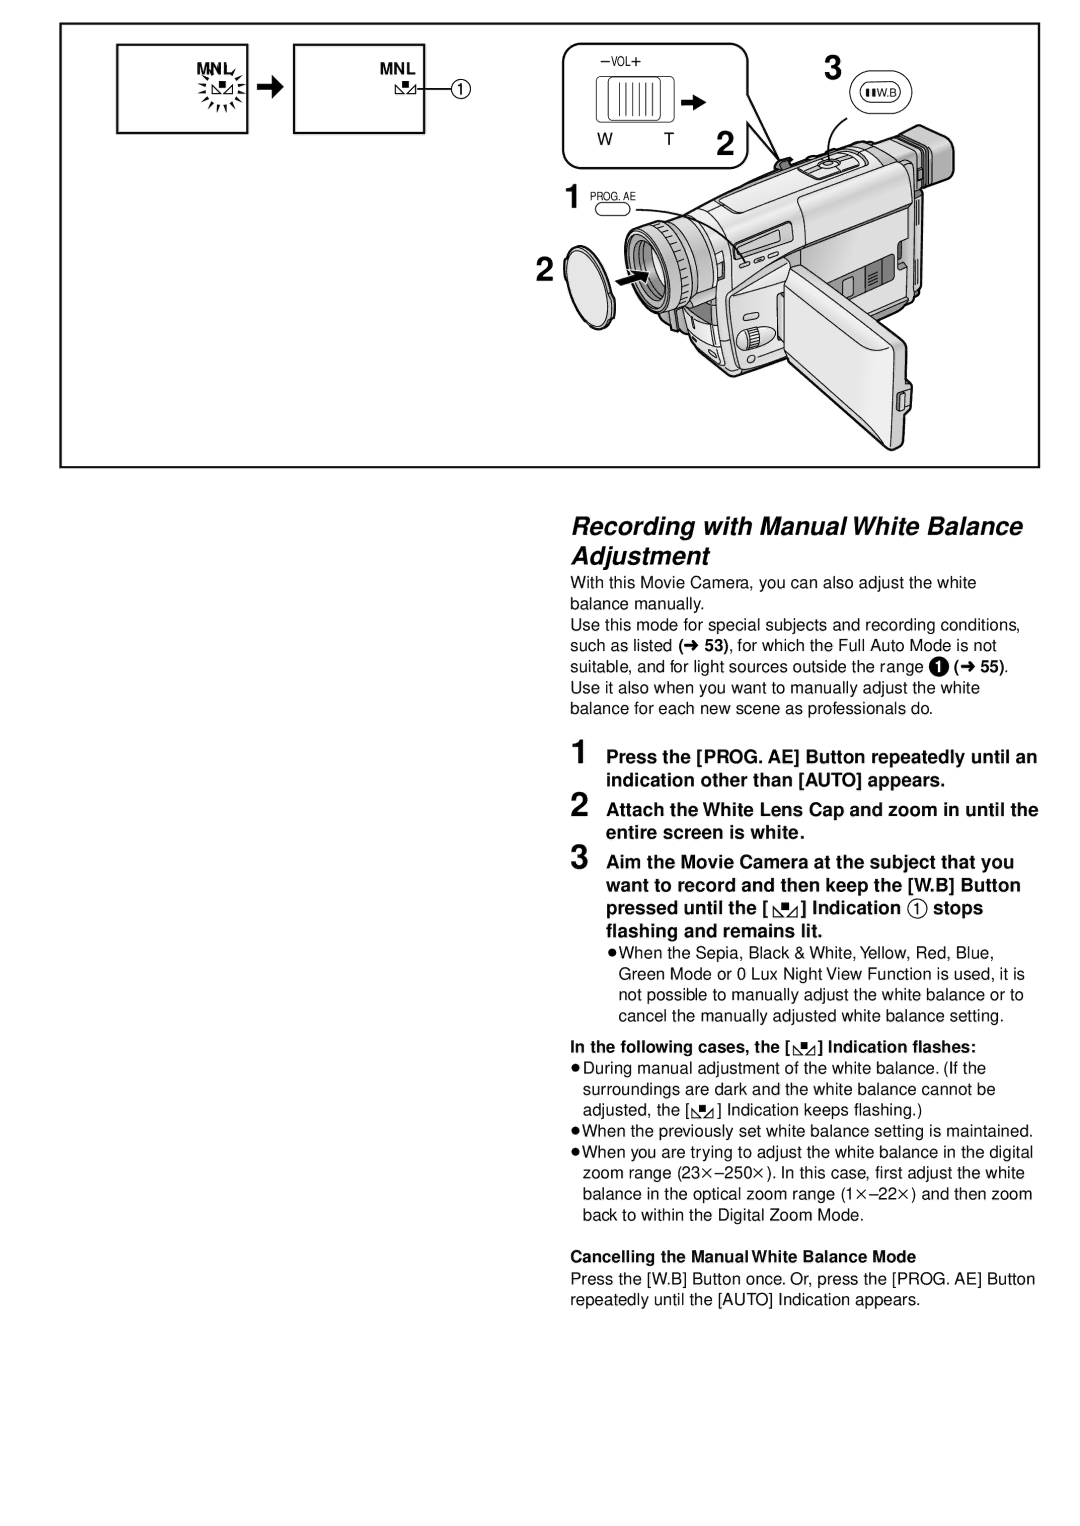
1 Press the [PROG. AE] Button repeatedly until an indication other than [AUTO] appears.
2 Attach the White Lens Cap and zoom in until the entire screen is white.
3 Aim the Movie Camera at the subject that you want to record and then keep the [W.B] Button pressed until the [1] Indication 1 stops flashing and remains lit.
¡When the Sepia, Black & White, Yellow, Red, Blue, Green Mode or 0 Lux Night View Function is used, it is not possible to manually adjust the white balance or to cancel the manually adjusted white balance setting.
In the following cases, the [1] Indication flashes:
¡During manual adjustment of the white balance. (If the surroundings are dark and the white balance cannot be adjusted, the [1] Indication keeps flashing.)
¡When the previously set white balance setting is maintained. ¡When you are trying to adjust the white balance in the digital zoom range
back to within the Digital Zoom Mode.
Cancelling the Manual White Balance Mode
Press the [W.B] Button once. Or, press the [PROG. AE] Button repeatedly until the [AUTO] Indication appears.