Getting Started
Setting up
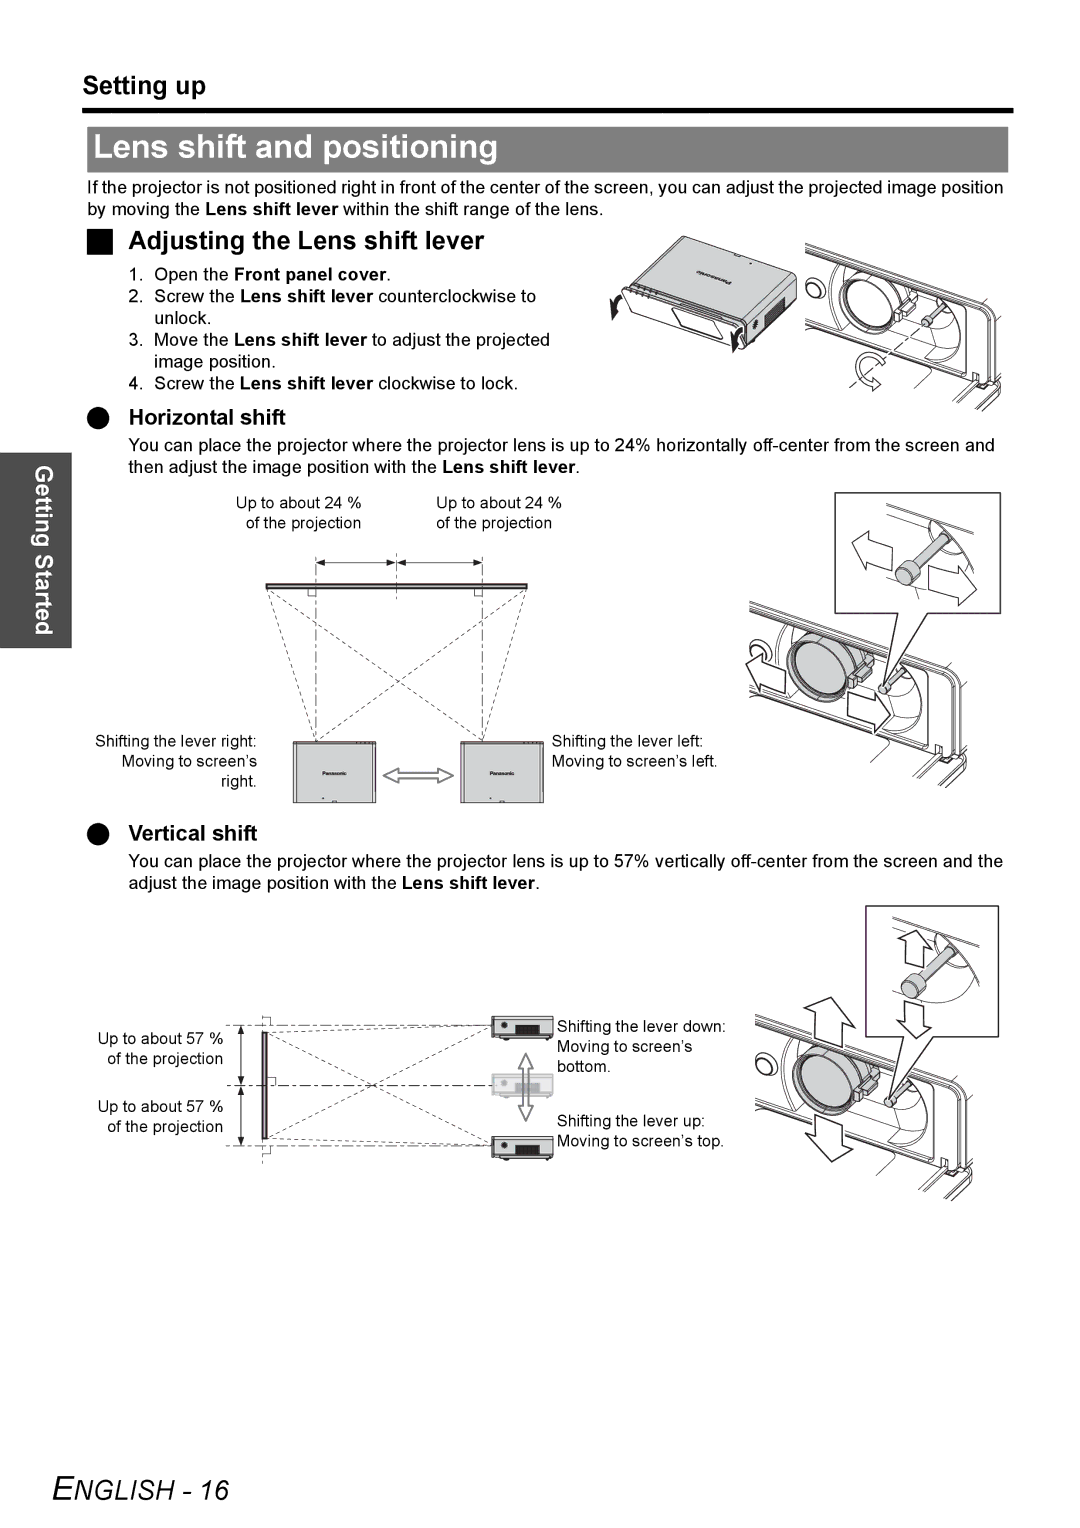
Lens shift and positioning
If the projector is not positioned right in front of the center of the screen, you can adjust the projected image position by moving the Lens shift lever within the shift range of the lens.
Adjusting the Lens shift lever
1. Open the Front panel cover.
2. Screw the Lens shift lever counterclockwise to unlock.
3. Move the Lens shift lever to adjust the projected image position.
4. Screw the Lens shift lever clockwise to lock.
Horizontal shift
You can place the projector where the projector lens is up to 24% horizontally
Up to about 24 % | Up to about 24 % | ||||||||||
of the projection | of the projection | ||||||||||
|
|
|
|
|
|
|
|
|
|
|
|
|
|
|
|
|
|
|
|
|
|
|
|
|
|
|
|
|
|
|
|
|
|
|
|
Shifting the lever right: | Shifting the lever left: |
Moving to screen’s | Moving to screen’s left. |
right. |
|
Vertical shift
You can place the projector where the projector lens is up to 57% vertically
Up to about 57 % of the projection
Up to about 57 % of the projection
![]()
![]() Shifting the lever down: Moving to screen’s bottom.
Shifting the lever down: Moving to screen’s bottom.
Shifting the lever up: ![]()
![]() Moving to screen’s top.
Moving to screen’s top.