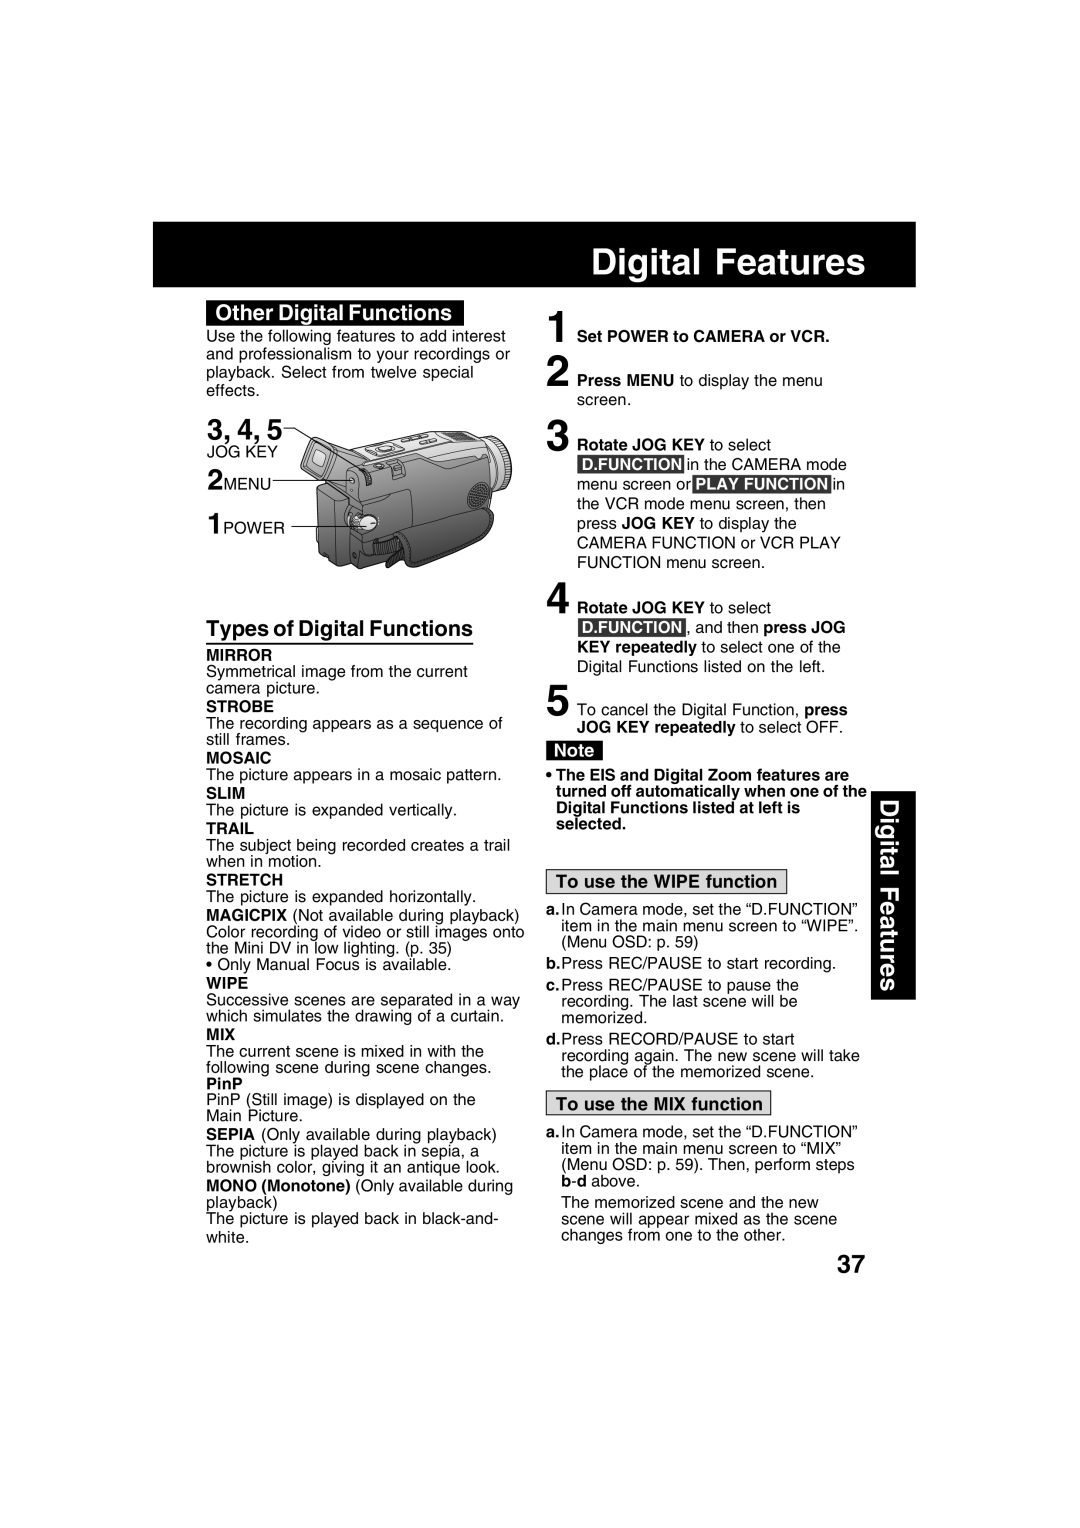
Other Digital Functions

Use the following features to add interest and professionalism to your recordings or playback. Select from twelve special effects.

3, 4, 5

JOG KEY 2MENU

1POWER

Types of Digital Functions

MIRROR

Symmetrical image from the current camera picture.

STROBE

The recording appears as a sequence of still frames.

MOSAIC

The picture appears in a mosaic pattern.

SLIM

The picture is expanded vertically.

TRAIL

The subject being recorded creates a trail when in motion.

STRETCH

The picture is expanded horizontally. MAGICPIX (Not available during playback) Color recording of video or still images onto the Mini DV in low lighting. (p. 35)

Only Manual Focus is available.

WIPE

Successive scenes are separated in a way which simulates the drawing of a curtain.

MIX

The current scene is mixed in with the following scene during scene changes.

PinP

PinP (Still image) is displayed on the Main Picture.

SEPIA (Only available during playback) The picture is played back in sepia, a brownish color, giving it an antique look. MONO (Monotone) (Only available during playback)

The picture is played back in black-and- white.

Digital Features

1 Set POWER to CAMERA or VCR.

2 Press MENU to display the menu screen.

3 Rotate JOG KEY to select


D.FUNCTION

in the CAMERA mode


menu screen or

PLAY FUNCTION

in


the VCR mode menu screen, then


press JOG KEY to display the


CAMERA FUNCTION or VCR PLAY


FUNCTION menu screen.


4 Rotate JOG KEY to select


D.FUNCTION

, and then press JOG


KEY repeatedly


to select one of the


Digital Functions listed on the left.


5 To cancel the Digital Function, press


JOG KEY repeatedly to select OFF.


Note


• The EIS and Digital Zoom features are


turned off automatically when one of the


Digital

Digital Functions listed at left is

selected.


To use the WIPE function


Features

c. Press REC/PAUSE to pause the

a. In Camera mode, set the “D.FUNCTION”


item in the main menu screen to “WIPE”.


(Menu OSD: p. 59)


b.Press REC/PAUSE to start recording.


recording. The last scene will be


memorized.


d.Press RECORD/PAUSE to start


recording again. The new scene will take


the place of the memorized scene.


To use the MIX function


a. In Camera mode, set the “D.FUNCTION”


item in the main menu screen to “MIX”


(Menu OSD: p. 59). Then, perform steps


b-dabove.


The memorized scene and the new


scene will appear mixed as the scene


changes from one to the other.


37

Page 37
Image 37
Panasonic PV-DV52 operating instructions Other Digital Functions, To use the Wipe function, To use the MIX function

PV-DV52 specifications

The Panasonic PV-DV52 was a compact and versatile camcorder that left an impression in the world of digital video recording during its time. Renowned for its user-friendly design and advanced features, the PV-DV52 catered to both amateur filmmakers and seasoned videographers seeking portability and quality.

One of the primary highlights of the PV-DV52 is its recording capability. This camcorder featured a MiniDV format, allowing users to record high-quality digital video with exceptional clarity. The MiniDV format ensured that the footage produced was crisp and vibrant, making it ideal for capturing special moments or creating home movies.

The PV-DV52 was equipped with a 3CCD imaging system, a notable technology that set it apart from many competitors. Unlike standard camcorders that use a single CCD, the 3CCD system utilized three separate CCD sensors—one for each primary color (red, green, and blue). This design resulted in improved color accuracy, enhanced image detail, and reduced artifacts, producing stunning visuals that truly represented the scene.

Another impressive feature of the PV-DV52 was its optical zoom capabilities. The camcorder came with a 10x optical zoom lens that enabled users to capture distant subjects without compromising quality. Additionally, users could employ a digital zoom feature, further extending their reach when needed. This flexibility made the camcorder ideal for various shooting scenarios, from capturing wildlife at a distance to recording events in large venues.

The PV-DV52 also prioritized ease of use, equipped with a user-friendly interface and intuitive controls. A flip-out LCD screen provided users with the ability to monitor their recordings easily, making framing shots and reviewing footage straightforward. The camcorder had built-in stabilization technology, which minimized the impact of shaky hands while filming, resulting in smoother video playback.

Moreover, the Panasonic PV-DV52 offered a range of connectivity options, including FireWire (IEEE 1394) ports, facilitating easy transfer of video to computers for editing. This feature was particularly significant, as it allowed for a seamless workflow for aspiring filmmakers looking to enhance their content.

Overall, the Panasonic PV-DV52 was a well-rounded and dependable camcorder that leveraged advanced technologies to deliver professional-quality video recording in a compact package. Its combination of 3CCD imaging, optical zoom, and user-friendly features made it a popular choice during its era, appealing to various users seeking to capture life's important moments with ease.