Setup
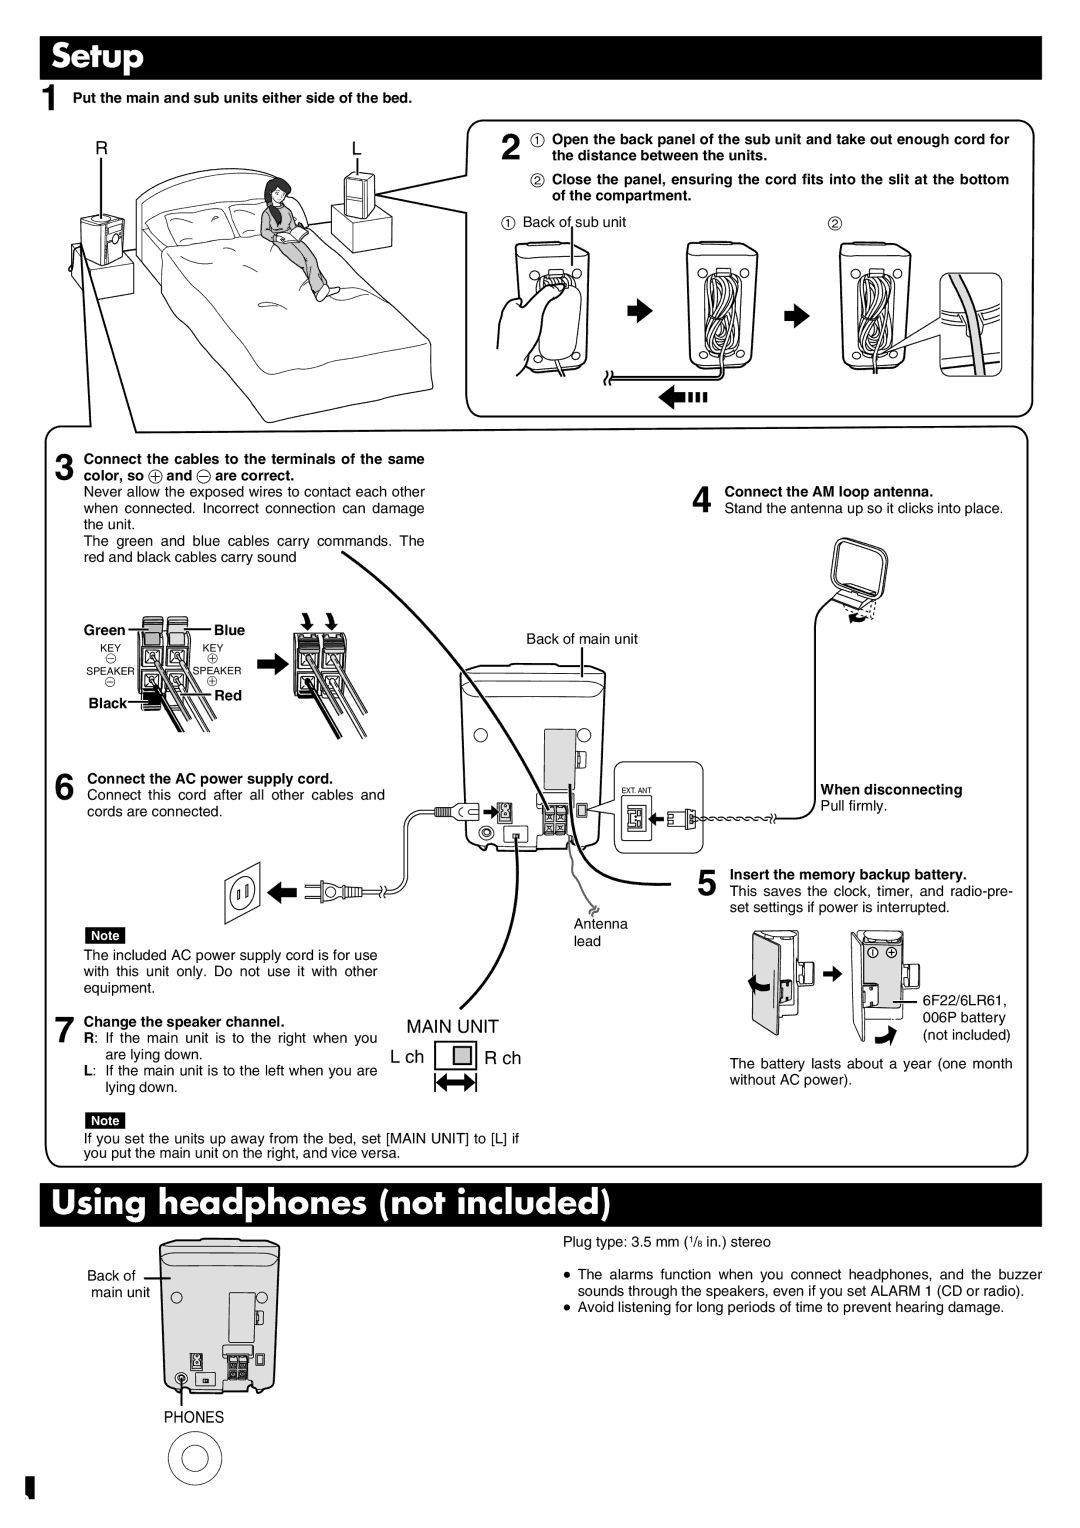
1 Put the main and sub units either side of the bed.
RL
3 Connect the cables to the terminals of the same color, so + and - are correct.
Never allow the exposed wires to contact each other when connected. Incorrect connection can damage the unit.
The green and blue cables carry commands. The red and black cables carry sound
2 1 Open the back panel of the sub unit and take out enough cord for the distance between the units.
2Close the panel, ensuring the cord fits into the slit at the bottom of the compartment.
1 Back of |
| sub unit | 2 |
| |||
|
|
|
|
4 Connect the AM loop antenna.
Stand the antenna up so it clicks into place.
Green | Blue | Back of main unit | |
KEY | KEY | ||
| |||
- | + |
|
SPEAKERSPEAKER
-![]()
![]() +
+
Black
Red
6 Connect the AC power supply cord. Connect this cord after all other cables and cords are connected.
Note
The included AC power supply cord is for use with this unit only. Do not use it with other equipment.
Change the speaker channel. | MAIN UNIT | ||||
7 R: If the main unit is to the right when you |
|
|
|
|
|
are lying down. | L ch |
|
|
| R ch |
L: If the main unit is to the left when you are |
|
|
| ||
|
|
|
|
| |
lying down. |
|
|
|
|
|
|
|
|
|
| |
EXT. ANT
Antenna lead
When disconnecting
Pull firmly.
5 Insert the memory backup battery.
This saves the clock, timer, and
![]() 6F22/6LR61, 006P battery
6F22/6LR61, 006P battery ![]() (not included)
(not included)
The battery lasts about a year (one month without AC power).
Note
If you set the units up away from the bed, set [MAIN UNIT] to [L] if you put the main unit on the right, and vice versa.
Using headphones (not included)
Back of main unit
Plug type: 3.5 mm (1/8 in.) stereo
≥The alarms function when you connect headphones, and the buzzer sounds through the speakers, even if you set ALARM 1 (CD or radio).
≥Avoid listening for long periods of time to prevent hearing damage.
PHONES