
SC-PT665 specifications
The Panasonic SC-PT665 is a versatile home theater system that delivers an immersive audio-visual experience, making it a popular choice for both movie enthusiasts and music lovers. Launched as part of Panasonic's line of home entertainment products, the SC-PT665 marries advanced technology with user-friendly features, creating a compelling addition to any modern living space.At the heart of the SC-PT665 is its powerful 5.1 channel surround sound configuration. This setup includes five satellite speakers and a robust subwoofer, allowing users to enjoy crisp dialogue and booming bass that fills the room. The system is particularly well-suited for movie nights, providing a cinematic experience that enhances every action-packed scene or quiet dialogue.
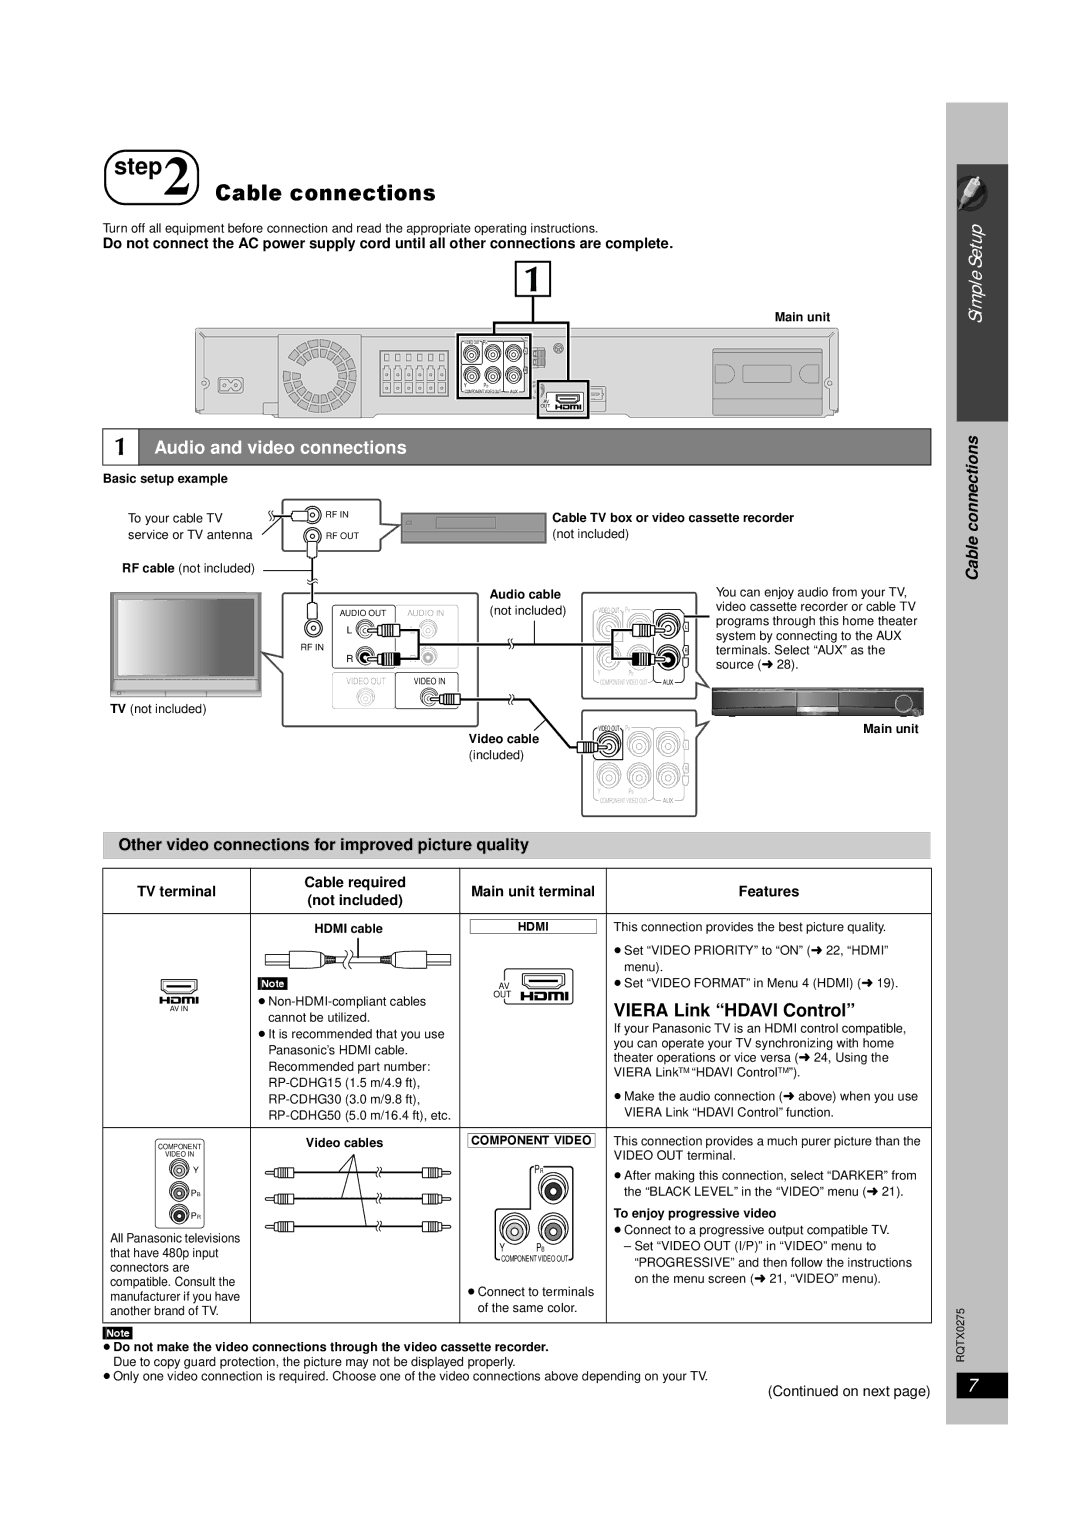
One of the standout features of the SC-PT665 is its compatibility with various audio formats. It supports Dolby Digital and DTS, ensuring that users can experience high-quality sound whether they are watching a DVD, streaming music, or playing video games. Additionally, the system comes equipped with a built-in DVD player, offering convenience and ease of use for those who prefer physical media.
Connectivity is another key characteristic of the SC-PT665. It includes multiple audio inputs, allowing users to connect their TV and other devices effortlessly. The system also features a USB port, enabling users to play music directly from flash drives, as well as Bluetooth connectivity for streaming music from smartphones and tablets.
The SC-PT665 also boasts user-friendly features such as a convenient remote control that makes it easy to navigate settings and adjust volume from across the room. Moreover, its sleek design ensures that it fits well with any home décor, making it as aesthetically pleasing as it is functional.
For those who prioritize sound quality and versatility in their home entertainment systems, the Panasonic SC-PT665 offers an impressive array of features. With its surround sound capability, compatibility with multiple audio formats, and smart connectivity options, it stands out as a formidable choice for anyone looking to elevate their audio experience at home. Whether you're enjoying a blockbuster movie or your favorite playlist, the SC-PT665 enhances every moment with rich sound and engaging clarity.