
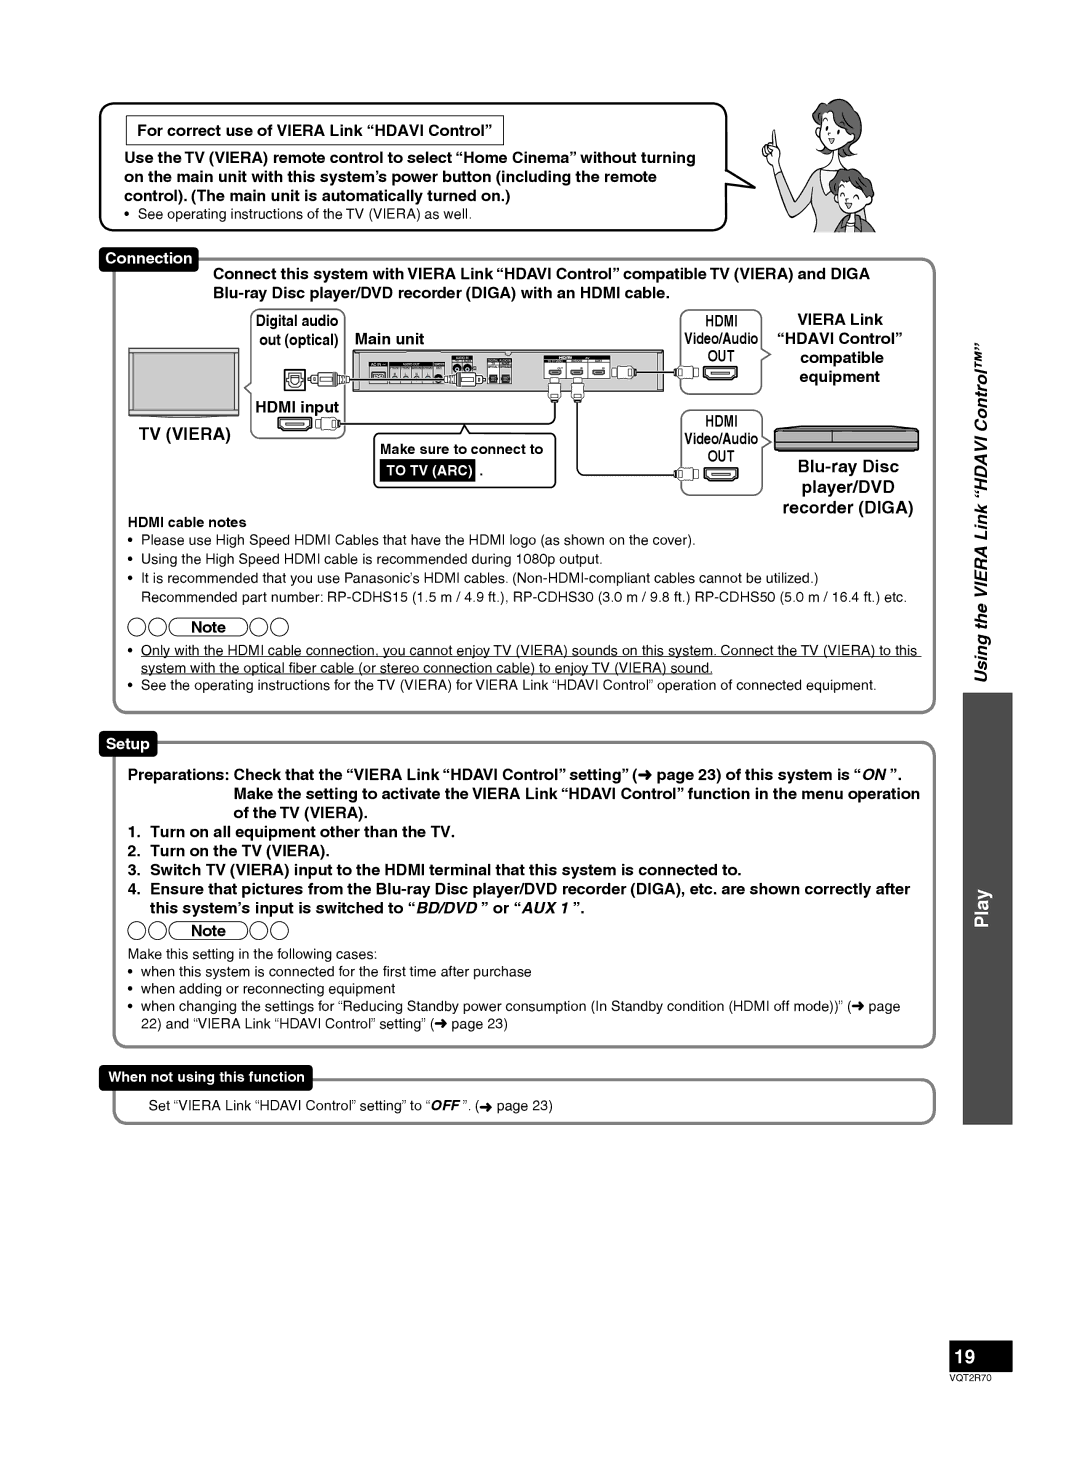
SC-ZT2 specifications
The Panasonic SC-ZT2 is an innovative soundbar system that brings an immersive audio experience to any home entertainment setup. Designed to complement the modern living space, this sleek soundbar not only delivers high-quality sound but also integrates advanced technologies that enhance its performance.One of the standout features of the SC-ZT2 is its unique 3D surround sound technology. This system utilizes Panasonic's proprietary Drivers and Advanced Digital Signal Processing (DSP) to create a spatial audio experience that fills the room. This technology allows users to enjoy movies, music, and games with a depth and clarity that traditional soundbars often struggle to achieve.
The SC-ZT2 boasts a powerful output, with its built-in subwoofers providing deep bass response that enhances the overall audio experience. This feature is particularly appealing for action movie enthusiasts and music lovers who crave that extra punch in their sound. The design of the soundbar is also noteworthy, blending seamlessly into contemporary interiors while providing robust build quality.
Connectivity is another area where the SC-ZT2 shines. It supports Bluetooth, allowing users to wirelessly stream music from their smartphones and tablets. Additionally, the soundbar is equipped with HDMI ARC (Audio Return Channel) which simplifies connections with compatible TVs, making setup quick and convenient. For those who prefer wired connections, the SC-ZT2 includes optical and auxiliary input options.
The SC-ZT2 features a user-friendly interface, with intuitive controls that make it easy for anyone to adjust settings or switch between input sources. With its built-in voice assistant compatibility, users can also control the soundbar using voice commands, adding to its convenience.
In terms of sound quality, the SC-ZT2 excels with rich midrange tones and clear highs, ensuring that dialogues remain crisp and intelligible, even in the loudest scenes. This soundbar also supports various audio formats, providing versatility for different content types.
Overall, the Panasonic SC-ZT2 represents a perfect blend of performance and design, making it an excellent choice for anyone looking to elevate their home audio experience. With its advanced technologies, powerful sound, and sleek aesthetics, it is a compelling addition to any home theater setup.