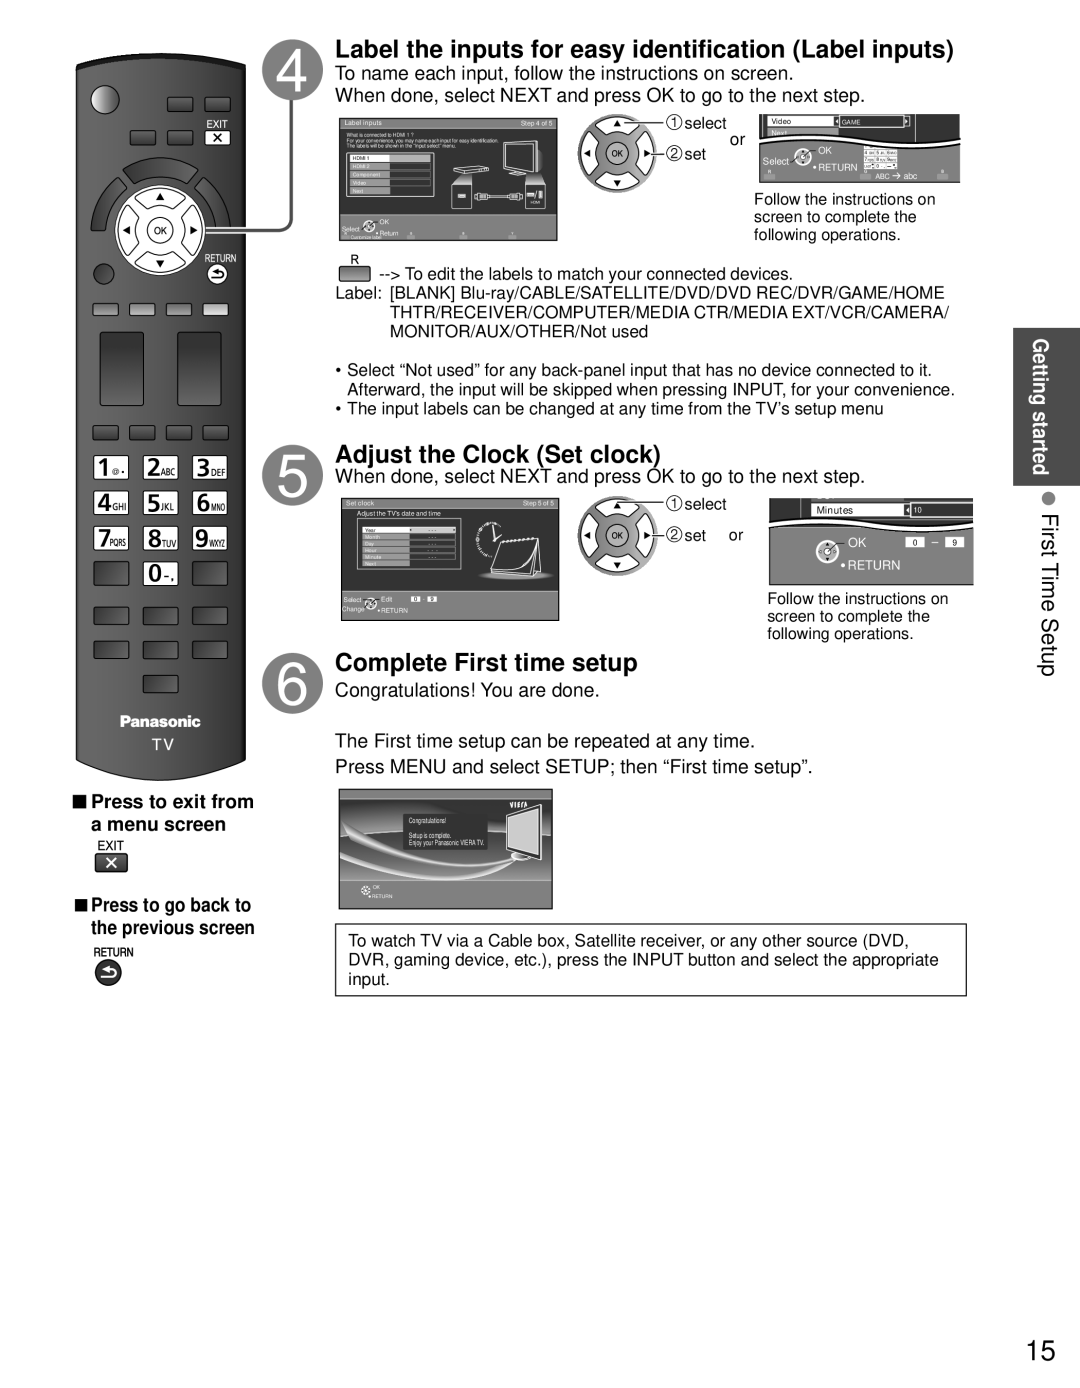
 Press to exit from a menu screen
■Press to go back to the previous screen
Label the inputs for easy identification (Label inputs)
To name each input, follow the instructions on screen.
When done, select NEXT and press OK to go to the next step.
Label inputs | Step 4 of 5 | select |
| Video |
| GAME | |
What is connected to HDMI 1 ? |
|
| or | Next |
|
| |
For your convenience, you may name each input for easy identification. |
|
|
|
|
| ||
The labels will be shown in the “Input select” menu. |
| set |
| OK | 1 @. 2 ABC 3 DEF | ||
HDMI 1 |
|
|
| Select | 4 GHI 5 JKL 6MNO | ||
|
|
|
| 7PQRS 8 TUV 9WXYZ | |||
HDMI 2 |
|
|
|
|
| RETURN LAST 0 | |
Component |
|
|
|
|
| ABC abc | |
Video |
|
|
|
|
|
|
|
Next |
|
|
|
| Follow the instructions on | ||
|
| HDMI |
|
| |||
| OK |
|
|
| screen to complete the | ||
Customize label |
|
|
| following operations. | |||
Select | Return |
|
|
|
|
|
|
|
|
|
|
|
|
| |
![]()
Label: [BLANK]
•Select “Not used” for any
•The input labels can be changed at any time from the TV’s setup menu
Adjust the Clock (Set clock)
When done, select NEXT and press OK to go to the next step.
Adjust the TV's date and time | Step 5 of 5 | select |
| Minutes | 10 |
| |||
Set clock |
|
|
|
|
|
|
|
| |
Year |
|
| - - - |
| set | or |
|
|
|
Month |
|
| - - - |
|
|
| OK | 0 | 9 |
Day |
|
| - - - |
|
|
| |||
Hour |
|
| - - - |
|
|
|
|
|
|
Minute |
|
| - - - |
|
|
| RETURN |
|
|
Next |
|
|
|
|
|
|
|
| |
Select | Edit | 0 | - 9 |
|
|
| Follow the instructions on |
| |
Change | RETURN |
|
|
|
|
| screen to complete the |
| |
|
|
|
|
|
|
|
| ||
|
|
|
|
|
|
| following operations. |
| |
Complete First time setup
Congratulations! You are done.
The First time setup can be repeated at any time.
Press MENU and select SETUP; then “First time setup”.
Congratulations!
Setup is complete.
Enjoy your Panasonic VIERA TV.
![]() OK
OK
![]() RETURN
RETURN
To watch TV via a Cable box, Satellite receiver, or any other source (DVD, DVR, gaming device, etc.), press the INPUT button and select the appropriate input.
Getting started First Time Setup
15
