Attaching the pedestal
Warning
Do not disassemble or modify the pedestal.
•Otherwise the TV may fall over and become damaged, and personal injury may result.
Caution
Do not use any other TV and displays.
•Otherwise the TV may fall over and become damaged, and personal injury may result.
Do not use the pedestal if it becomes warped or
•If you use the pedestal while it is physically damaged, personal injury may result. Contact your nearest Panasonic dealer immediately.physically damaged.
During set-up, make sure that all screws are
•If insufficient care is taken to ensure screws are properly tightened during assembly, the pedestal will not be strong enough to support the TV, and it might fall over and become damaged, and personal injury may result.securely tightened.
•If the TV is knocked or children climb onto the pedestal with the TV installed, the TV may fall over and personal injury may result.Ensure that the TV does not fall over.
Two or more people are required to install and
•If two or more people are not present, the TV may be dropped, and personal injury may result.remove the TV.
Assembly screw (4) | Assembly screw (4) | |
(silver) |
| (black) |
•XYN5+F18FN | •THEL060N | |
M5 × 18 mm | M5 × 25 mm | |
Pole (2) |
| Base |
•R:TBLA3614L:TBLA3615 | ||
|
| |
L | R |
|
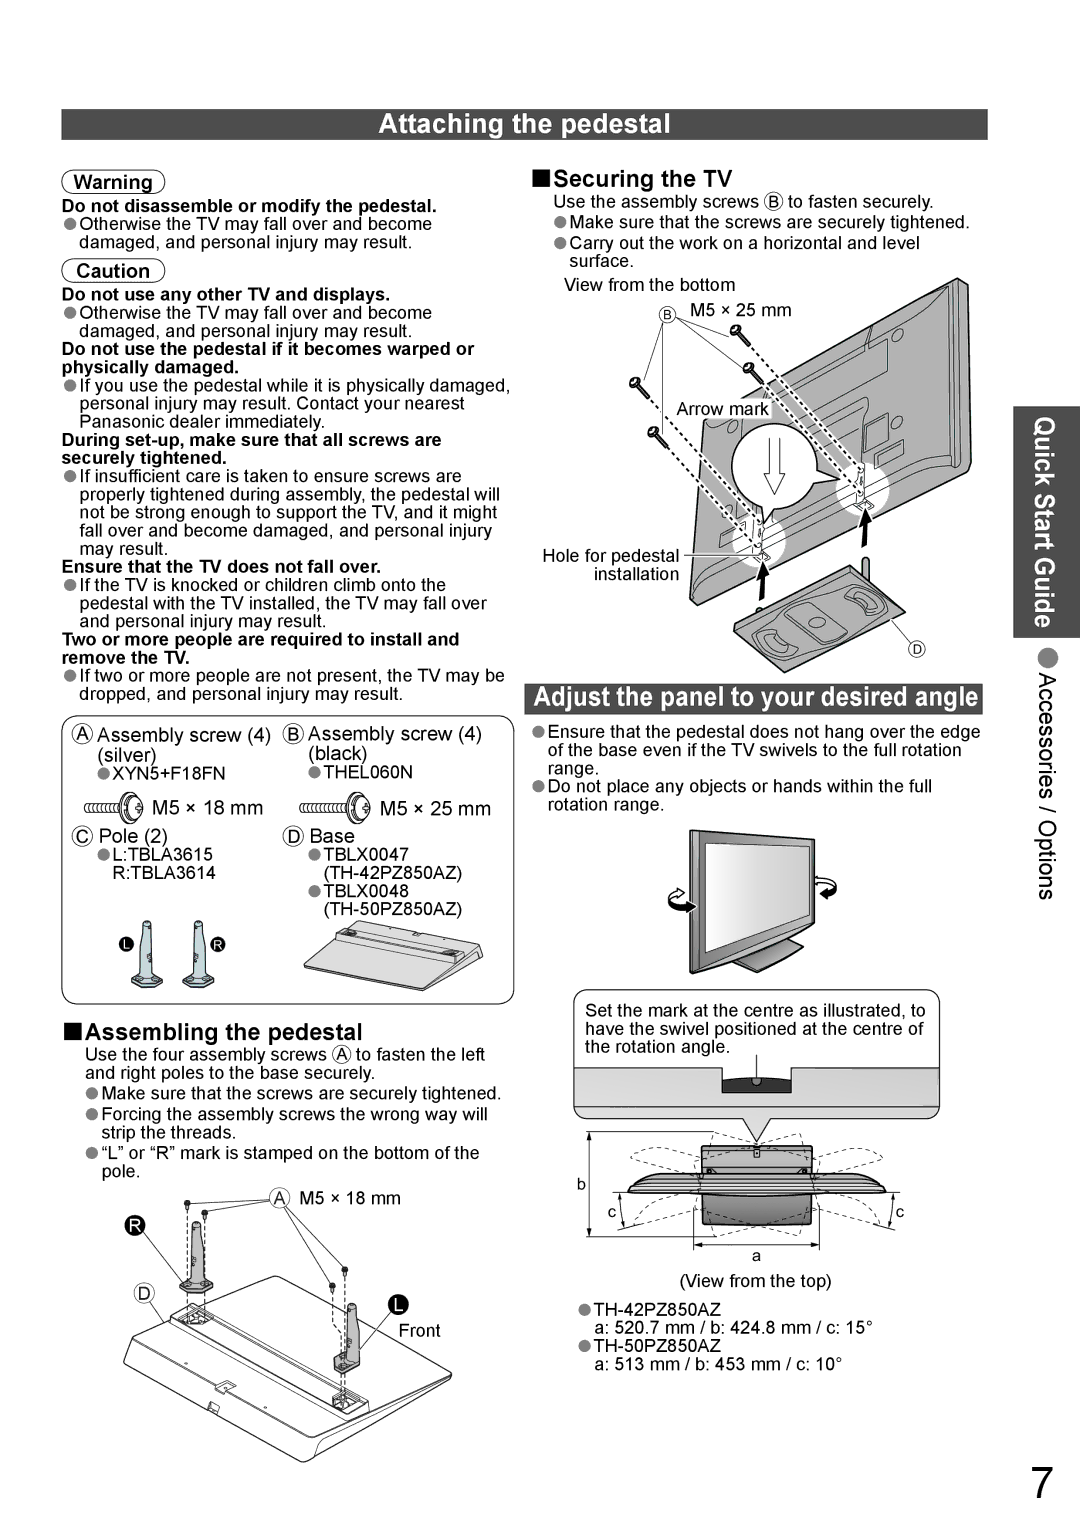
■Securing the TV
Use the assembly screws ![]() to fasten securely.
to fasten securely.
•Make sure that the screws are securely tightened.
•Carrysurface.out the work on a horizontal and level
View from the bottom
BM5 × 25 mm
Arrow mark
Hole for pedestal installation
D
Adjust the panel to your desired angle
•Ensure that the pedestal does not hang over the edge of the base even if the TV swivels to the full rotation range.
•Do not place any objects or hands within the full rotation range.
Quick Start Guide •Accessories / Options
■Assembling the pedestal | Set the mark at the centre as illustrated, to | |
have the swivel positioned at the centre of | ||
the rotation angle. | ||
Use the four assembly screws to fasten the left | ||
and right poles to the base securely. |
| |
Make sure that the screws are securely tightened. |
| |
•Forcing the assembly screws the wrong way will |
| |
•strip the threads. |
| |
•pole.“L” or “R” mark is stamped on the bottom of the |
|
| A M5 × 18 mm | b |
|
| c | c | |
R |
| ||
|
|
| |
|
|
| a |
D | L | (View from the top) | |
| |||
| Front | •a: 520.7 mm / b: 424.8 mm / c: 15° | |
|
| ||
|
| •a: 513 mm / b: 453 mm / c: 10° |
7
