Adjusting POS. /SIZE
AUTO SETUP Automatically adjust
Notes:
•If the dot clock frequency is 162 MHz or higher, DOT CLOCK cannot be made.
•If the image is that the edge is hardly figured out or shadowy, that cannot be adjusted automatically. In such case, press AUTO SETUP again after changing the image to the clearer one.
•When
•Select NORMALIZE in POS. /SIZE and press the ACTION (![]() ) button when appropriate adjustment cannot be made.
) button when appropriate adjustment cannot be made.
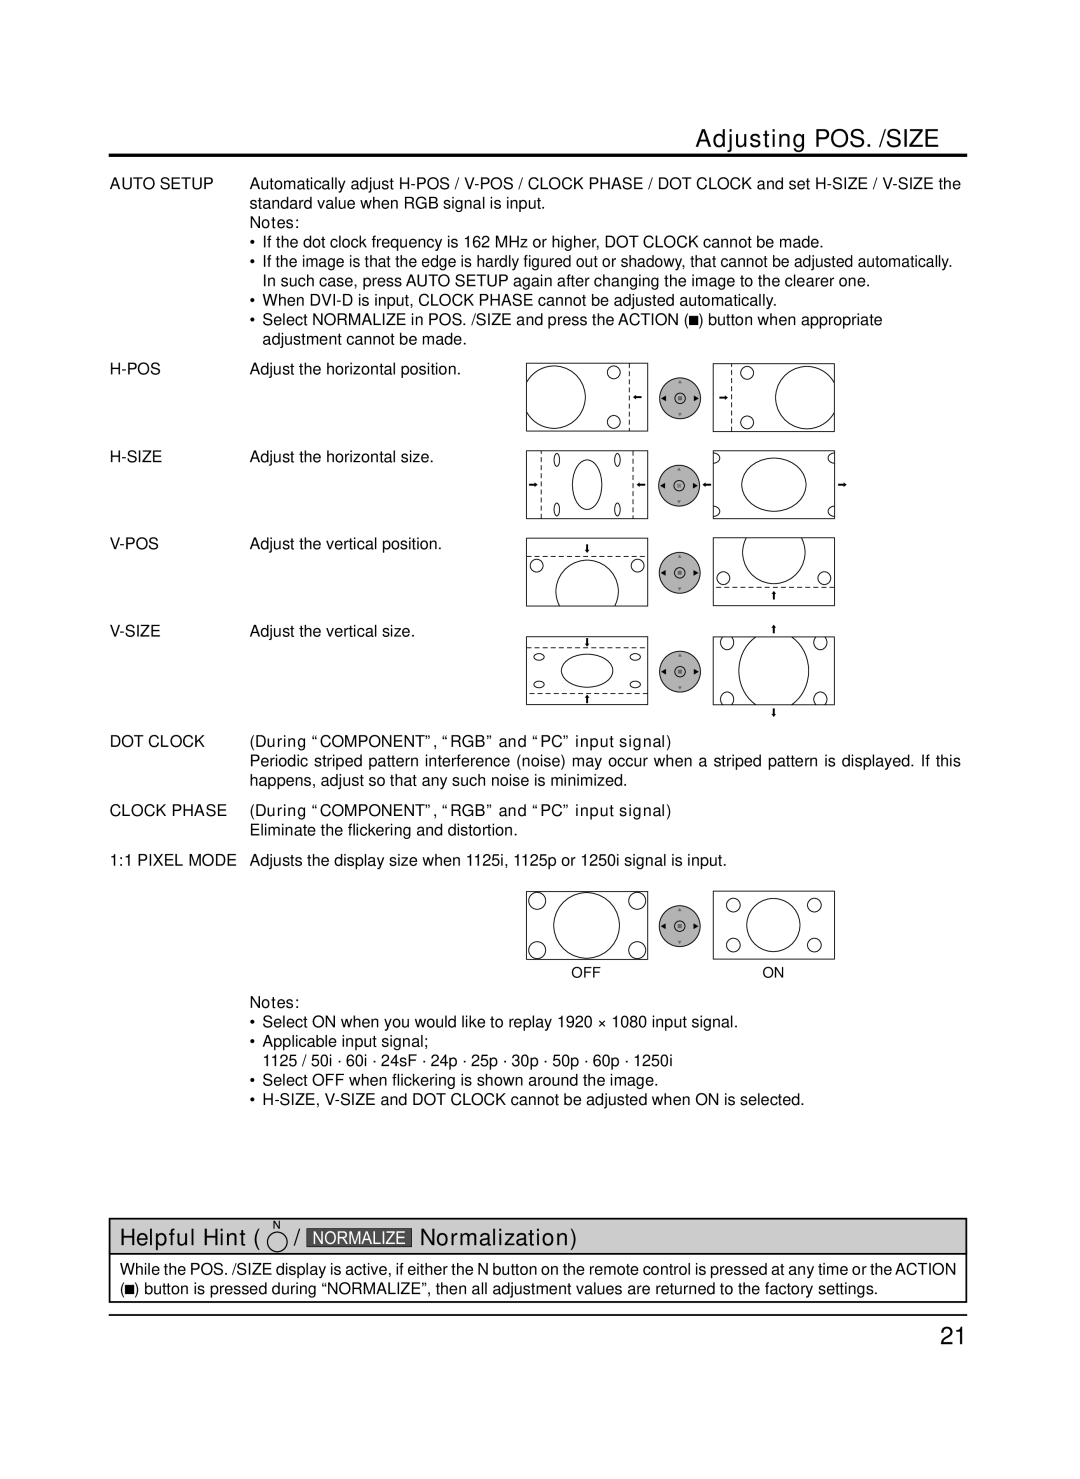
Adjust the horizontal position. |
Adjust the horizontal size. |
Adjust the vertical position. |
Adjust the vertical size. |
DOT CLOCK | (During “COMPONENT”, “RGB” and “PC” input signal) | ||||
| Periodic striped pattern interference (noise) may occur when a striped pattern is displayed. If this | ||||
| happens, adjust so that any such noise is minimized. | ||||
CLOCK PHASE | (During “COMPONENT”, “RGB” and “PC” input signal) | ||||
| Eliminate the flickering and distortion. | ||||
1:1 PIXEL MODE | Adjusts the display size when 1125i, 1125p or 1250i signal is input. | ||||
|
|
|
|
|
|
|
|
|
|
|
|
OFFON
Notes:
•Select ON when you would like to replay 1920 × 1080 input signal.
•Applicable input signal;
1125 / 50i · 60i · 24sF · 24p · 25p · 30p · 50p · 60p · 1250i
•Select OFF when flickering is shown around the image.
•
Helpful Hint ( ![]() /
/
NORMALIZE
Normalization)
While the POS. /SIZE display is active, if either the N button on the remote control is pressed at any time or the ACTION (![]() ) button is pressed during “NORMALIZE”, then all adjustment values are returned to the factory settings.
) button is pressed during “NORMALIZE”, then all adjustment values are returned to the factory settings.
21