Basic Controls
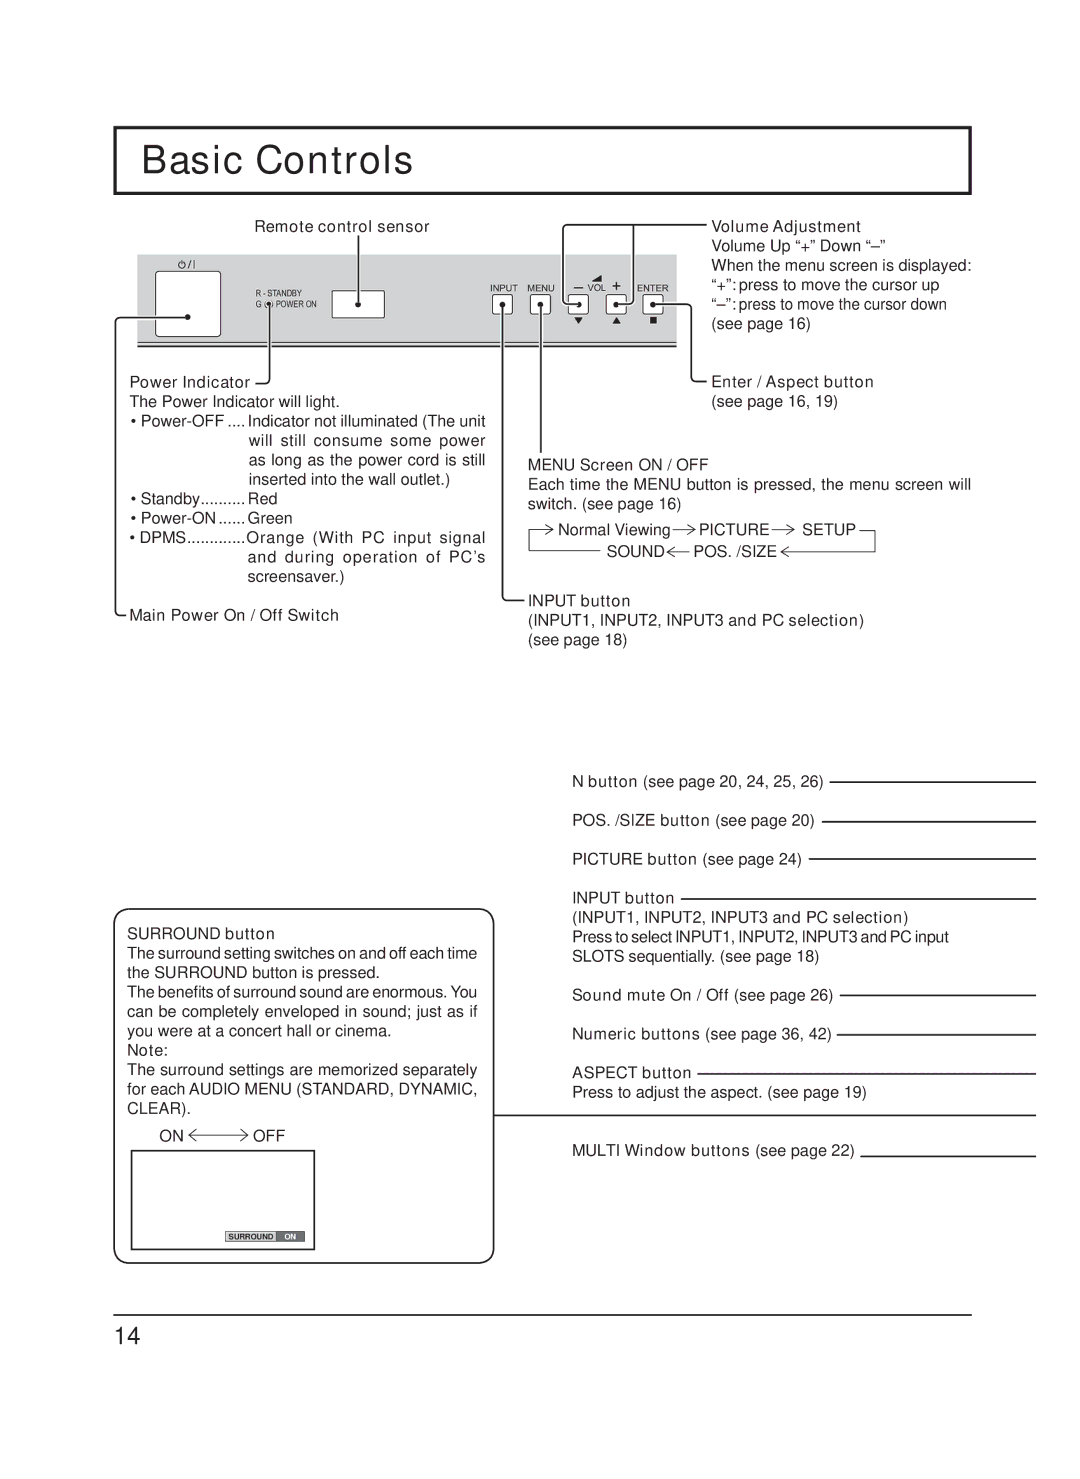
Remote control sensor
R - STANDBY | INPUT MENU | VOL + ENTER |
|
| |
G POWER ON |
|
|
Volume Adjustment Volume Up “+” Down “–”
When the menu screen is displayed: “+”: press to move the cursor up
Power Indicator
The Power Indicator will light.
•
•Standby.......... Red
•
•DPMS.............Orange (With PC input signal and during operation of PC’s screensaver.)
Main Power On / Off Switch
SURROUND button
The surround setting switches on and off each time the SURROUND button is pressed.
The benefits of surround sound are enormous. You can be completely enveloped in sound; just as if you were at a concert hall or cinema.
Note:
The surround settings are memorized separately for each AUDIO MENU (STANDARD, DYNAMIC, CLEAR).
ON  OFF
OFF
Enter / Aspect button (see page 16, 19)
MENU Screen ON / OFF
Each time the MENU button is pressed, the menu screen will switch. (see page 16)
Normal Viewing PICTURE | SETUP |
SOUND![]() POS. /SIZE
POS. /SIZE
INPUT button
(INPUT1, INPUT2, INPUT3 and PC selection) (see page 18)
N button (see page 20, 24, 25, 26)
POS. /SIZE button (see page 20)
PICTURE button (see page 24)
INPUT button
(INPUT1, INPUT2, INPUT3 and PC selection) Press to select INPUT1, INPUT2, INPUT3 and PC input SLOTS sequentially. (see page 18)
Sound mute On / Off (see page 26)
Numeric buttons (see page 36, 42)
ASPECT button
Press to adjust the aspect. (see page 19)
MULTI Window buttons (see page 22)
SURROUND ON
14