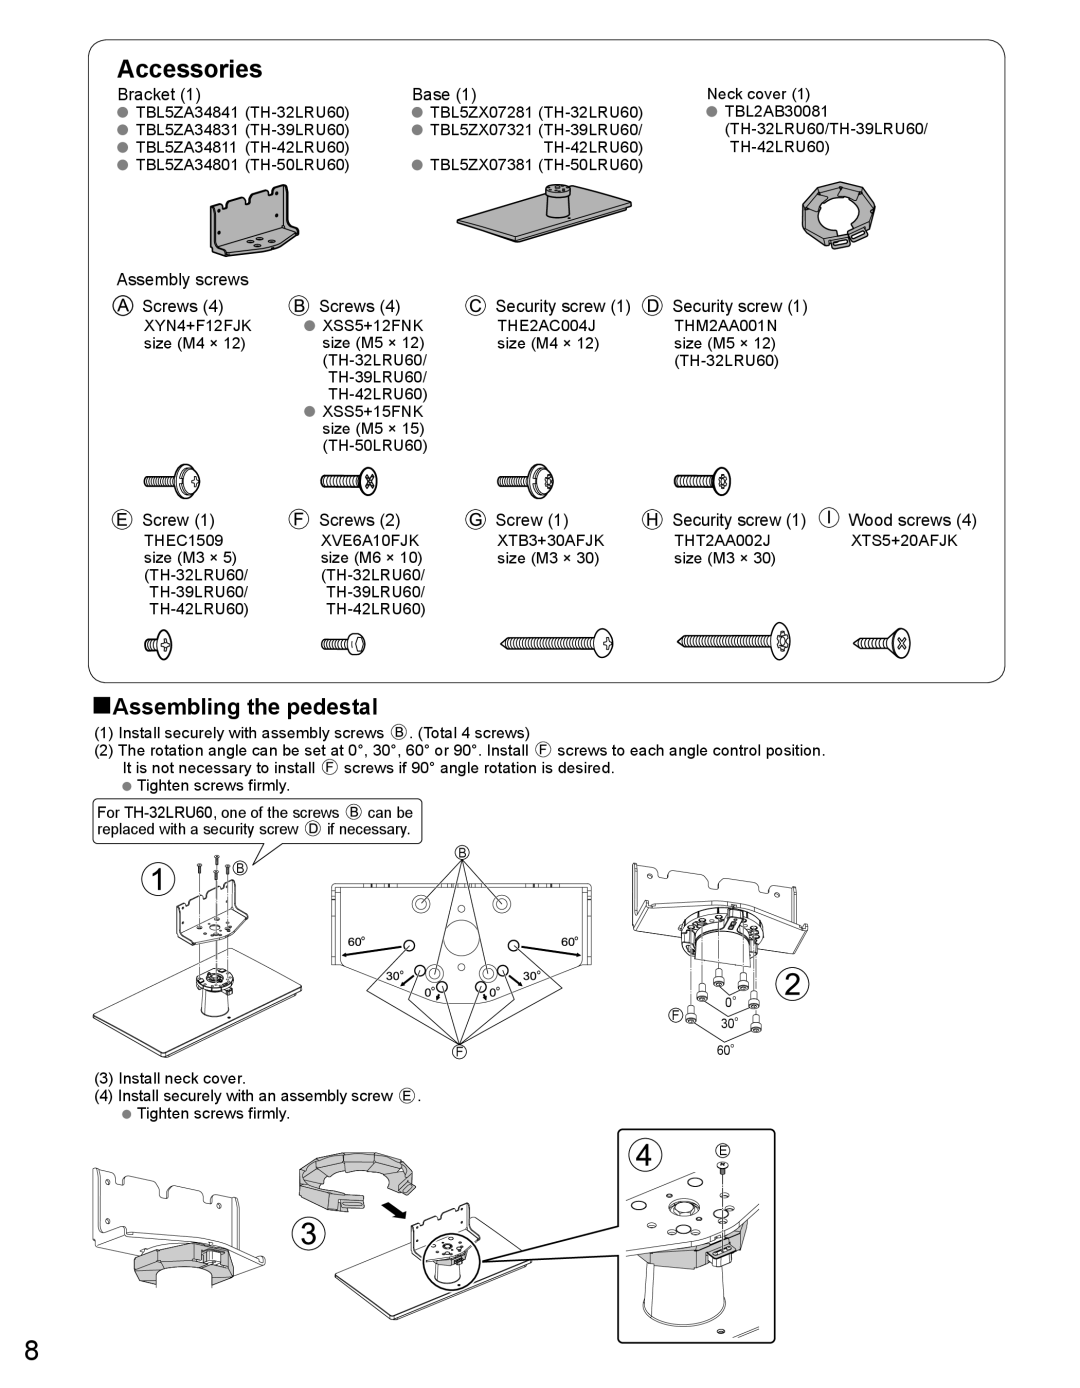
Accessories
Bracket (1) | Base (1) | Neck cover (1) |
TBL5ZA34841 | TBL5ZX07281 | TBL2AB30081 |
TBL5ZA34831 | TBL5ZX07321 | |
TBL5ZA34811 | ||
TBL5ZA34801 | TBL5ZX07381 |
|
Assembly screws
Screws (4) | Screws (4) | Security screw (1) | Security screw (1) |
XYN4+F12FJK | XSS5+12FNK | THE2AC004J | THM2AA001N |
size (M4 × 12) | size (M5 × 12) | size (M4 × 12) | size (M5 × 12) |
|
| ||
|
|
| |
|
|
| |
| XSS5+15FNK |
|
|
| size (M5 × 15) |
|
|
|
|
|
Screw (1) | Screws (2) | Screw (1) | Security screw (1) |
THEC1509 | XVE6A10FJK | XTB3+30AFJK | THT2AA002J |
size (M3 × 5) | size (M6 × 10) | size (M3 × 30) | size (M3 × 30) |
|
| ||
|
| ||
|
|
Wood screws (4)
XTS5+20AFJK
■Assembling the pedestal
(1)Install securely with assembly screws ![]() . (Total 4 screws)
. (Total 4 screws)
(2)The rotation angle can be set at 0°, 30°, 60° or 90°. Install ![]() screws to each angle control position. It is not necessary to install
screws to each angle control position. It is not necessary to install ![]() screws if 90° angle rotation is desired.
screws if 90° angle rotation is desired.
![]() Tighten screws firmly.
Tighten screws firmly.
For ![]() can be replaced with a security screw
can be replaced with a security screw ![]() if necessary.
if necessary.
B
B
0°
F 30°
F | 60° |
(3)Install neck cover.
(4)Install securely with an assembly screw ![]() .
.
![]() Tighten screws firmly.
Tighten screws firmly.
E
8