Technical Information
Closed Caption (CC)
![]() For viewing the CC of digital broadcasting, set the aspect to FULL (If viewing with
For viewing the CC of digital broadcasting, set the aspect to FULL (If viewing with
![]() The CC can be displayed on the TV if the receiver (such as a
The CC can be displayed on the TV if the receiver (such as a
![]() If the CC is set to On on both the receiver and TV when the signal is 480i (except for the HDMI connection), the CC may overlap on the TV.
If the CC is set to On on both the receiver and TV when the signal is 480i (except for the HDMI connection), the CC may overlap on the TV.
![]() If a digital program is being output in analog format, the CC data will also be output in analog format.
If a digital program is being output in analog format, the CC data will also be output in analog format.
![]() If the recorder or output monitor is connected to the TV, the CC needs to be set up on the recorder or output monitor.
If the recorder or output monitor is connected to the TV, the CC needs to be set up on the recorder or output monitor.
Aspect Ratio (FORMAT)
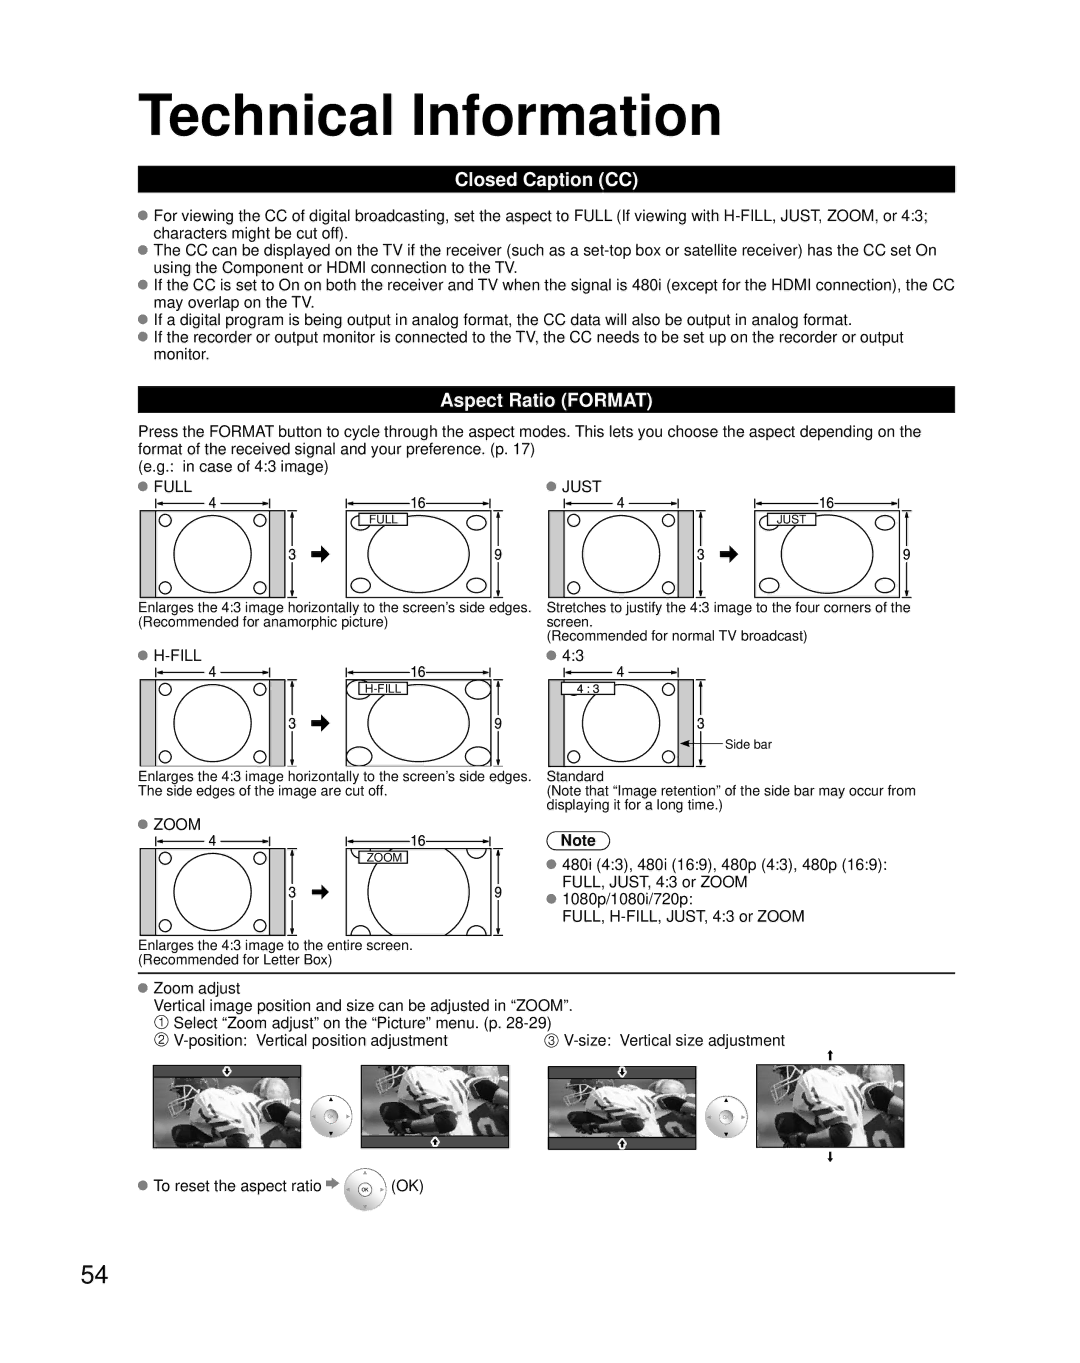
Press the FORMAT button to cycle through the aspect modes. This lets you choose the aspect depending on the format of the received signal and your preference. (p. 17)
(e.g.: in case of 4:3 image)
FULL |
| JUST | ||
|
|
|
|
|
FULL
JUST
Enlarges the 4:3 image horizontally to the screen’s side edges. (Recommended for anamorphic picture)
Stretches to justify the 4:3 image to the four corners of the screen.
(Recommended for normal TV broadcast)

H-FILL
Enlarges the 4:3 image horizontally to the screen’s side edges. The side edges of the image are cut off.
 ZOOM
ZOOM
ZOOM
Enlarges the 4:3 image to the entire screen. (Recommended for Letter Box)
![]() 4:3
4:3
![]() Side bar
Side bar
Standard
(Note that “Image retention” of the side bar may occur from displaying it for a long time.)
Note
![]() 480i (4:3), 480i (16:9), 480p (4:3), 480p (16:9): FULL, JUST, 4:3 or ZOOM
480i (4:3), 480i (16:9), 480p (4:3), 480p (16:9): FULL, JUST, 4:3 or ZOOM
![]() 1080p/1080i/720p:
1080p/1080i/720p:
FULL,
![]() Zoom adjust
Zoom adjust
Vertical image position and size can be adjusted in “ZOOM”.
Select “Zoom adjust” on the “Picture” menu. (p. |
|
![]() To reset the aspect ratio
To reset the aspect ratio ![]()
![]() (OK)
(OK)
54